Google Cloud Platform#
Installation requirements#
- Golden image with Hystax Acura (provided by request).
-
Resources to launch a virtual machine disk created from the Hystax Acura Golden image:
- 8 vCPUs,
- 16GB RAM,
- 200GB SSD disk.
-
Resources to launch a virtual machine for the Hystax Cloud Agent. Created in each target / failover project:
- 2 vCPUs,
- 4GB RAM,
- 20GB disk.
-
SMTP server with TLS/SSL encryption.
-
Security groups allowing the following traffic:
-
Hystax Acura host:
- Ingress -- tcp/443,
- Ingress -- tcp/4443,
- Ingress -- udp/12201.
-
Hystax Cloud Agent (spawned automatically in the Target Project):
- Ingress -- tcp/80,
- Ingress -- tcp/15000.
-
Installation steps#
Cloud configuration#
1. Download Acura and Cloud Agent archives provided by Hystax.
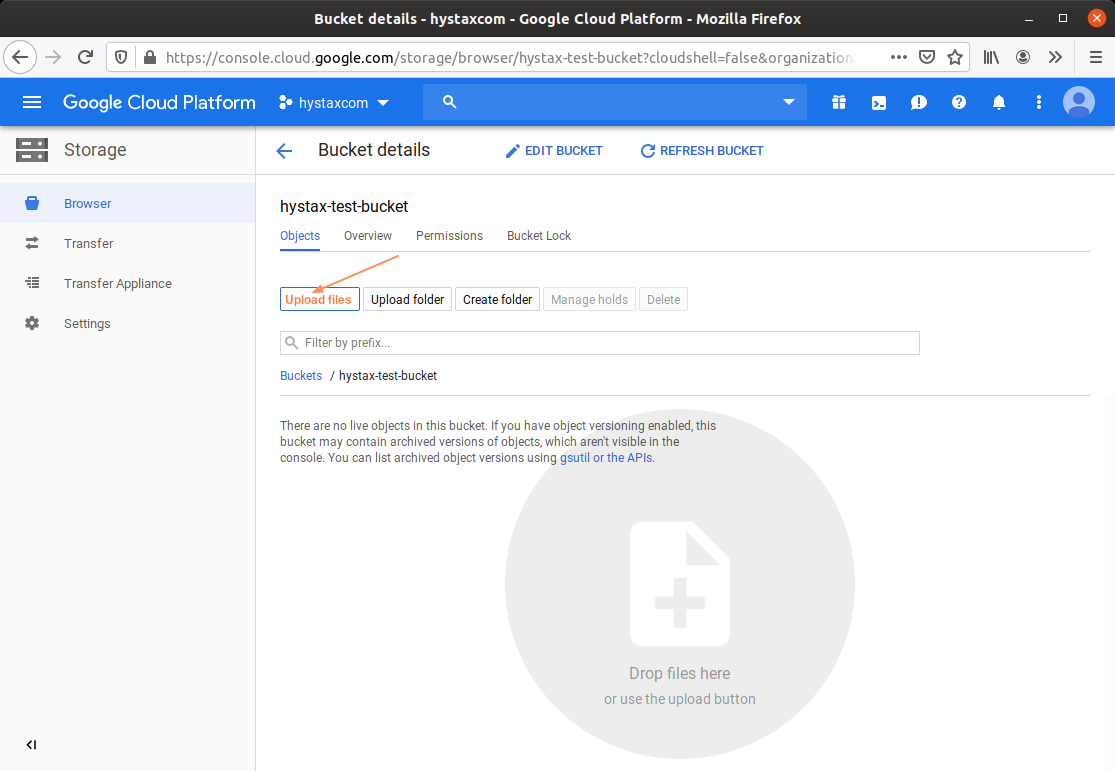
Go to Storage → Browser section in GCP UI and open one of your buckets. Create one if there are no buckets. Upload the archives to the selected bucket. Wait till the upload is finished.
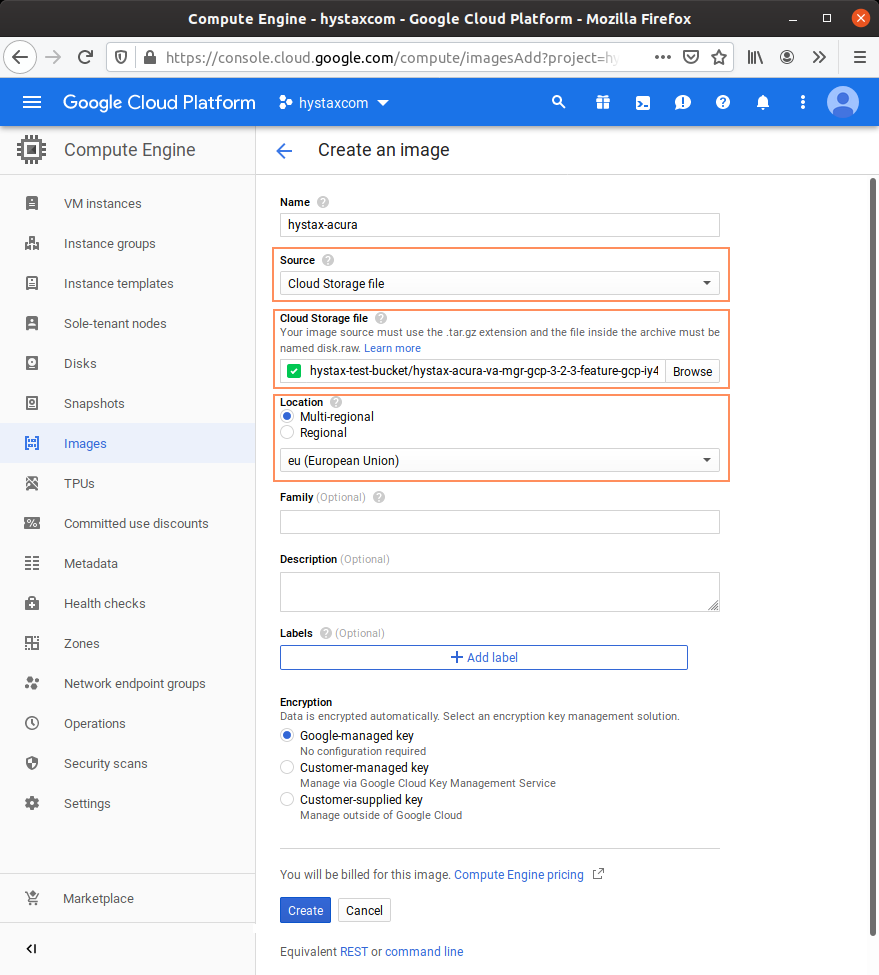
2. Create an image for Acura.
Go to Compute Engine → Images section in GCP UI and press Create image:
- Set Cloud storage file as a source.
- Choose the Acura archive as the cloud storage image file.
- Choose the region used for Acura instance deployment.
- The image name is not important, you can put something like “Hystax-Acura“ there.
Once the image is created, it is safe to remove the Acura archive from the cloud storage bucket.
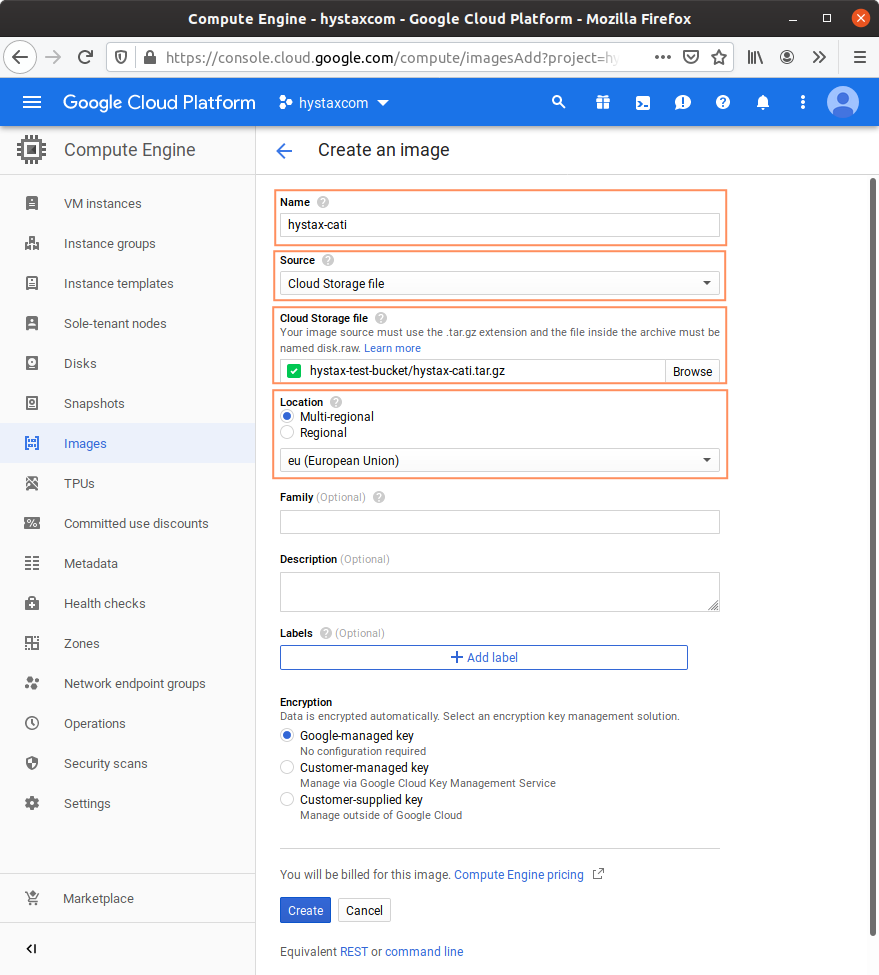
3. Create an image for Cloud Agent.
Go to Compute Engine → Images section in GCP UI and press Create image:
- Set Cloud storage file as a source.
- Choose the Cloud Agent archive as the cloud storage image file.
- Choose the same region as used for the Acura image.
- The image name must be set to “Hystax-cati”.
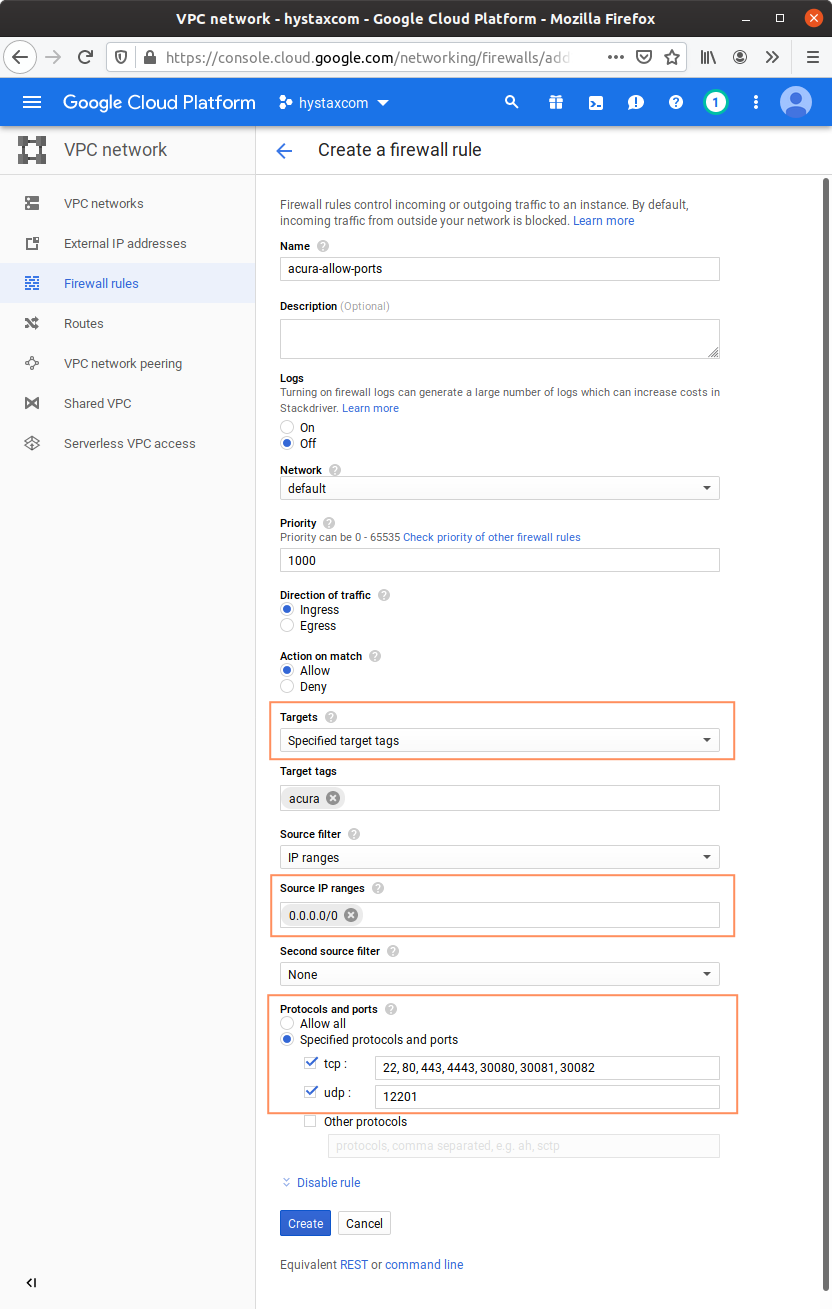
4. Create firewall rules for the Acura instance.
Go to the VPC network → Firewall rules section in GCP UI. Create a new rule:
- Choose the network used for Acura deployment.
- Set “Acura“ in Target tags.
-
Allow the following ports:
-
tcp: 22, 80, 443, 4443, 30080, 30081, 30082,
- udp: 12201.
5. Create firewall rules for Cloud Agent.
During replications, Acura automatically creates Cloud Agent instances and talk to them over the private network. Make sure that there is a firewall rule that permits communication inside your network.
For the “default“ network this rule is already created by Google:

If you are going to deploy Acura to a non-default network, create a similar rule for this network:
- Set “Targets“ into All instances in the network.
- Set “IP ranges“ to the CIDR range of your network.
- Allow all ports.
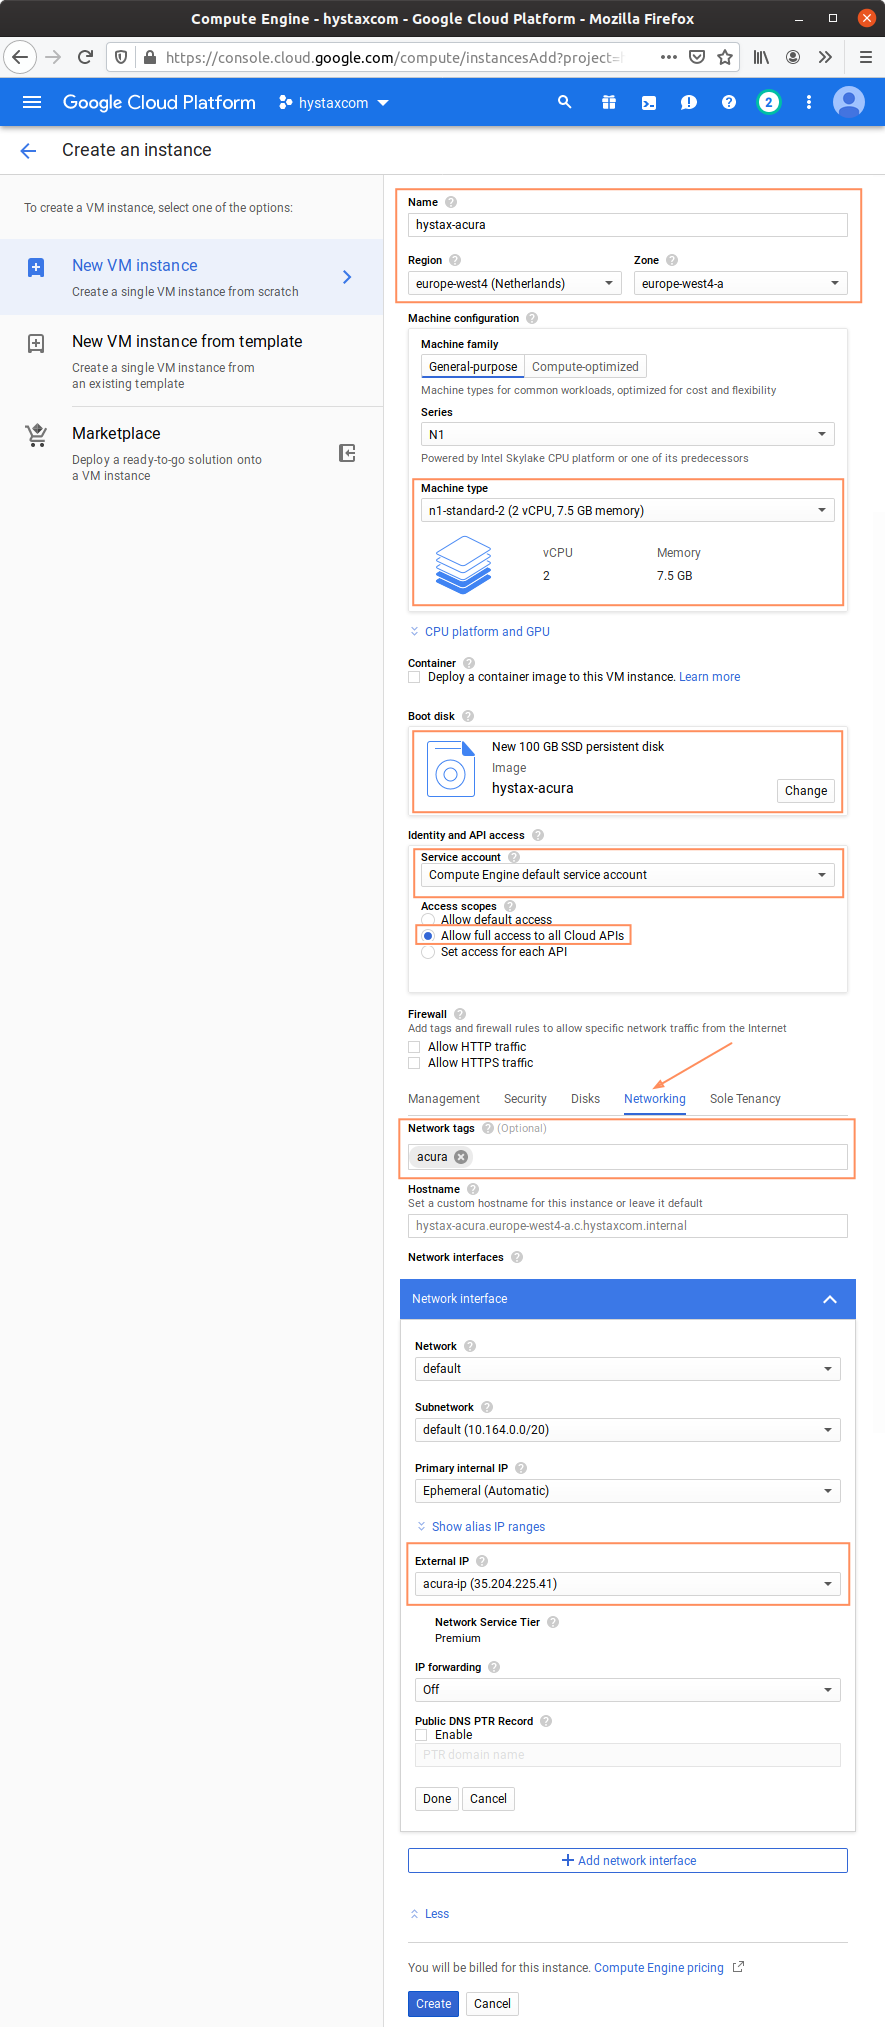
6. Create an Acura instance.
Go to Compute Engine → VM instances section in GCP UI and press Create Instance:
-
Choose a flavor that meets the minimum requirements or better.
-
In “Boot disk“ choose the Acura image from the Custom Images tab and set the disk size to at least 100GB. The SSD disk type is recommended.
-
Select Service account that has permissions:
compute.addresses.usecompute.disks.createcompute.disks.createSnapshotcompute.disks.deletecompute.disks.getcompute.disks.setLabelscompute.disks.usecompute.images.useReadOnlycompute.instances.attachDiskcompute.instances.createcompute.instances.deletecompute.instances.detachDiskcompute.instances.getcompute.instances.listcompute.instances.setLabelscompute.instances.setMetadatacompute.instances.setServiceAccountcompute.instances.setTagscompute.instances.updateDisplayDevicecompute.machineTypes.getcompute.snapshots.createcompute.snapshots.deletecompute.snapshots.getcompute.snapshots.listcompute.snapshots.setLabelscompute.snapshots.useReadOnlycompute.subnetworks.usecompute.subnetworks.useExternalIpcompute.zones.getiam.serviceAccounts.actAsiam.serviceAccounts.getiam.serviceAccounts.listresourcemanager.projects.get
All of these permissions are part of the global roles:
- Compute Admin,
- Service Account User.
(Optional) For more accurate log display add
compute.globalOperations.listpermission. -
Allow full access to all cloud APIs for this instance. Acura won’t be able to run without cloud API access.
-
Open Management, security, disks, networking, sole tenancy spoiler and navigate to Networking tab:
-
Put “Acura“ to Network tags. This enables the firewall rule created earlier.
-
Edit the default network interface: create a fixed external IP instead of a temporary one. This prevents Acura from losing its public IP on shutdown/reboot.
-
Press Create to run the Acura instance.
Note
You don’t need to create Cloud Agent instances: Acura runs them automatically using the image created earlier.
Pass Acura initial configuration#
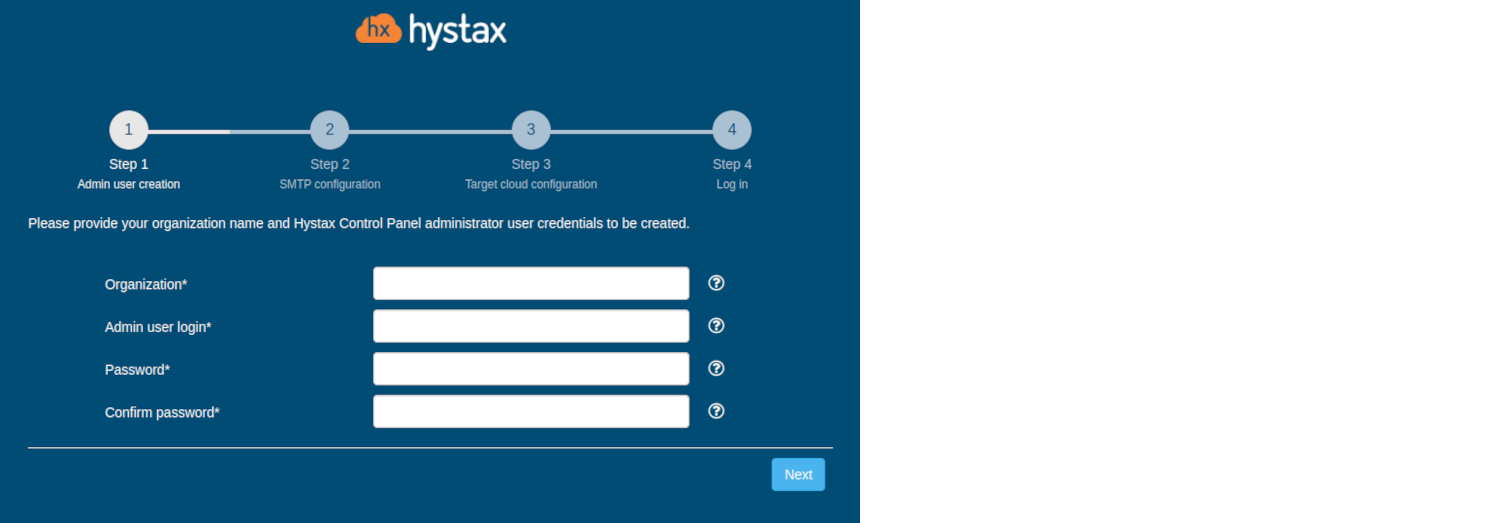
Step 1. Admin user creation.
Enter the organization name and new Hystax Admin user credentials in the Setup Wizard. This is the user account for logging in to the Hystax Acura Control Panel and system management. If any errors occur, the system notifies you.
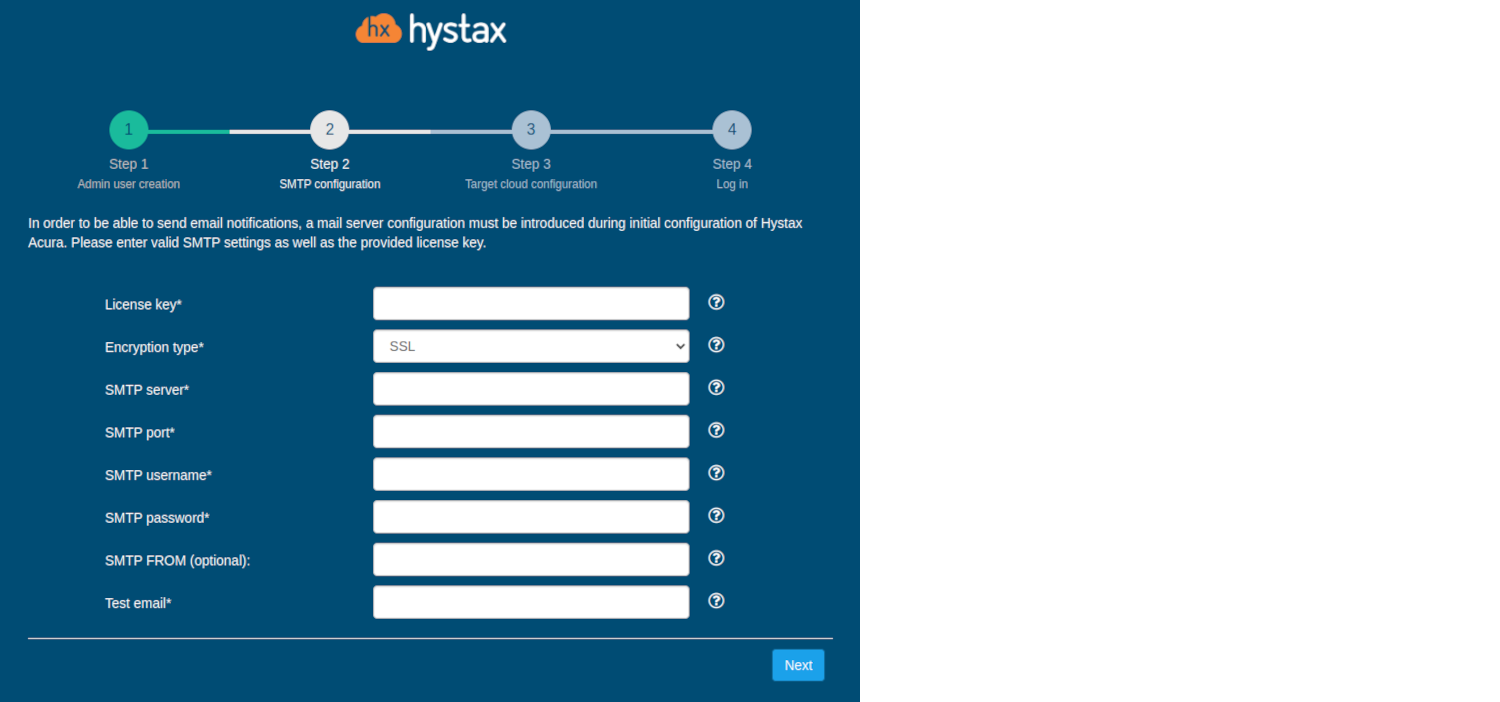
Step 2. SMTP configuration.
Fill in your Hystax License key that was supposed to be shared with you in advance as well as the settings for accessing your mail server used to send notifications from Acura and generate periodic reports. If you prefer a public SMTP server associated with your email address (Gmail, Yahoo, etc.), please look up the required settings online. For a private SMTP server, contact your network administrator for details. Please note that only SMTP servers with SSL/TLS encryption are supported. A sample notification is sent to the specified ‘Test email address’ to verify functionality.
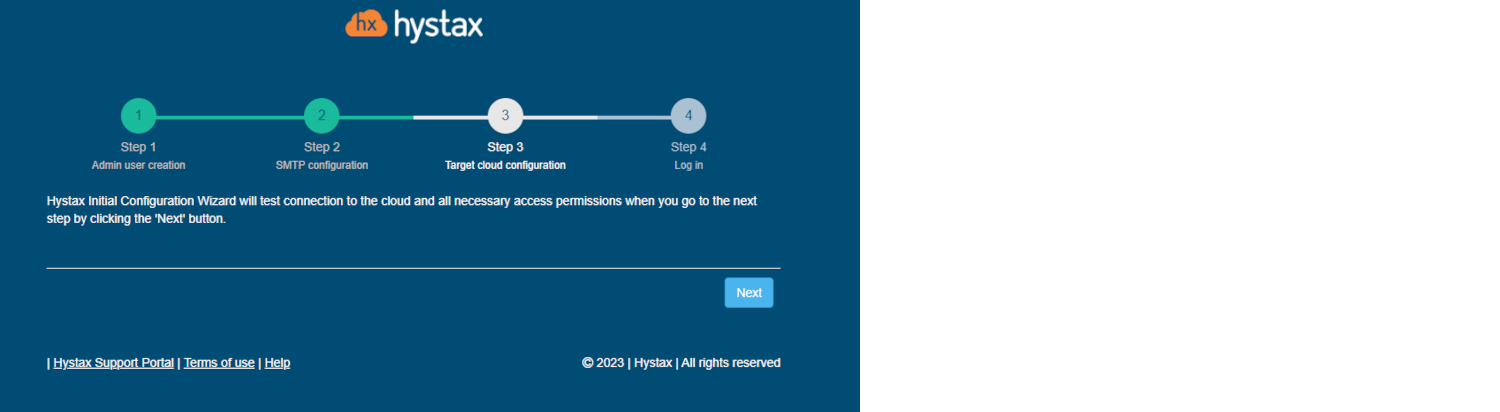
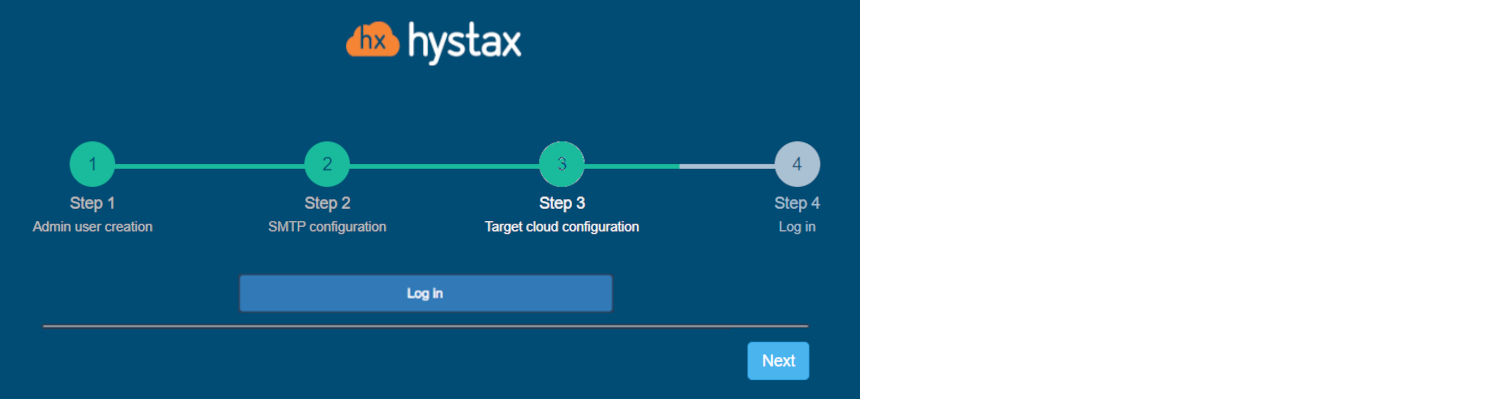
Step 3. Target cloud configuration.
During the initial setup, the cloud is configured automatically, you just need to click the "Next" button.
If you are adding a new cloud or decide to edit an automatically created one, go to the section with a detailed description of the fields.
Press “Next” to run cloud check. If this check fails with permission errors, please verify that the Acura instance has full access to all cloud APIs.
Note
Shut down the instance to change its permission settings.
Step 4. Log in.
Installation completed. You can now sign in using the credentials entered in the first step.
Congratulations, you are now ready to use Acura! Just enter the administrator username and password specified on the first step of installation in the login page of the solution.