OpenNebula#
Installation requirements#
-
Resources to launch a virtual machine disk created from the Hystax Acura Golden image:
- 8 vCPUs,
- 16GB RAM,
- 200GB SSD disk.
-
Resources to launch a virtual machine for the Hystax Cloud Agent. Created in each target / failover project:
- 2 vCPUs,
- 4GB RAM,
- 20GB disk.
-
Security groups that allow the following traffic:
-
Hystax Acura Controller:
- Port -- tcp/443,
- Port -- tcp/4443,
- Port -- udp/12201.
-
Hystax Cloud Agent (automatically created in the Target Project):
- Port -- tcp/80,
- Port -- tcp/15000.
Installation steps#
Cloud configuration#
1. Deploy the virtual machine from the Image with the key pair attached and run it to the OpenNebula cloud.
Note
It is highly recommended to add a key pair to give you SSH access to the machine.
It takes from 10 to 20 minutes to start the service and gain access to the web interface.
2. Upload the cloud agent image named Hystax_CATI to the target project.
Pass Acura initial configuration#
Open a web browser and navigate to https://<ACURA_IP_ADDRESS>/. You are redirected to the Hystax Setup Wizard. After completing the steps, the installation is complete and you can start using Hystax Acura.
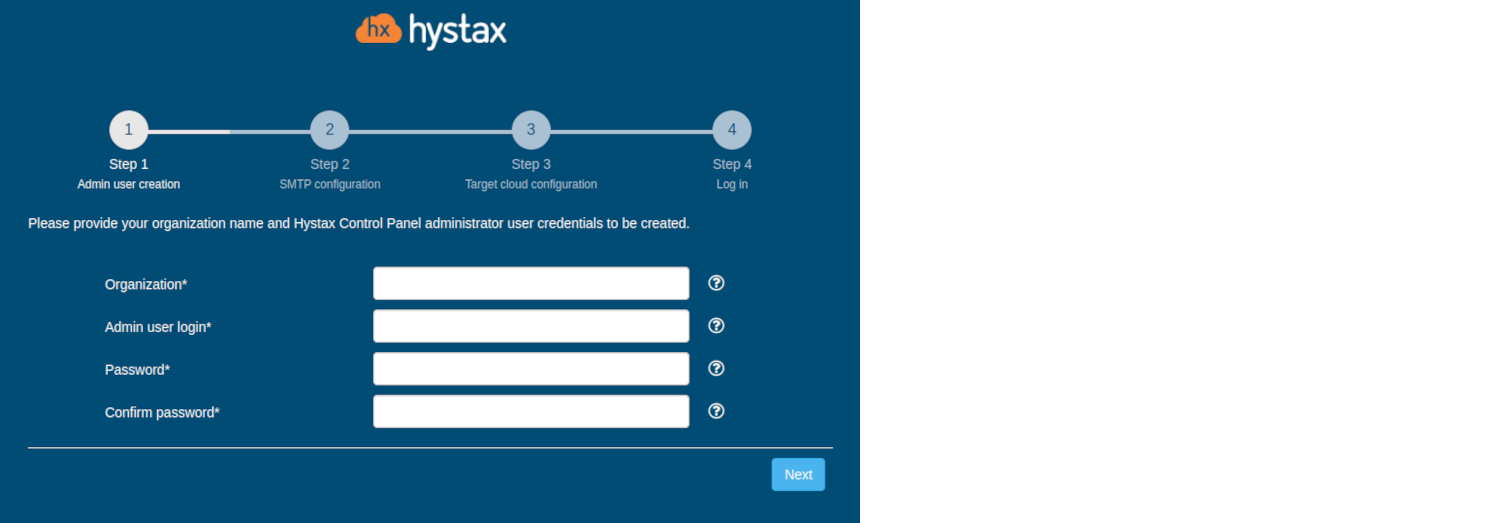
Step 1. Admin user creation.
Enter the organization name and new Hystax Admin user credentials in the Setup Wizard . This is the user account for logging in to the Hystax Acura Control Panel and system management. If any errors occur, the system notifies you.
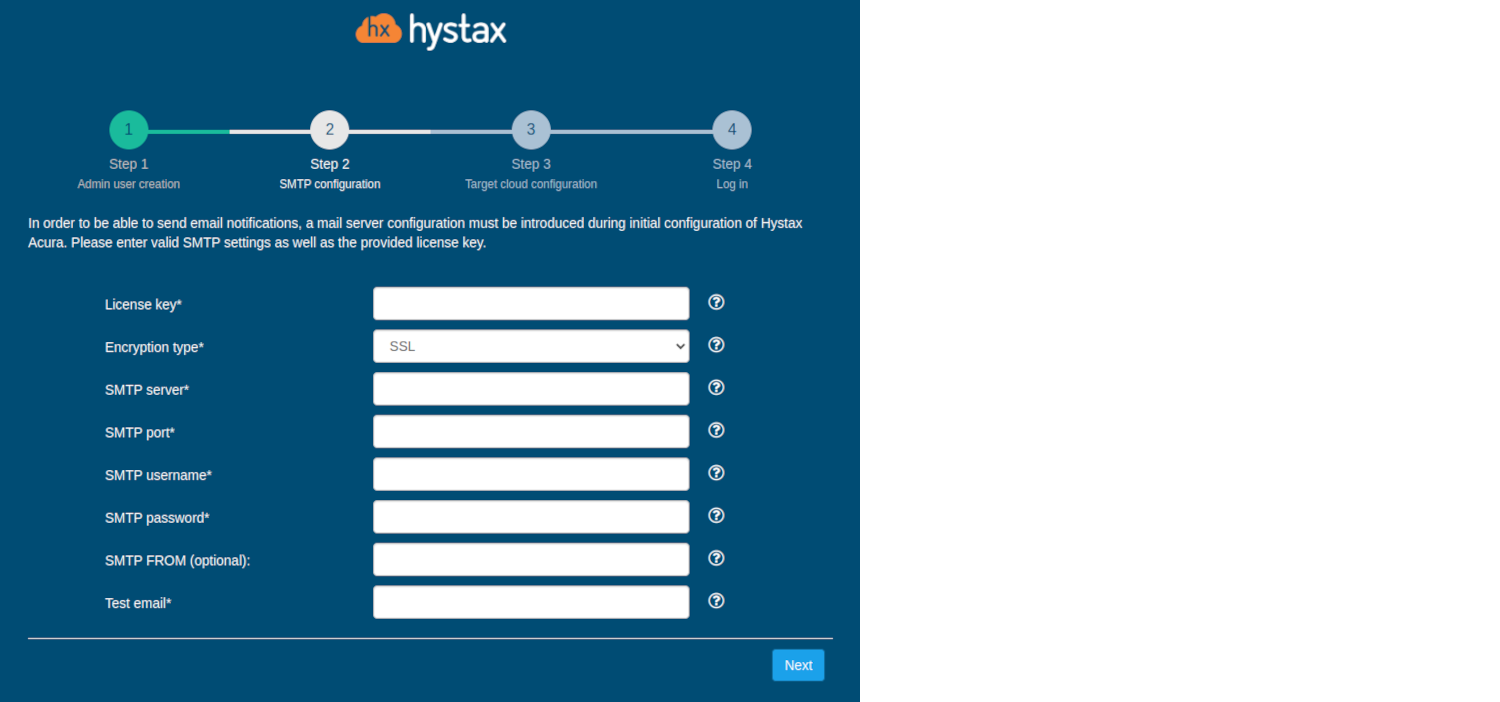
Step 2. SMTP configuration.
Fill in your Hystax License key that was supposed to be shared with you in advance as well as the settings for accessing your mail server used to send notifications from Acura and generate periodic reports. If you prefer a public SMTP server associated with your email address (Gmail, Yahoo, etc.), please look up the required settings online. For a private SMTP server, contact your network administrator for details. Please note that only SMTP servers with SSL/TLS encryption are supported. A sample notification is sent to the specified ‘Test email address’ to verify functionality.
Step 3. Target cloud configuration.
Complete all fields by providing cloud configuration details. You can click on the "?" for field tips. After clicking the "Next" button, the installation wizard confirms the correctness of the entered data and notifies you in case of an error.
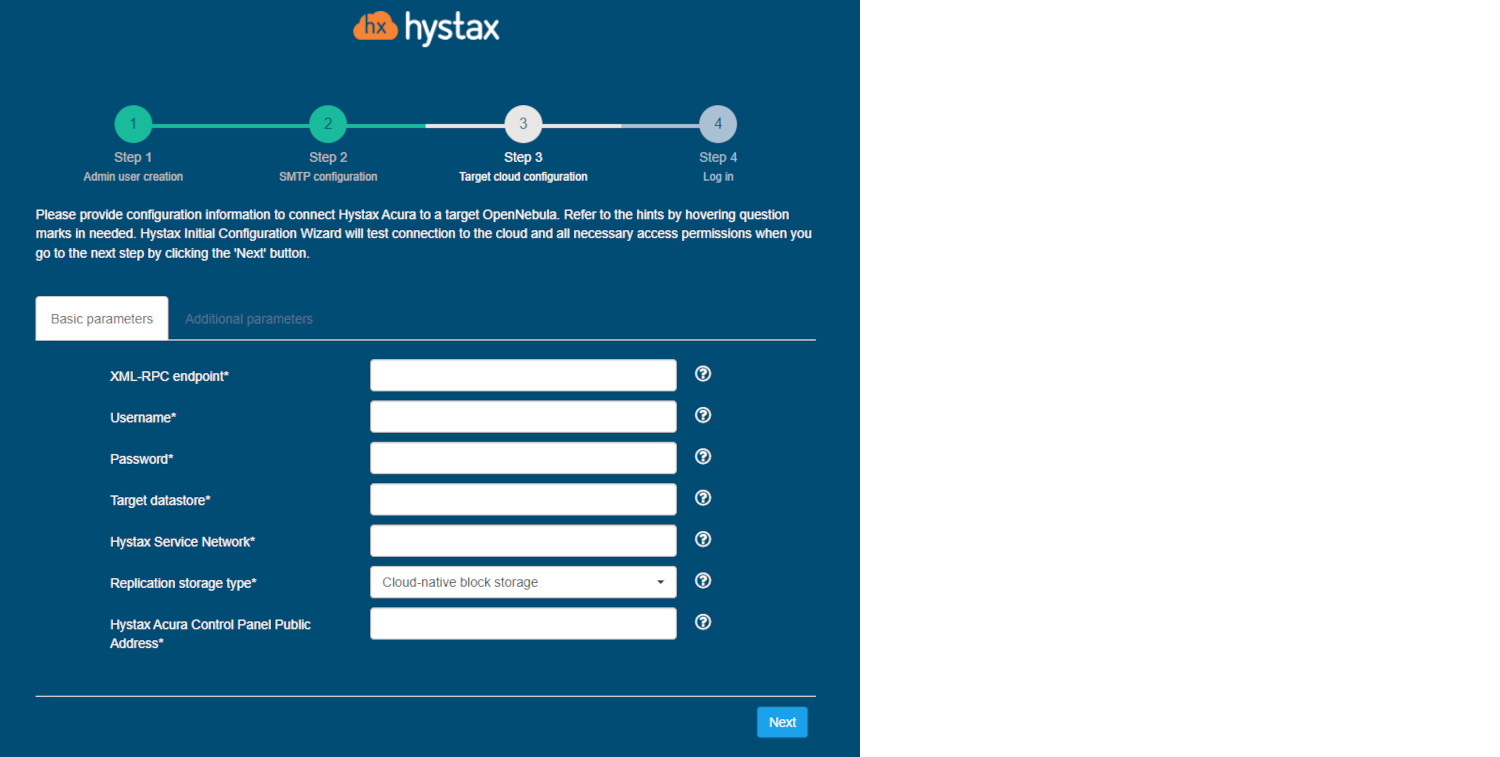
Detailed description of the fields.
The specified user must have the following rights for Hystax Acura:
-
Loading an image
-
Instance launch
-
Volume creation
-
Attaching a volume to an instance
-
Detaching a volume from an instance
-
Create a volume snapshot
-
Create a volume from a snapshot
-
Deleting a snapshot
-
Deleting a volume
-
Network management
Click "Next" to start cloud validation.
Step 4. Log in.
Installation completed. You can now sign in using the credentials entered in the first step.
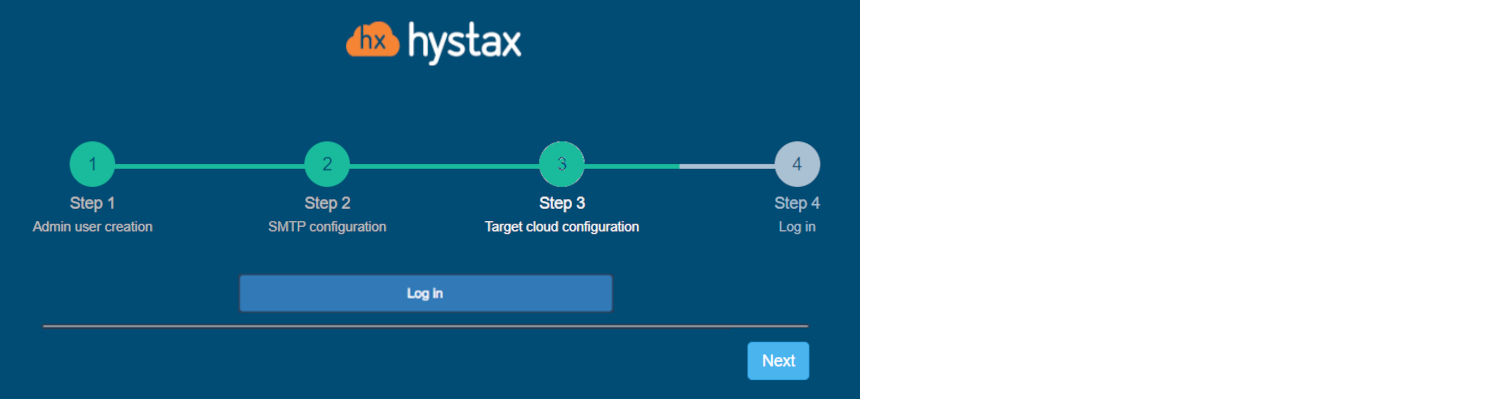
Congratulations, you are now ready to use Acura! Just enter the administrator username and password specified on the first step of installation in the login page of the solution.
Troubleshooting OpenNebula#
Hystax Acura automatically checks for cloud access and necessary permissions to ensure the operation is complete. It provides detailed error messages that describe possible causes of problems. In case of an error, please check the correctness of the entered data and the availability of the necessary permission. If you encounter difficulties during the installation process and have any questions, you can contact the Hystax support service using the contact information provided below. The Hystax Support Portal is available at https://support.hystax.com/portal/en/kb. There you can find all articles from our Knowledge Base. You can also submit support requests in your personal account.