Google Cloud Platform#
Configure the target cloud in two ways: via the UI or via API functions.
To configure the target cloud via the UI, open the ACP. In the right part of the page, above the client list, click the Manage Clouds button. The page displays information about the target clouds. Use the available commands in the Actions menu to configure clouds. To add a cloud, click Add below the table with the list of target clouds.
Select the GCP cloud type.
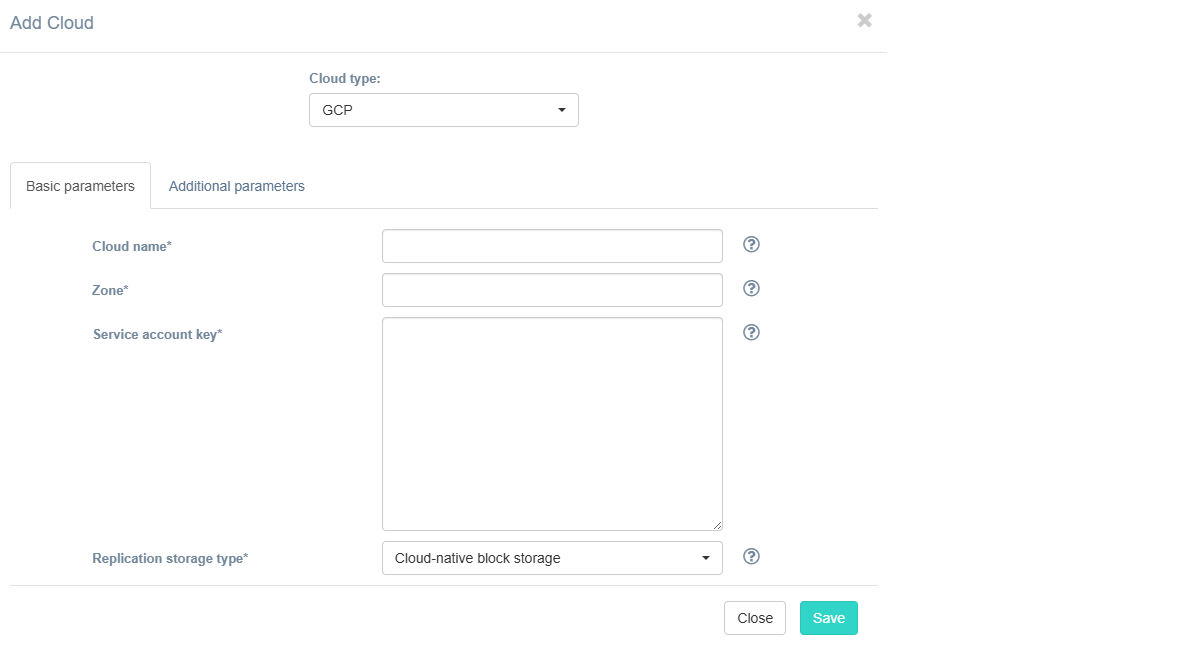
Fill in the fields on the Basic Parameters tab by providing information about the cloud configuration. Click "?" for field tips.
The table below provides a normative mapping between UI field labels and API parameter names used by Hystax Acura during cloud discovery, replication, and recovery workflows.
| Field name in UI / API | Description | Example |
|---|---|---|
Cloud name /name |
The cloud name to be displayed in the UI. The name must be unique. | Hystax-Acura |
Zone /zone |
Specific GCP zone (e.g., us-central1-a) for replicated workloads. |
eu-west-1 |
Service account key /service_account |
JSON-formatted Service Account key providing credentials for GCP API access. Note: Ensure the service account has sufficient roles/permissions (e.g., Compute Admin, Networking Admin, Service Account User) for agent deployment and replication tasks. |
{ "type": "service_account", "project_id": "my-gcp-project", "private_key_id": "abc123...", "client_email": "[email protected]", ... } |
| Replication storage type / - |
Choose storage type to use for replicated data. Migration and recovery from cloud-native block storage is fastest, but the other storage types can be cheaper. Detailed description. | Cloud-native block storage |
If necessary, add information about additional parameters. To do this, go to the Additional Parameters tab, select the required parameter, and enter its value. The tooltip system works similarly to the Basic Parameters tab. Description of additional parameters:
| Field | Description |
|---|---|
| Cloud agent flavor | Flavor to use for the cloud agent instances |
| Cloud agent flavor requirements | Requirements for cloud agent flavor in JSON format, for example: {"cpu": "value", "ram": "value", "hdd": "value"} |
| Cloud agent image ID | ID of the cloud agent image from the target cloud |
| Cloud agent security group | Security group used by Cloud Agents |
| Cloud agent subnet | Subnet where cloud instances will be spun up |
| Cloud agent volume type | Cloud agent volume type |
| Cloud site replications launch timeout (minutes) | Timeout for a launch of replications during Cloud Site creation (in minutes) |
| Cloud site replications timeout (minutes) | Timeout for a replications during Cloud Site creation (in minutes) |
| Cloud site timeout | Cloud site creation timeout in minutes |
| Enable ransomware protection | Detect and suspend machines with abnormally large incremental replication size to mitigate possible ransomware impact. |
| Ransomware protection threshold | Ransomware protection threshold (in percent). Defines the maximum permissible size of incremental replication relative to the latest full backup. Exceeding this threshold triggers automatic machine suspension. |
| Replicated volume type | Default volume type used to create volumes for replicated VMs |
| Security group | Name of the security group with all required ports opened |
| Send replication data to cloud agent directly | Check this box to send replication data directly to cloud agent, it can increase replication speed. |
| Set default tag | Tag created resources with provided tag name |
| Use https server on cloud agent | When this option is enabled, the cloud agent starts with an https server. This option will not be applied to existing agents, only to new ones. |
| Use multi-regional snapshots | Create multi-regional snapshots instead of regional snapshots |
| Use public IP for cloud agent | Cloud Agent will be created with public IP and Acura will use public IP to connect to Cloud Agent |
Note
You will need to shut down the instance to change its permission settings.
Click the Save button. The solution checks the entered data for correctness. If an error occurs, a notification appears.