Integrations#
Google Calendar#
Integrating Google Calendar to display shareable resource booking intervals as events allows users to view and manage availability in real time. Each booked interval appears as a Google Calendar event, making it easy to see open and reserved slots at a glance. This setup enables streamlined scheduling, letting users quickly check and share resource availability with others through a familiar calendar interface.
Follow these steps to connect Google Calendar to OptScale:
Prepare your Google Calendar#
1. Create or choose one of the existing secondary calendars in your Google Calendar
2. Share it with the OptScale service account
[email protected] to do this:
-
Select the calendar
-
Open the Calendar Settings
-
Navigate to the Share with specific people or groups section
-
Click the Add people and groups button
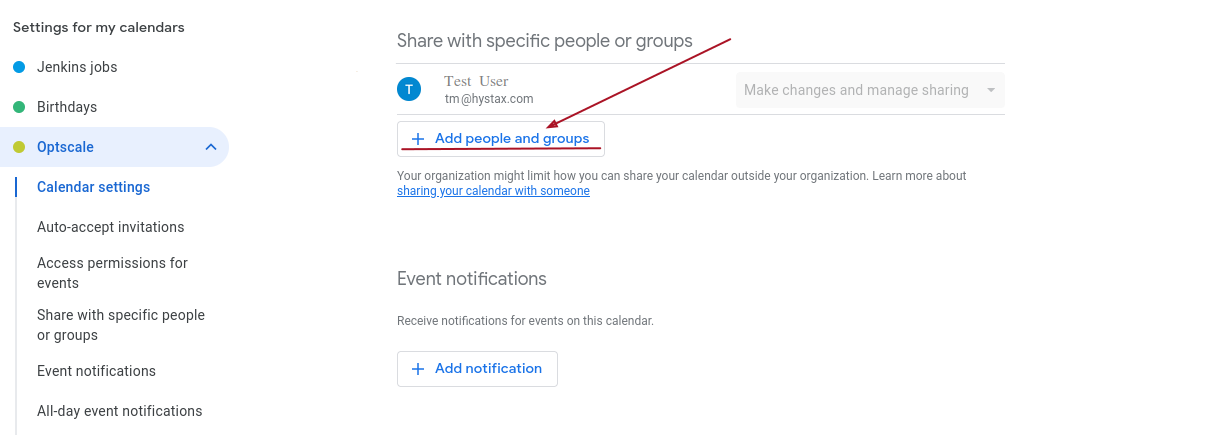
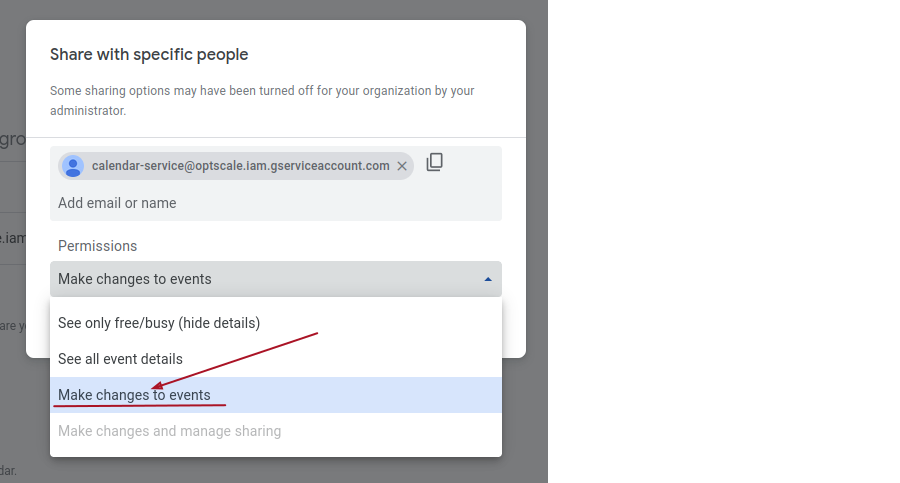
- Add the email address:
[email protected]and select the Make changes to events permission.
Note
If you have an open-source OptScale, please use the client_email specified in the user_template.yml file instead of [email protected].
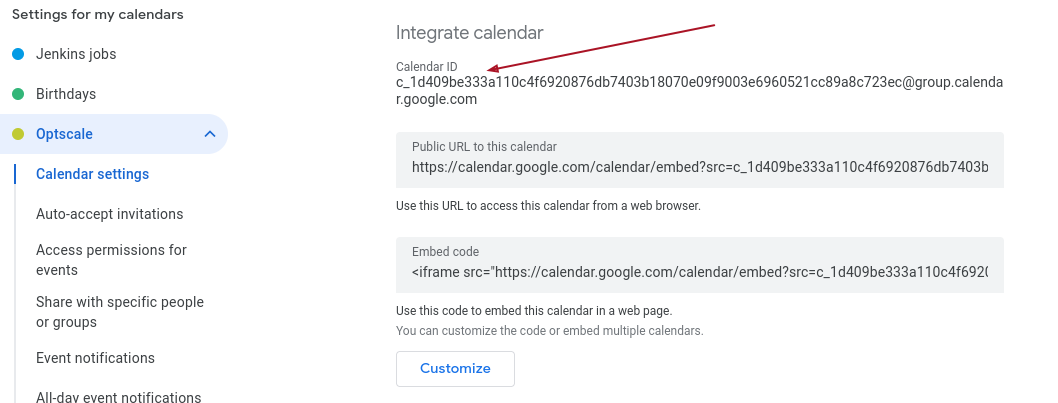
3. Copy the Calendar ID from the Integrate calendar section.
Connect the Calendar to OptScale#
1. Open the Integrations page and click the CONNECT CALENDAR button
2. Paste the Calendar ID into the opened side modal
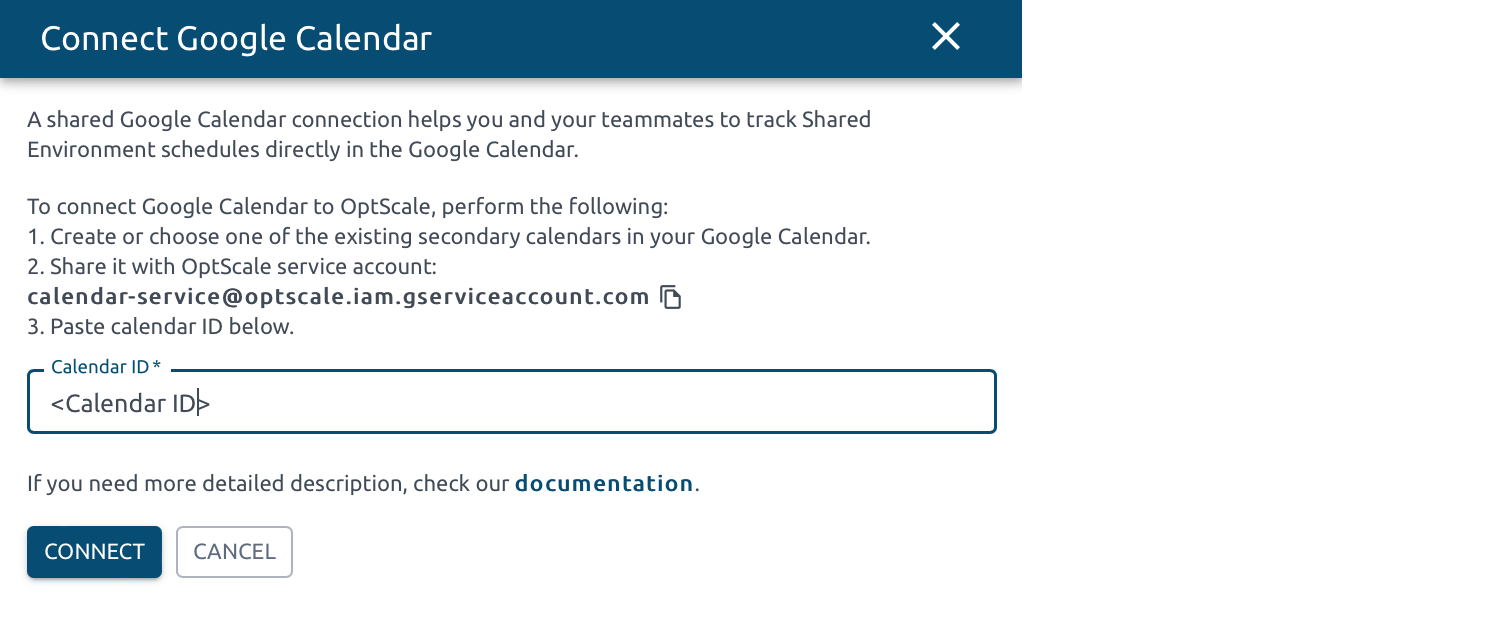
3. Click the Connect button to view your Shared Environment schedules directly in the Google Calendar.
Slack App#
Slack has become a popular communication tool that brings Managers, DevOps and Engineering team members together in their everyday tasks. OptScale can be integrated into Slack as an application to provide a range of notifications, monitoring and management options in a familiar interface to engage everyone in a more efficient FinOps strategy without delays that are often caused by the necessity to access several platforms.
To add our app to your Workspace in Slack and connect it to your OptScale account:
1. Access OptScale's UI (https://my.optscale.com/, by default).
2. Log in as the user that you want to assign the Slack app to. (Re-login as a preferred user to get Slack notifications depending on the Organization Role).
3. Go to <optscale_url>/slacker/v2/install (https://my.optscale.com/slacker/v2/install).
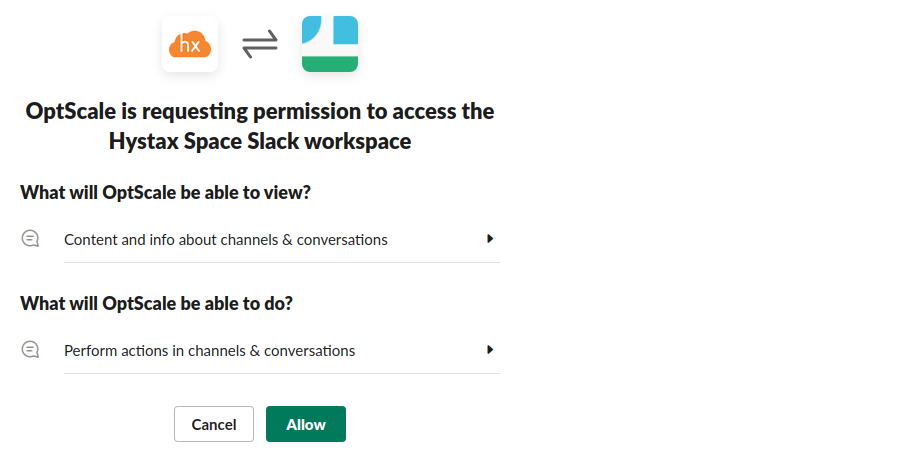
4. Click on the Add to Slack button.
5. Click Allow on the next page to add the permissions and be redirected to the Slack desktop app or its browser version.
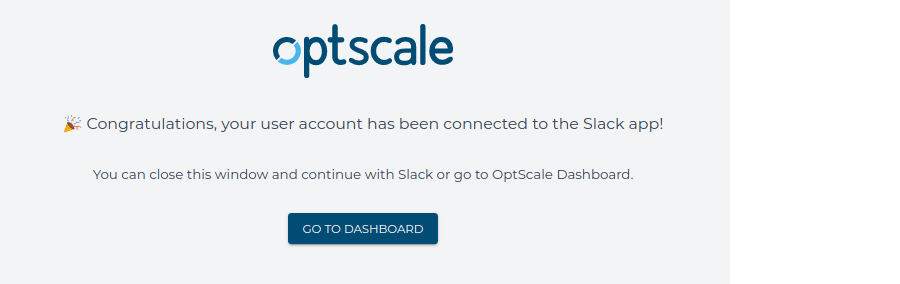
6. Once the application is installed in Slack, you will see a greeting message which includes a link to authorize the app in OptScale, so please follow it.
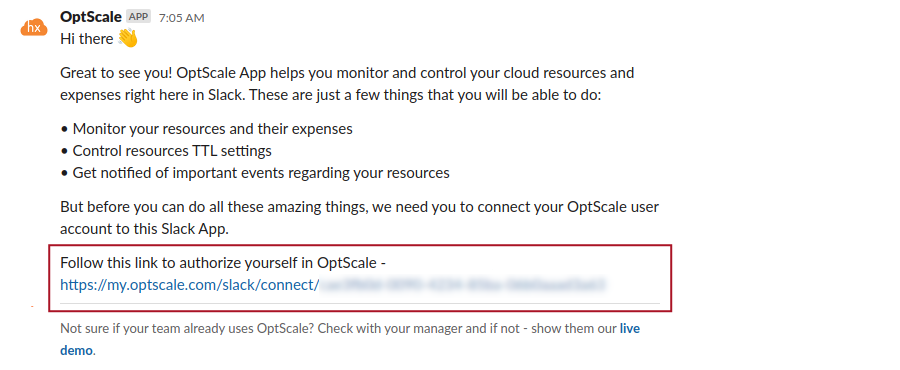
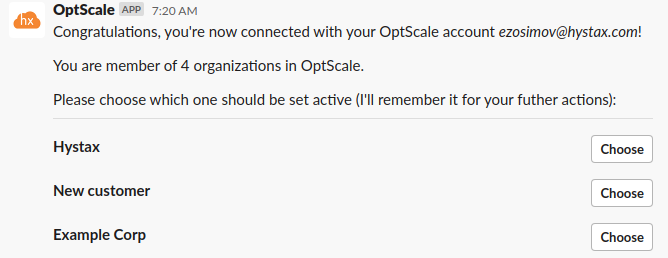
Your OptScale account has been connected to the Slack app!
If the user is a member of several organizations in OptScale, the next step is to choose a default organization.
Listing resources#
To get a list of resources that have been assigned to you in the current organization, select OptScale in the Apps section and type in "resources".
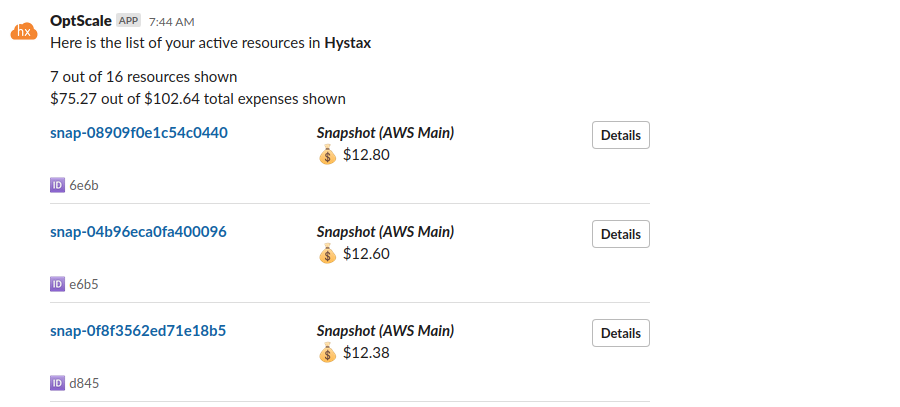
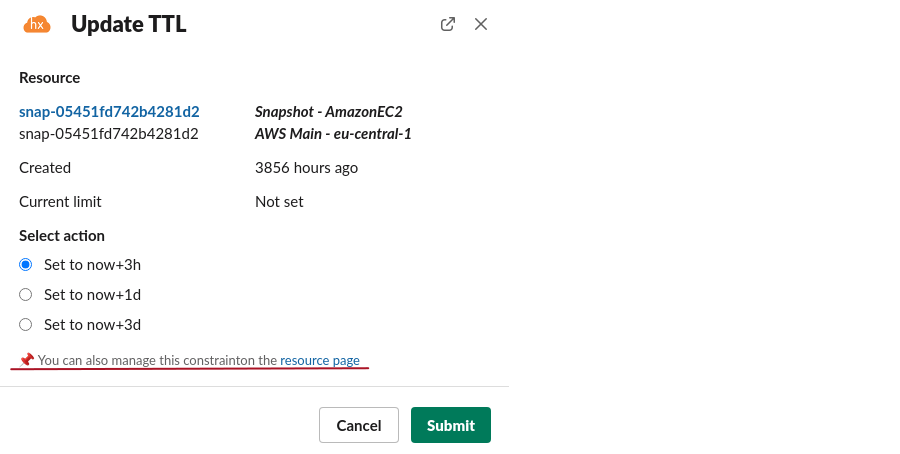
By clicking the Details button to the right of any presented resource, you will receive a new message containing its full name, region, pool, owner as well as the amount of related expenses and constraints with the option to modify resource's current TTL via the Update TTL button.
Additionally, each message in the app contains a link to OptScale web console or the corresponding Resource page for a quick access to the main portal.
Listing environments#
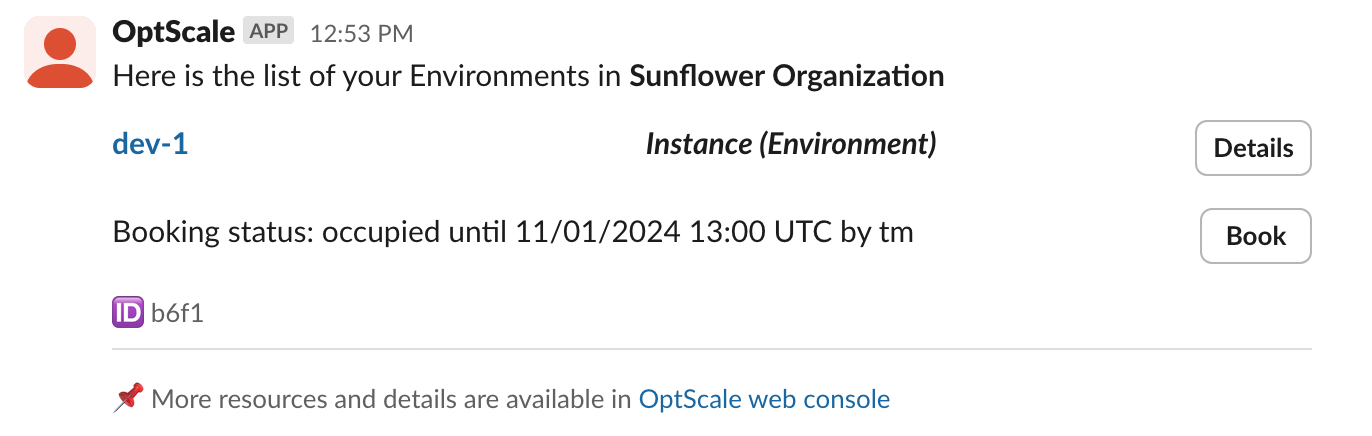
To get a list of existing shareable resources (first 10 by name), select OptScale in the Apps section and type in "envs".
Listing organization#
To get a list of your organizations, select OptScale in the Apps section and type in "org".
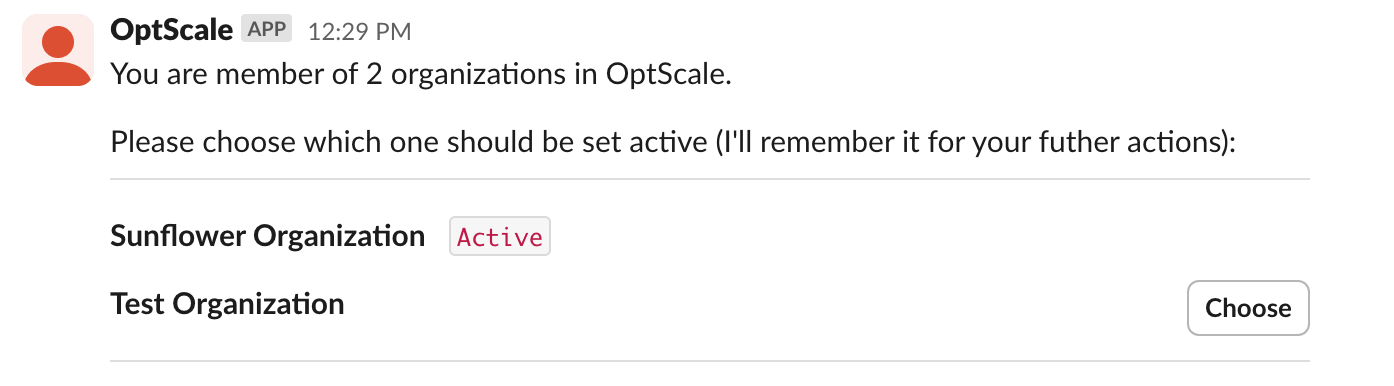
The active organization is labeled “Active”. To select another organization as active, click the Choose button to the organization's right.
Notifications & alerts#
All team members can receive alerts about occurrences and tasks in the cloud that require additional attention through the designated notification channel.
Below are the instructions on how to include OptScale alerts into your Notifications channel in Slack:
1. Create a Notifications channel in Slack if you do not have one already
2. Access the Channel details
3. Select the Integrations tab
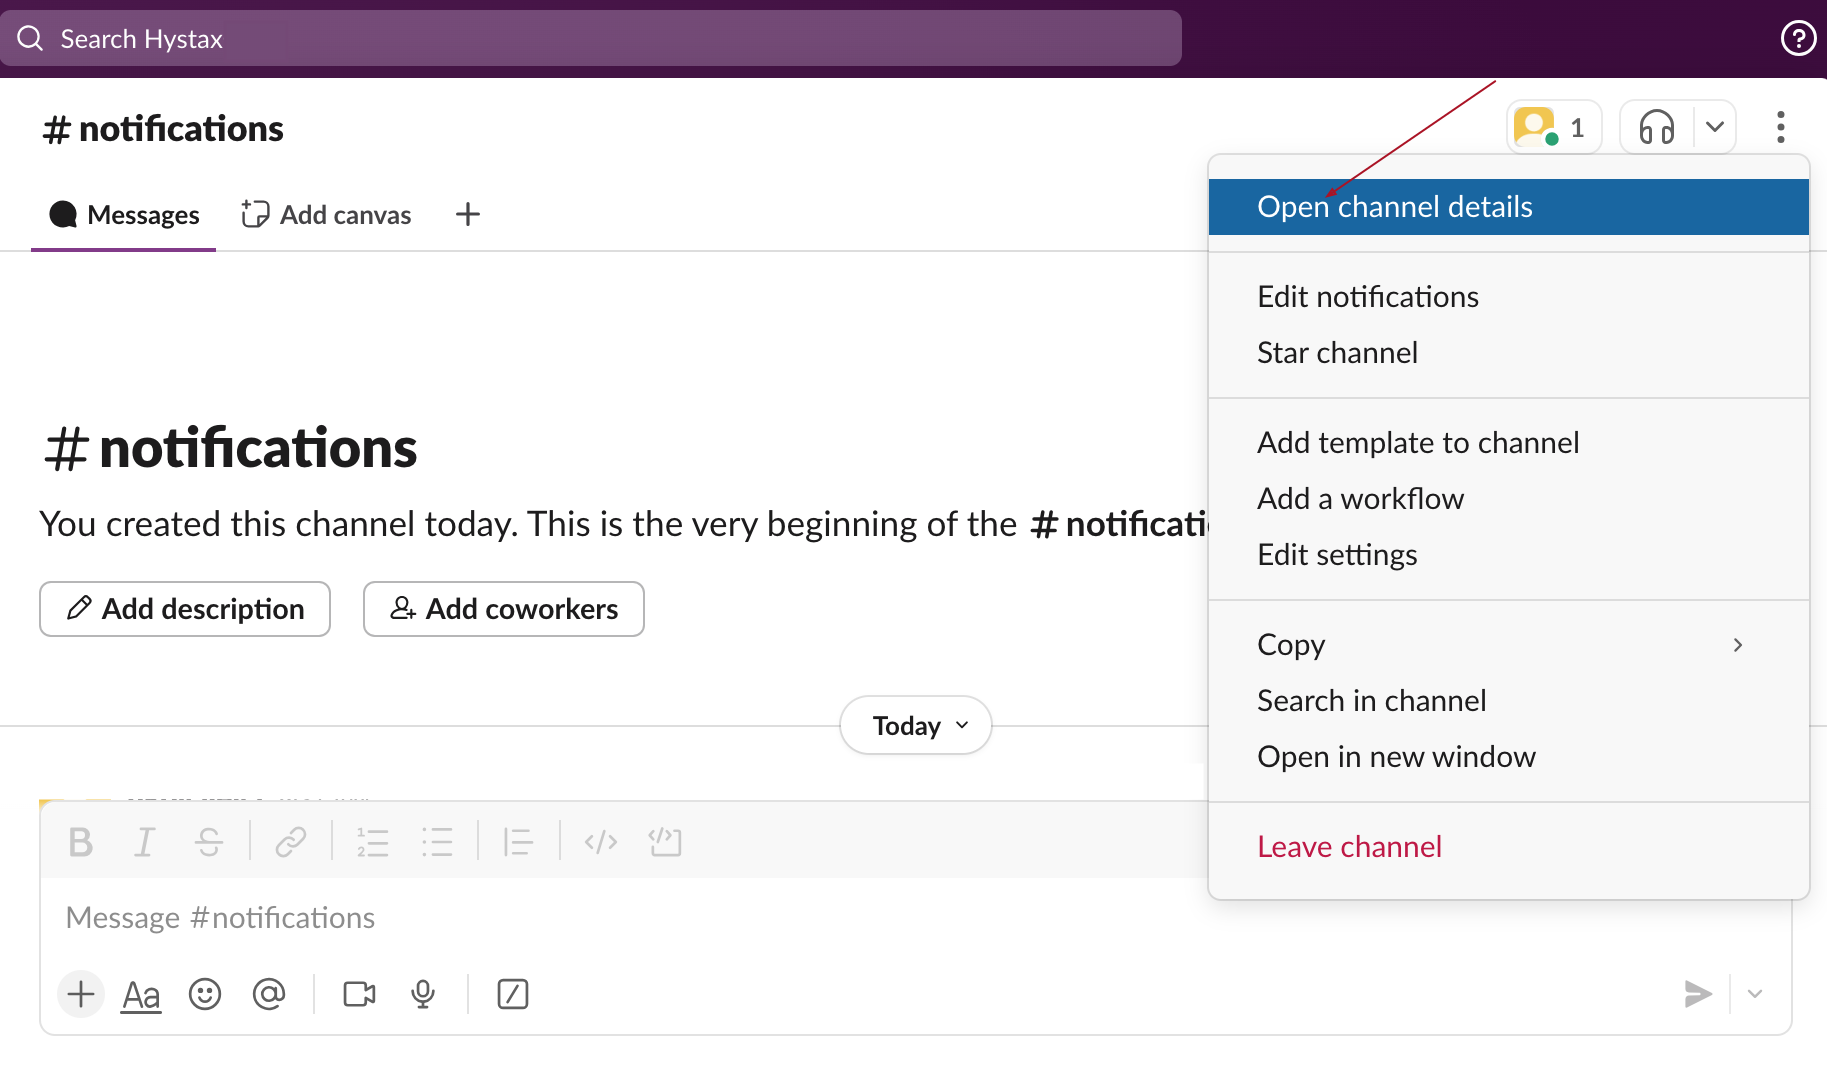
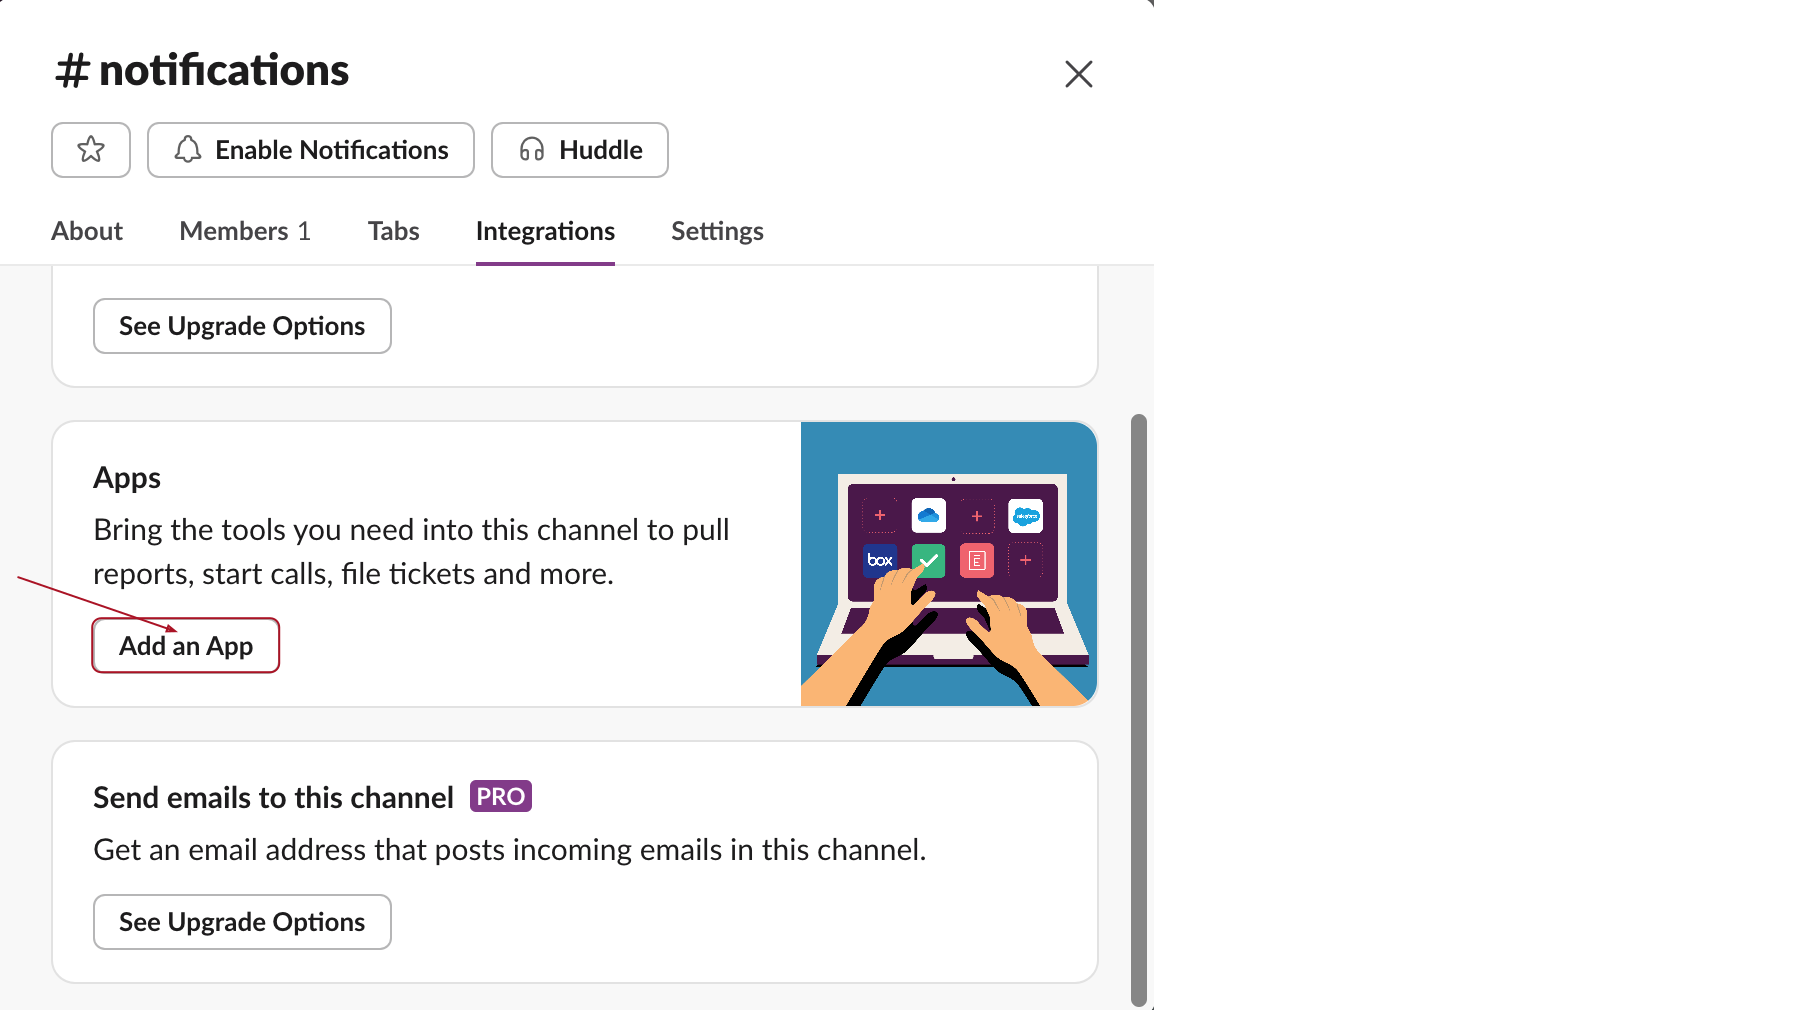
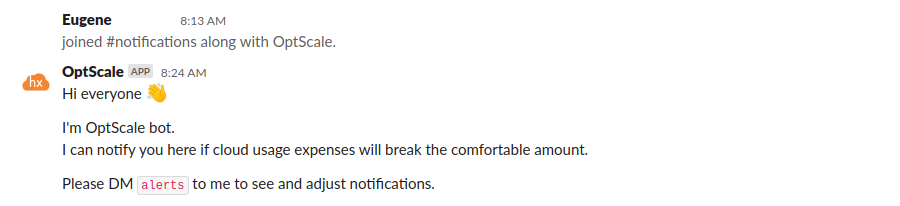
4. Select OptScale from the list of apps in your workspace. You will receive the following message
Now that the app is connected to the Notification channel, you can create additional alerts for your team:
Note
Only users with the Manager Role can modify and update notifications.
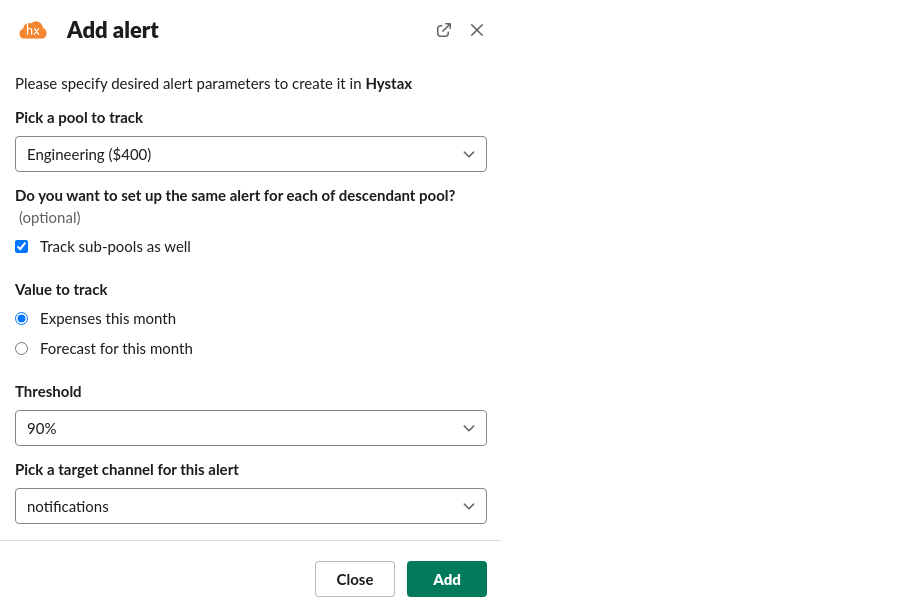
1. Select OptScale in the Apps section and type in "alerts".
2. You will receive a list of existing alerts, from which you can Delete or Add alert. Choose the latter option to add a new one.
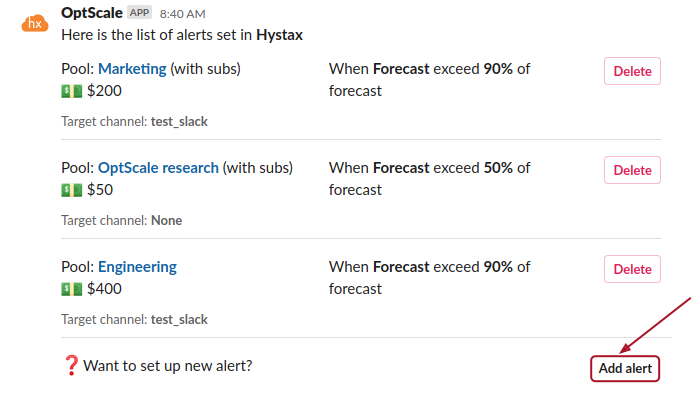
3. In the new window, select the desired pool that should be tracked, the threshold limit to trigger the alert and the target channel where the members should be notified and click Add.
The task is complete! You have added a new alert for your team members to help control your Organization's cloud expenses.