Power Schedules#
Use the Power Schedule feature to optimize the use of computational resources to improve efficiency, reduce costs, and minimize energy consumption. Its objective is to implement a power management policy that enables users to schedule instances to start/stop according to predefined schedules. This policy is applicable across multiple cloud platforms, including AWS, MS Azure, GCP, and Alibaba.
The entry point to the power schedule page is a Power Schedules item in the Policies section of the menu.
Base principals#
Power Schedules is a feature that allows instances in the cloud to be powered on and off based on a predefined schedule.
Notes:
-
A resource can have only one power schedule.
-
The schedule runs every day.
-
A single power schedule can include multiple power-on and power-off time triggers.
-
Supported on AWS, Azure, Alibaba Cloud, and GCP.
Permissions#
Permissions required for powering on/off instances:
-
AWS
ec2:StartInstances,ec2:StopInstances- Allows starting or stopping EC2 instances a user has tagged, programmatically and in the console.
- Source: AWS Identity and Access Management.
-
Azure
Microsoft.Compute/virtualMachines/start/actionMicrosoft.Compute/virtualMachines/deallocate/action- Allows users to start/stop specific Azure virtual machines (VMs).
-
Alibaba Cloud
ecs:StartInstance,ecs:StopInstance.
-
Google Cloud (GCP)
compute.instances.start,compute.instances.stop
Page oveview#
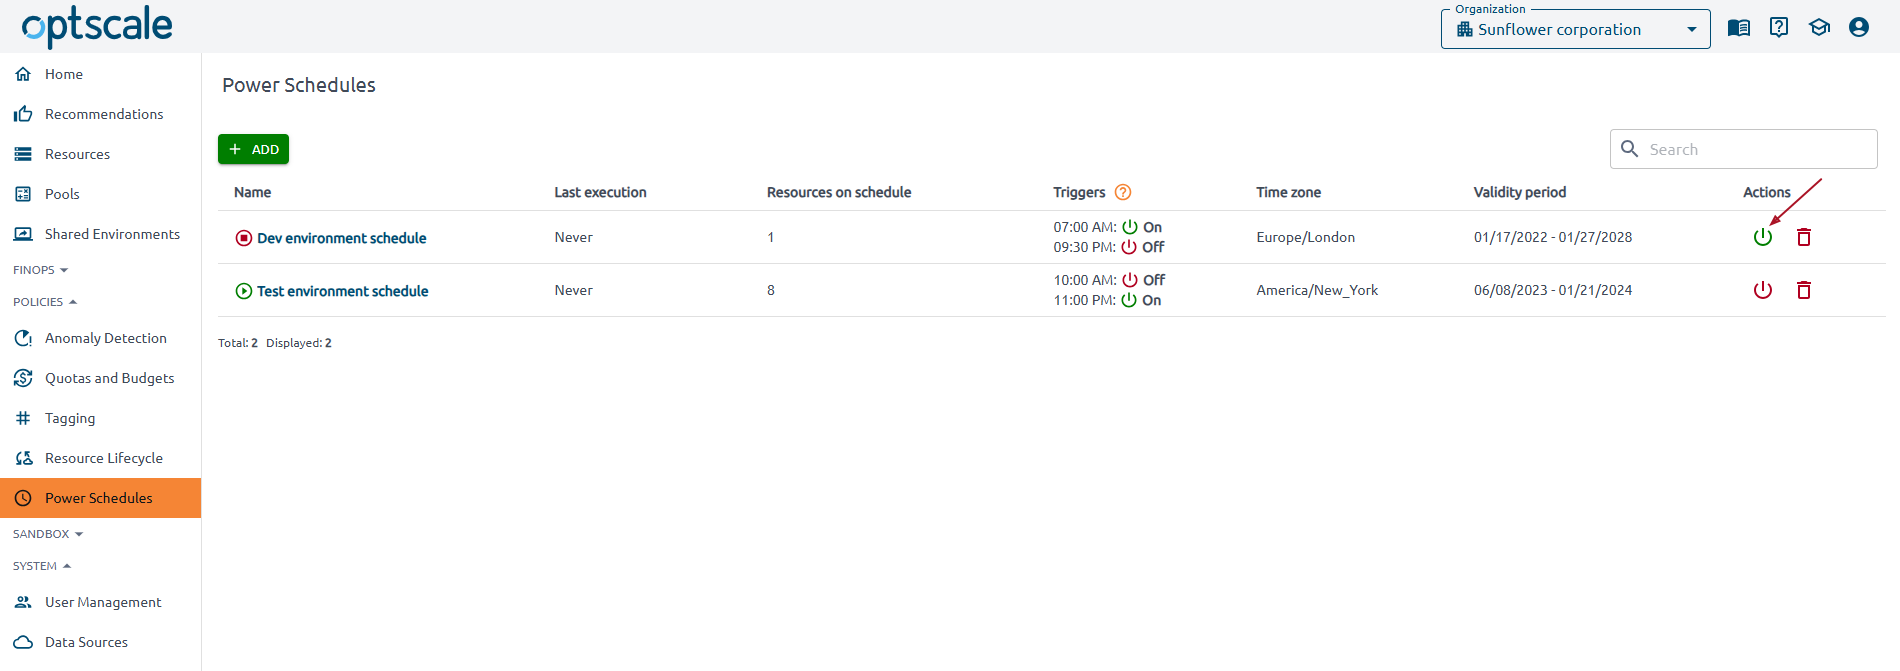
Go to the Power Schedules page to view a summary of existing schedules. Find a list with key details there, including the last execution date and time,
the number of resources assigned to the schedule, time triggers for powering instances on and off, time zone, validity period, and actions (available only for the users with the Organization manager role). An active schedule is marked with  , while an inactive schedule is marked with
  .
.
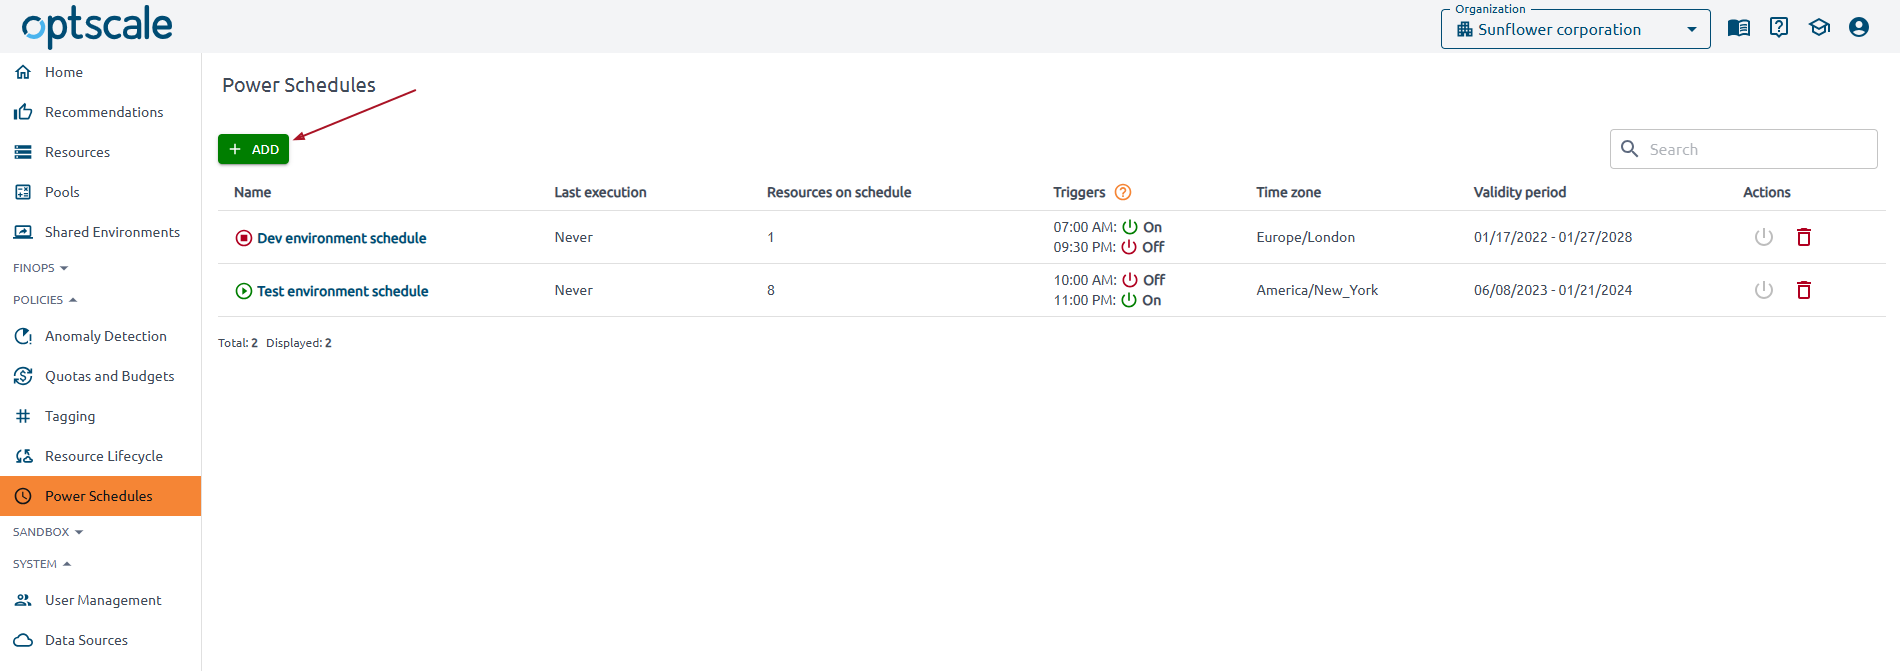
Use the ADD button to add a schedule. A user with the Organization manager role can perform this action.
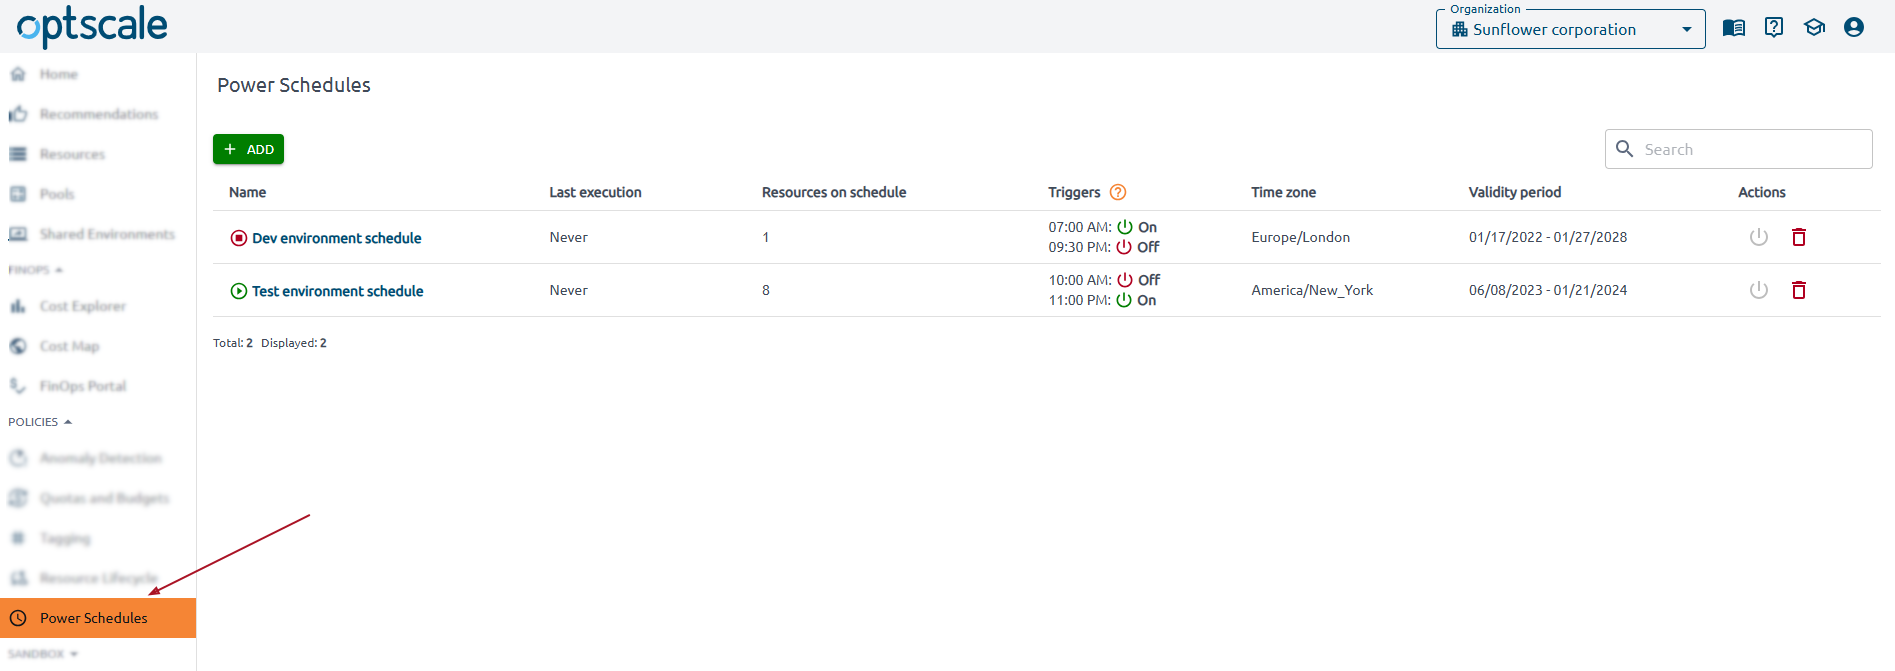
Click the schedule name to get details.
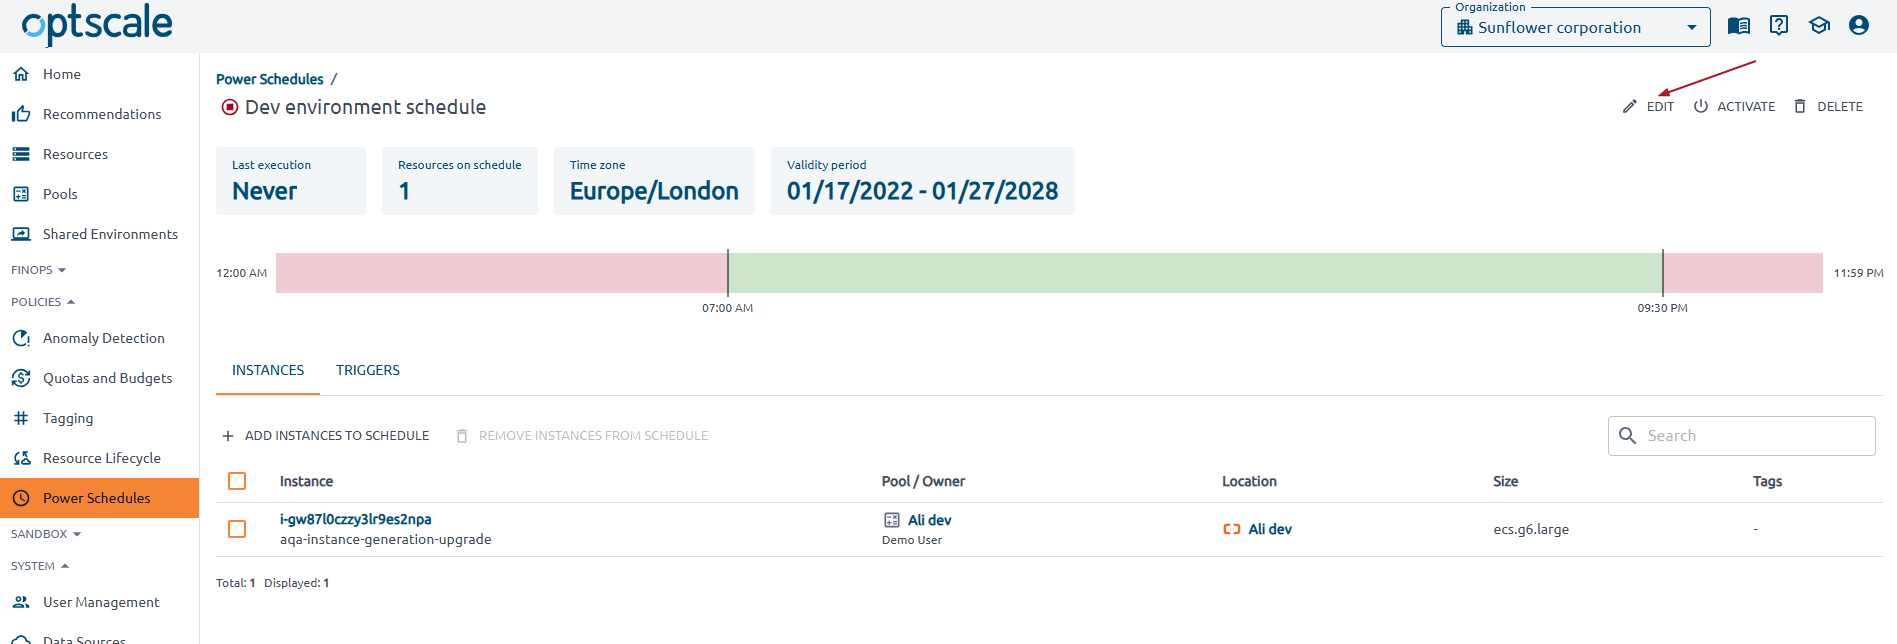
Get details#
Go to the Policies section → Power Schedules page → click on the schedule name in the table.
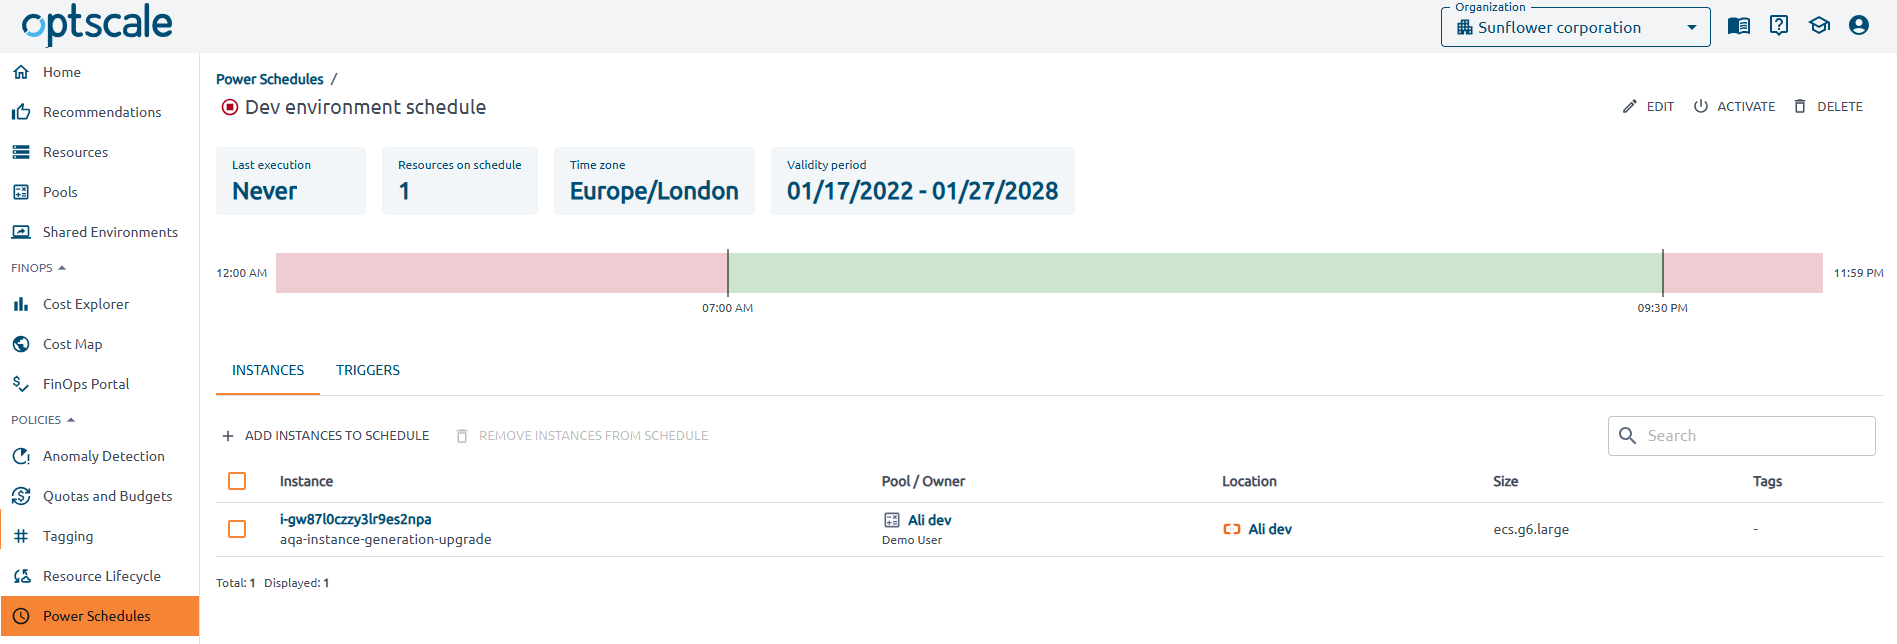
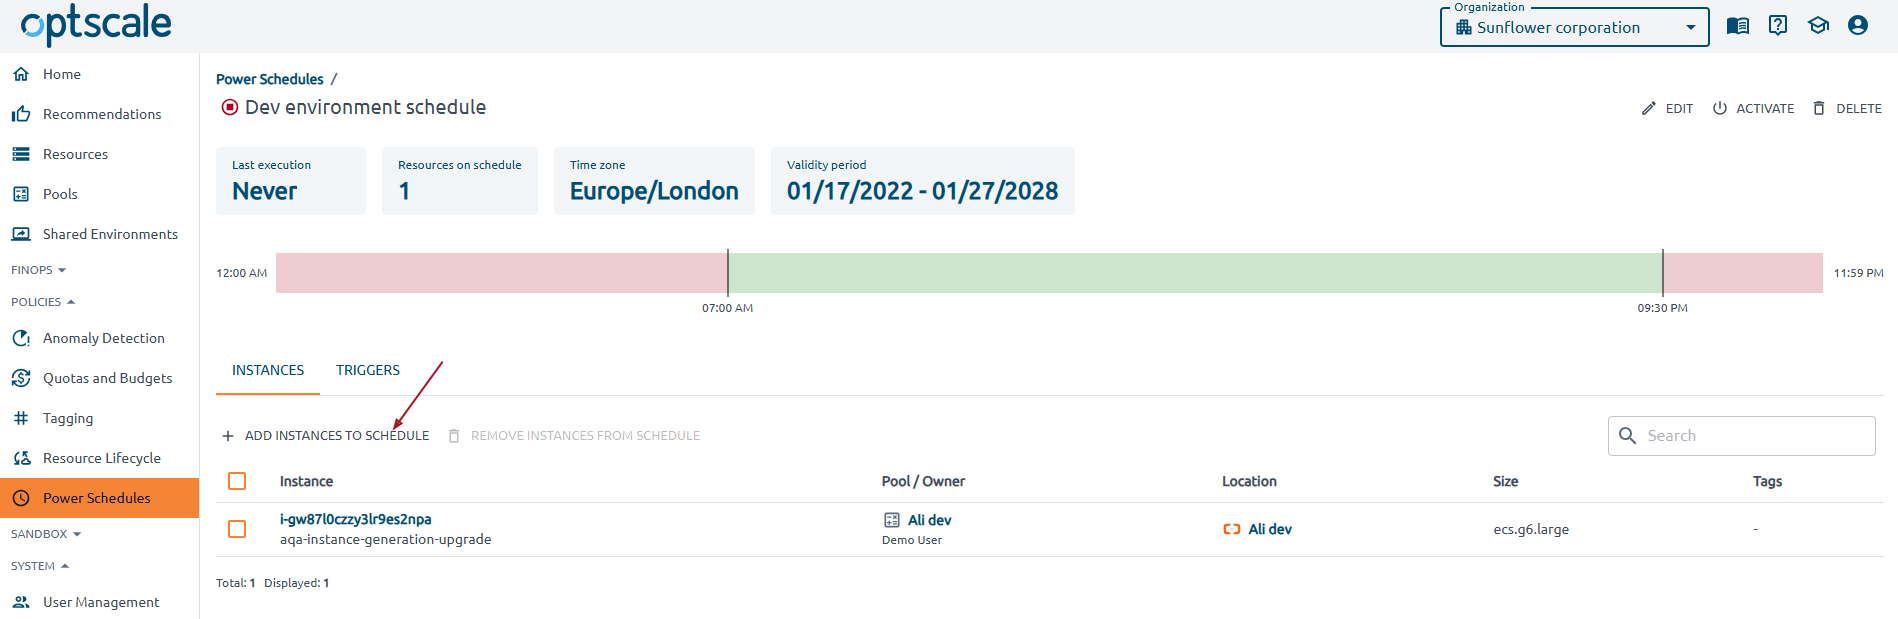
Use Summary Cards to get an at-a-glance overview of important details, such as the last execution time, the total number of resources associated with the schedule, the time zone in which the schedule operates, and the validity period.
Below the Summary Cards find a visual representation of scheduled power actions over a 24-hour period. It includes a horizontal bar that maps scheduled actions to specific times of the day.
-
Green blocks indicate times when instances are powered on.
-
Red blocks indicate times when instances are powered off.
-
Time Labels (e.g., 12:00 AM, 2:00 AM, 10:00 AM, etc.) help interpret when actions will be executed.
Find the list of instances and their associated actions on the Instances tab. Use this tab to search for instances and add or remove them from the schedule. Click in the instance to get detailed information about it.
On the Triggers tab, a list of triggers is displayed. To edit triggers, use the EDIT button at the top right of the page.
Actions#
Add new schedule#
Note
Only organizational managers can add a power schedule.
Enter the name, select a time zone, and specify the initiation and expiration dates. Set triggers. By default, each schedule must have at least one trigger. Use the ADD TRIGGER button to add additional triggers.
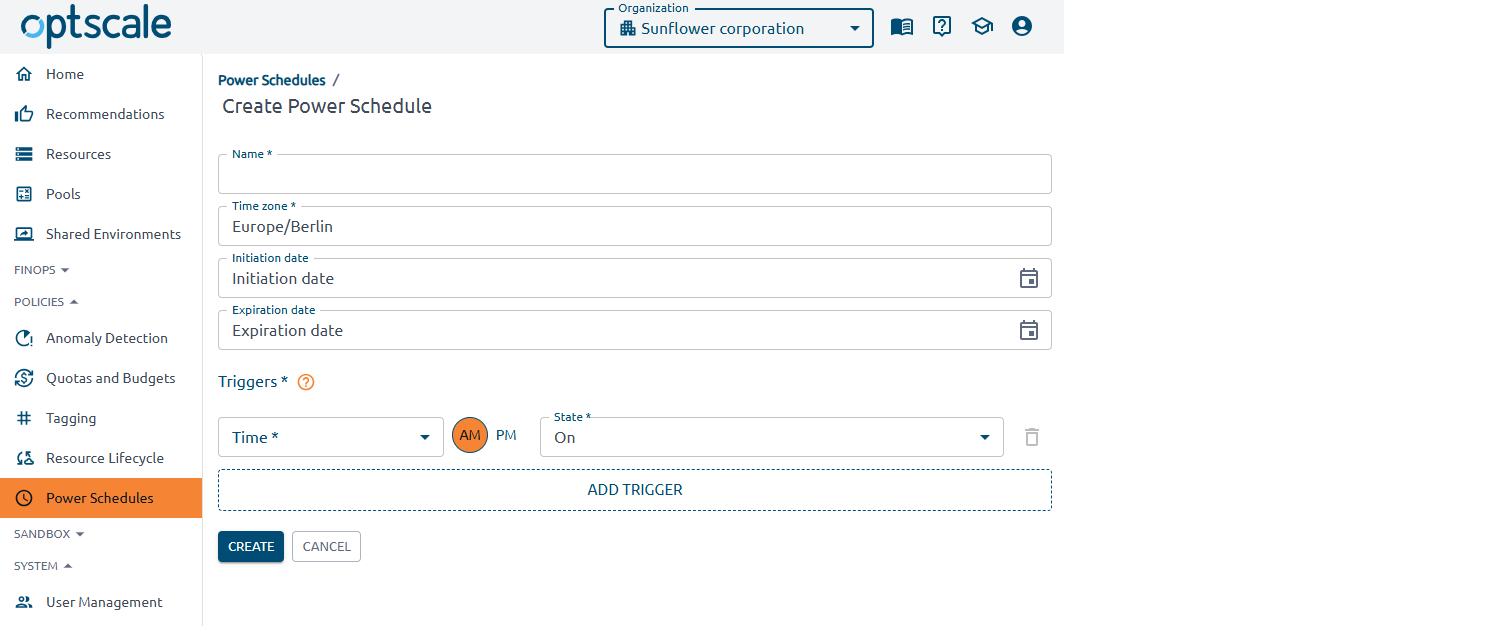
Click CREATE to accept the changes.
Add instances to schedule#
Note
Only organizational managers can add instances to the power schedule.
Go to the Policies section → Power Schedules page → click on the schedule name in the table → go to the Instances tab → click ADD INSTANCES TO SCHEDULE.
Select the Data Sources, use filters and search to narrow the results. Check the box next to the instances you want to add.
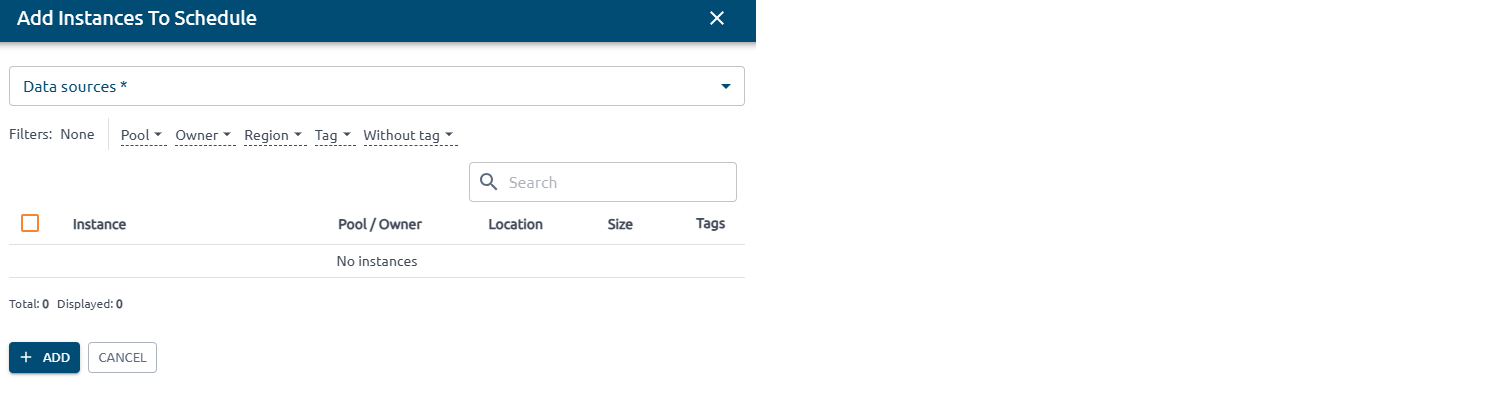
Click ADD.
Remove instances from schedule#
Note
Only organizational managers can remove instances from the power schedule.
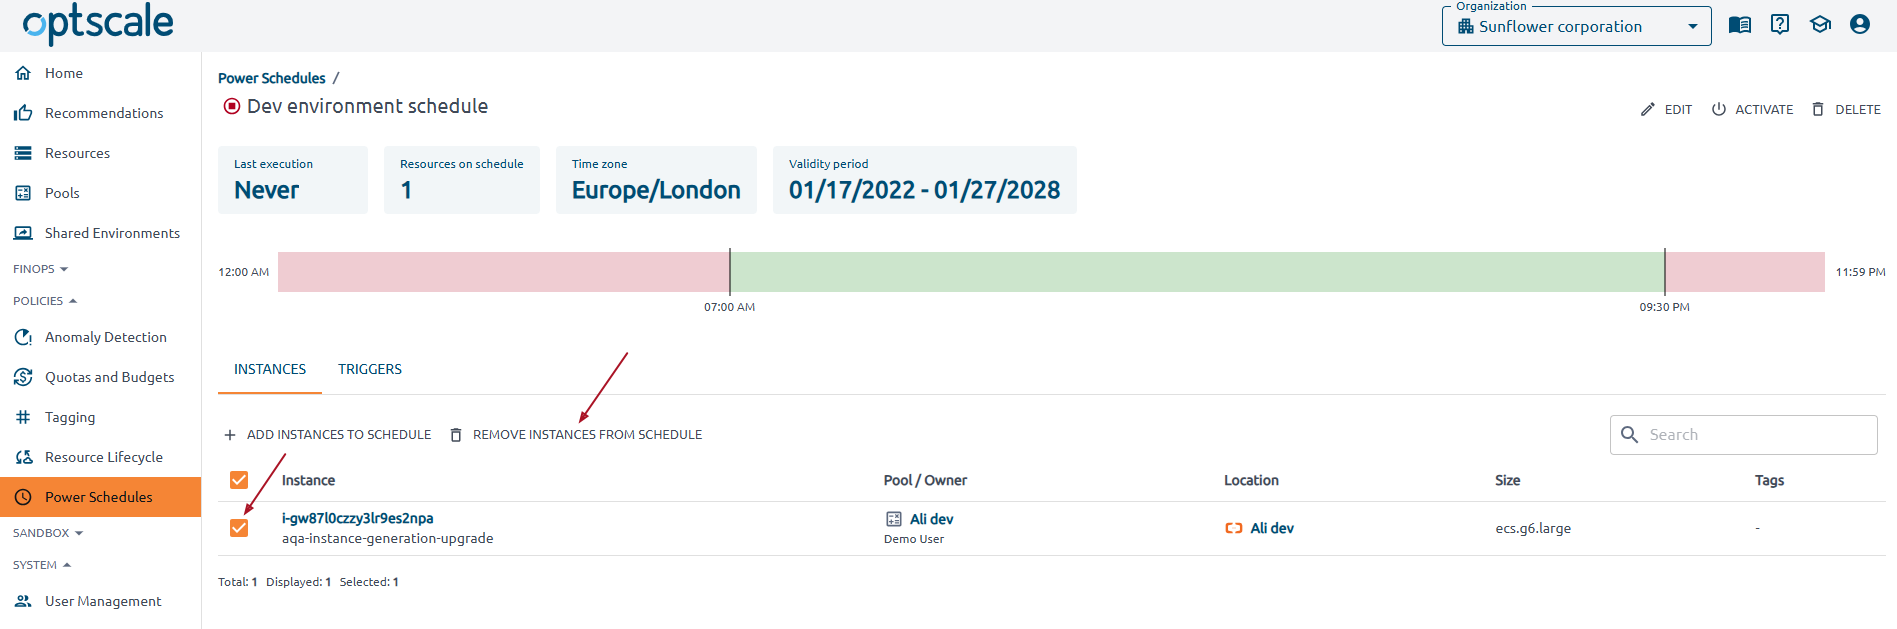
Go to the Policies section → Power Schedules page → click on the schedule name in the table → go to the Instances tab → check the box next to the instance you want to remove → click REMOVE INSTANCES FROM SCHEDULE.
Activate/deactivate#
Note
Only organizational managers can activate/deactivate a power schedule.
There are two ways how to activate/deactivate the schedule:
1. Go to the Policies section → Power Schedules page → find the schedule you want to activate/deactivate in the table → click  to activate or
  to deactivate in the Actions column.
2. Go to the Policies section → Power Schedules page → click on the schedule name in the table → click  or
or  at the top right of the page.

Edit#
Note
Only organizational managers can edit a power schedule.
Go to the Policies section → Power Schedules page → click on the schedule name in the table → click the EDIT button at the top right of the page.
Update the fields, add or remove triggers.
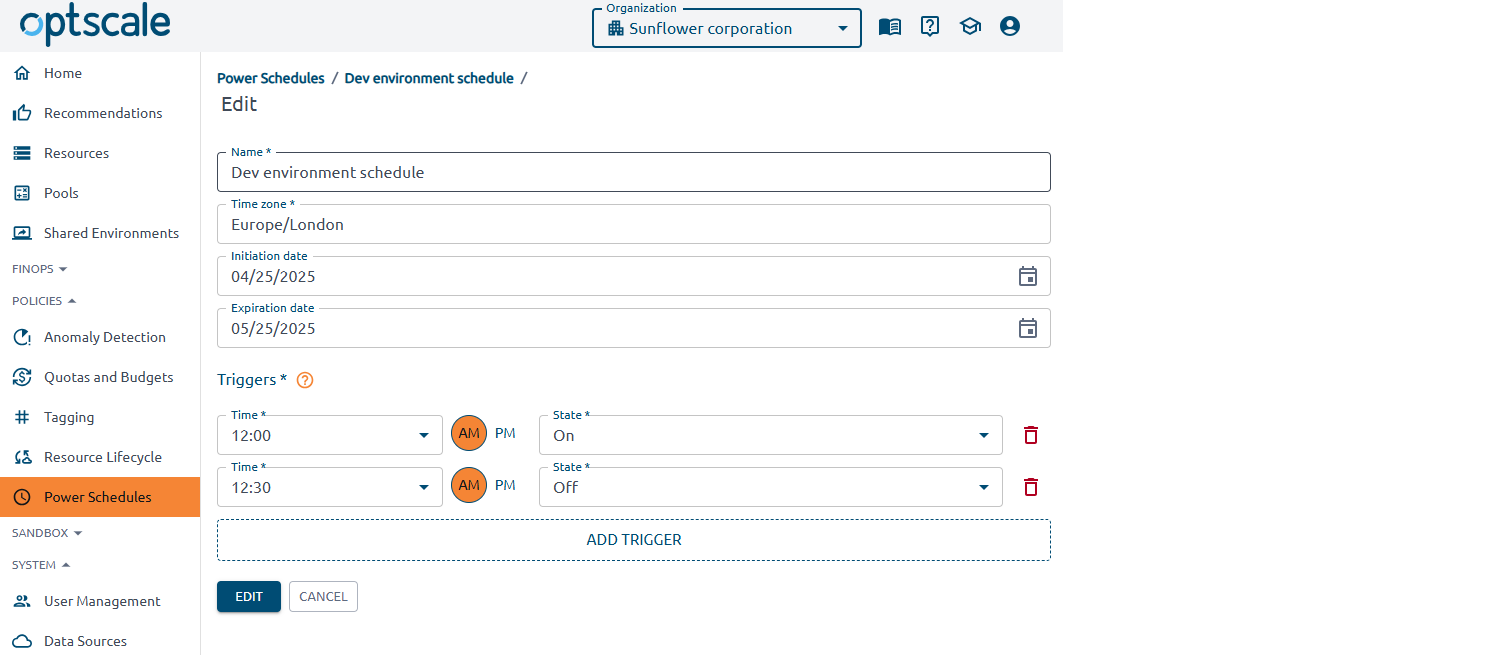
Click EDIT to accept the changes.
Delete#
Note
Only organizational managers can delete a power schedule.
There are two ways how to delete the schedule:
1. Go to the Policies section → Power Schedules page → find the schedule you want to delete in the table → click ![]() at the top right of the page.
at the top right of the page.

2. Go to the Policies section → Power Schedules page → click on the schedule name in the table → click the DELETE button at the top right of the page.
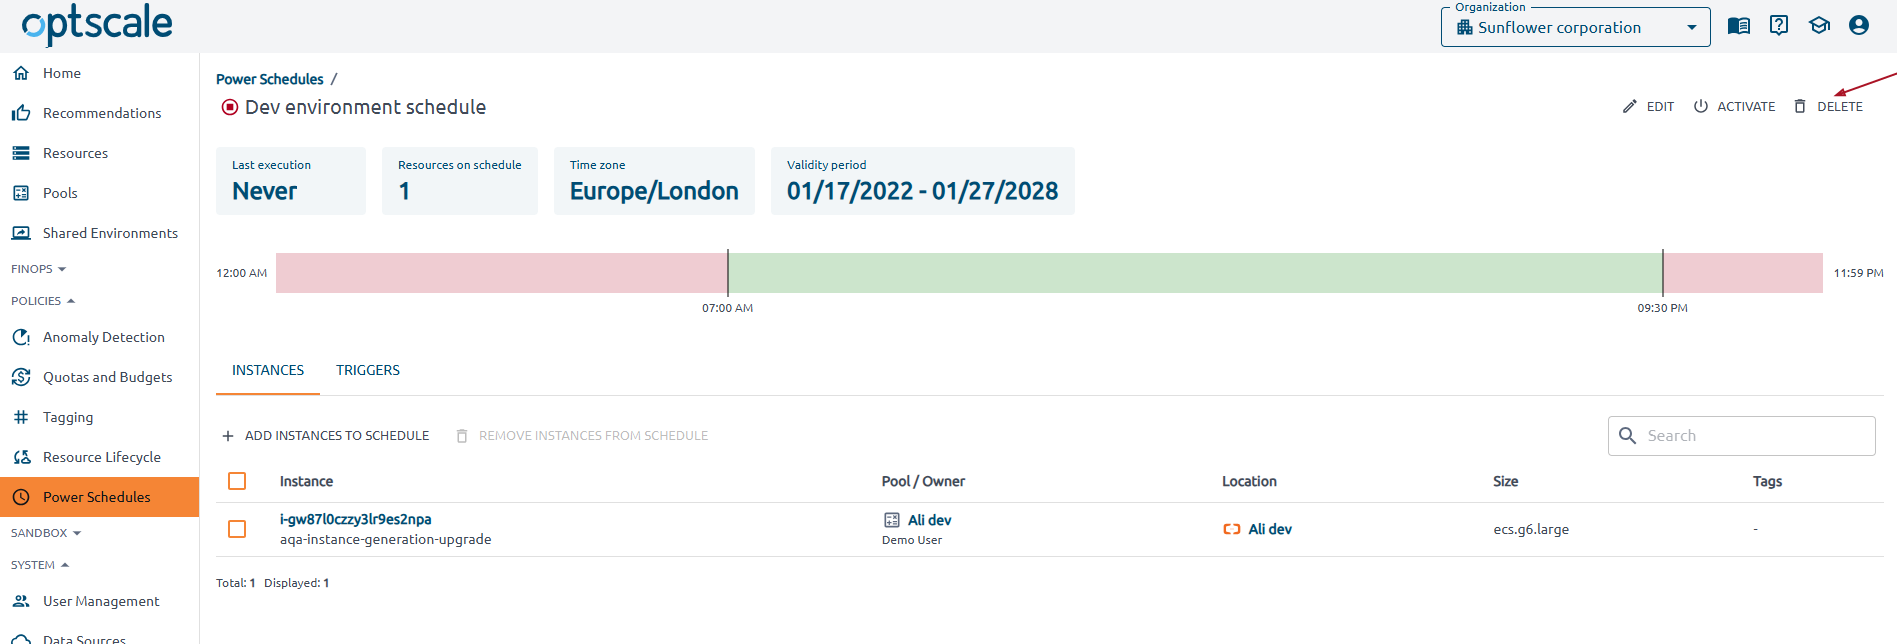
Confirm the action.