Whitepaper 'FinOps and cost management for Kubernetes'
Please consider giving OptScale a Star on GitHub, it is 100% open source. It would increase its visibility to others and expedite product development. Thank you!
Ebook 'From FinOps to proven cloud cost management & optimization strategies'
OptScale FinOps
OptScale — FinOps
FinOps overview
Cost optimization:
AWS
MS Azure
Google Cloud
Alibaba Cloud
Kubernetes
MLOps
OptScale — MLOps
ML/AI Profiling
ML/AI Optimization
Big Data Profiling
OPTSCALE PRICING
cloud migration
Acura — Cloud migration
Overview
Database replatforming
Migration to:
AWS
MS Azure
Google Cloud
Alibaba Cloud
VMWare
OpenStack
KVM
Public Cloud
Migration from:
On-premise
disaster recovery
Acura — DR & cloud backup
Overview
Migration to:
AWS
MS Azure
Google Cloud
Alibaba Cloud
VMWare
OpenStack
KVM
Technical whitepapers

Hystax Acura installation guide (Flexible Engine)

Hystax Acura installation guide for Flexible Engine

Overview

Hystax is a cloud migration and disaster recovery company focusing on consistent replication of IT workloads and providing real-time migration and Best-In-Class Disaster Recovery.

To deploy the Hystax Acura solution, a customer needs to request Hystax ([email protected]) to provide an AMI and a CloudFormation template of the solution and follow the steps described in this document.

Installation requirements

  • Golden image with Hystax Acura (provided by request)
  • Flexible Engine virtual machine with 8 vCPUs, 16 GB RAM, and 100 GB disk created from the Hystax Acura Golden image
  • Resources to launch a VM with 2 vCPUs, 4 GB RAM, and 40 GB disk for the Hystax Cloud Agent. Created in each target/failover project
  • SMTP server with TLS/SSL encryption
  • Security Groups allowing the following traffic:

• Hystax Acura host: (downloaded from Acura Control Panel and deployed from an OVA template on the target ESXi host or vCenter Cluster)

    • • Ingress – tcp/443
      • Ingress – tcp/4443
      • Ingress – udp/12201

• Hystax Cloud Agent (spawned automatically in the Target Project):

    • • Ingress – tcp/80
      • Ingress – tcp/3260

Installation steps

1. Deploy a virtual machine from the golden image with a key pair attached and launch it in the Flexible Engine cloud.

Note: Adding a key pair during Acura’s deployment is highly recommended to provide you with SSH access to the machine. Although the Hystax Engineering team will be able to perform maintenance checks and troubleshooting (as long as the network is reachable and your security groups allow the corresponding traffic), it is better to have your own means of accessing the Acura instance. Please refer to Flexible Engine’s official documentation on using an SSH public-private key pair.

2. Upload the provided Cloud Agent image to your target project and rename it to Hystax_CATI

3. Open a web browser and go to https://<ip_address_of_the_machine>/. You will be redirected to the Hystax Setup Wizard. After you perform all the steps, the installation will be complete and you will be able to start using Hystax Acura.

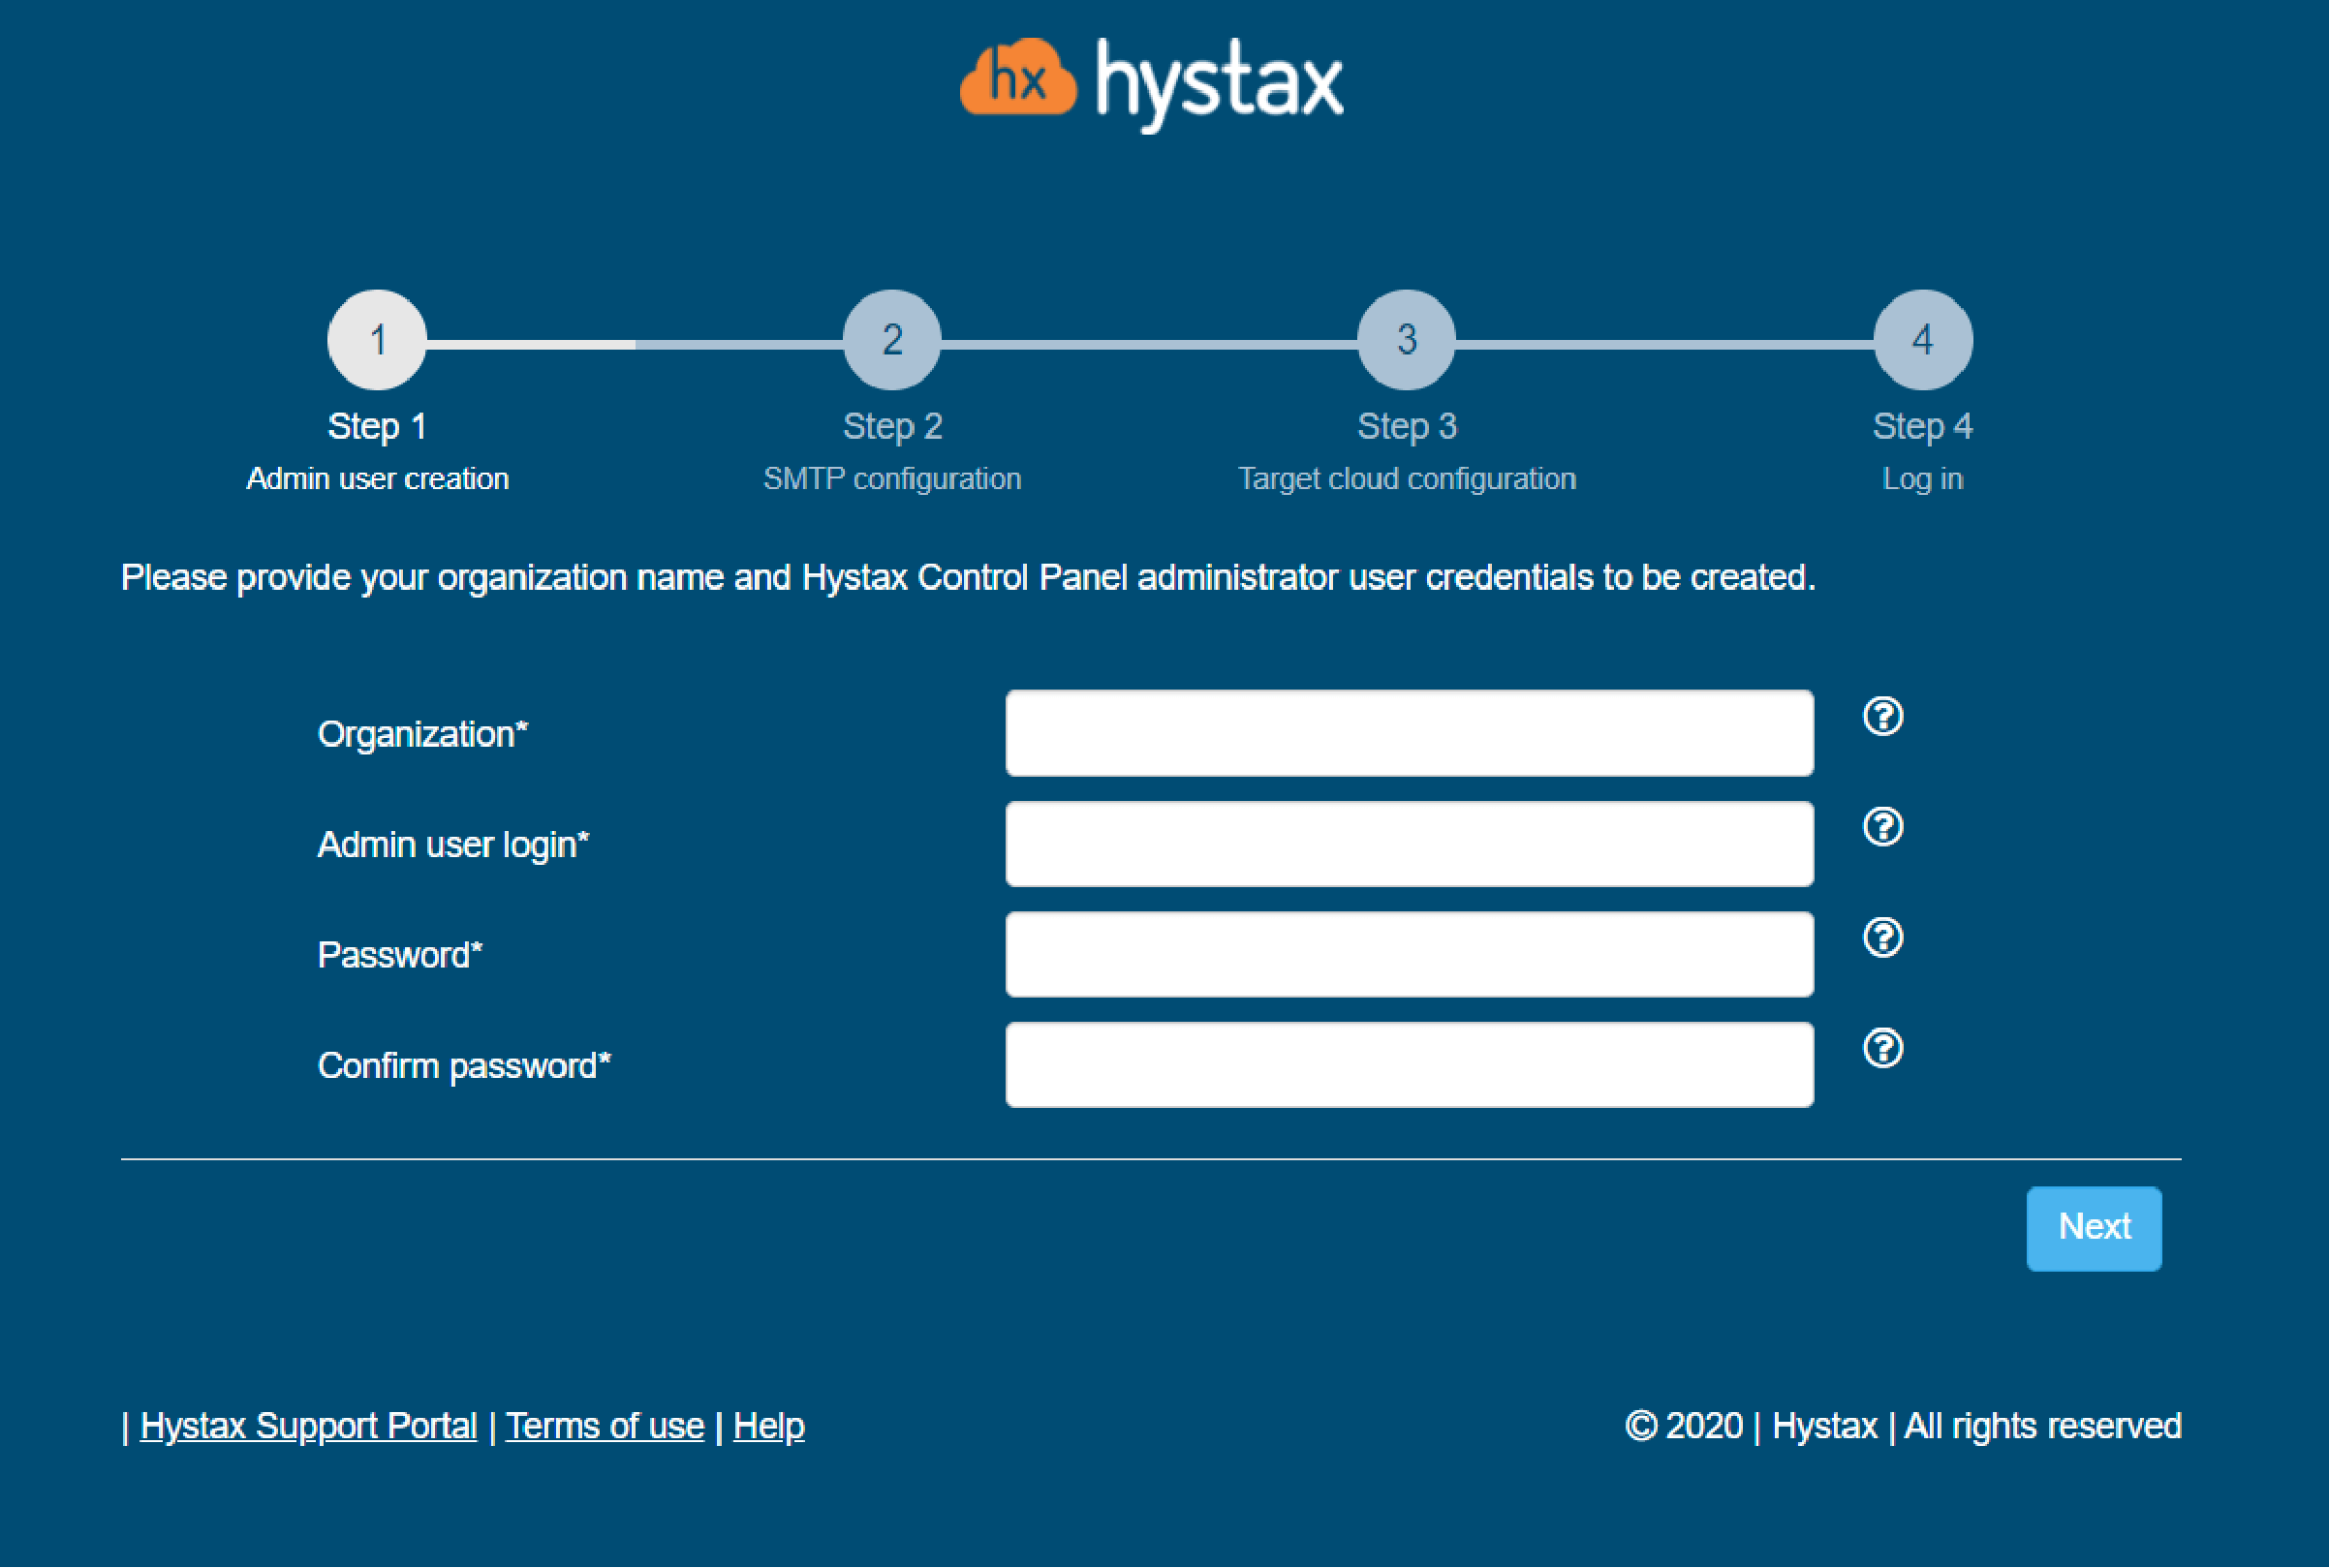
4. Step 1: Enter the organization name and new Hystax Admin User credentials into the Setup Wizard. This will be the user account for logging in to Hystax Acura Control Panel and managing the system. If there are any errors, the system will notify you.
Hystax Acura installation Flexible Engine admin user creation

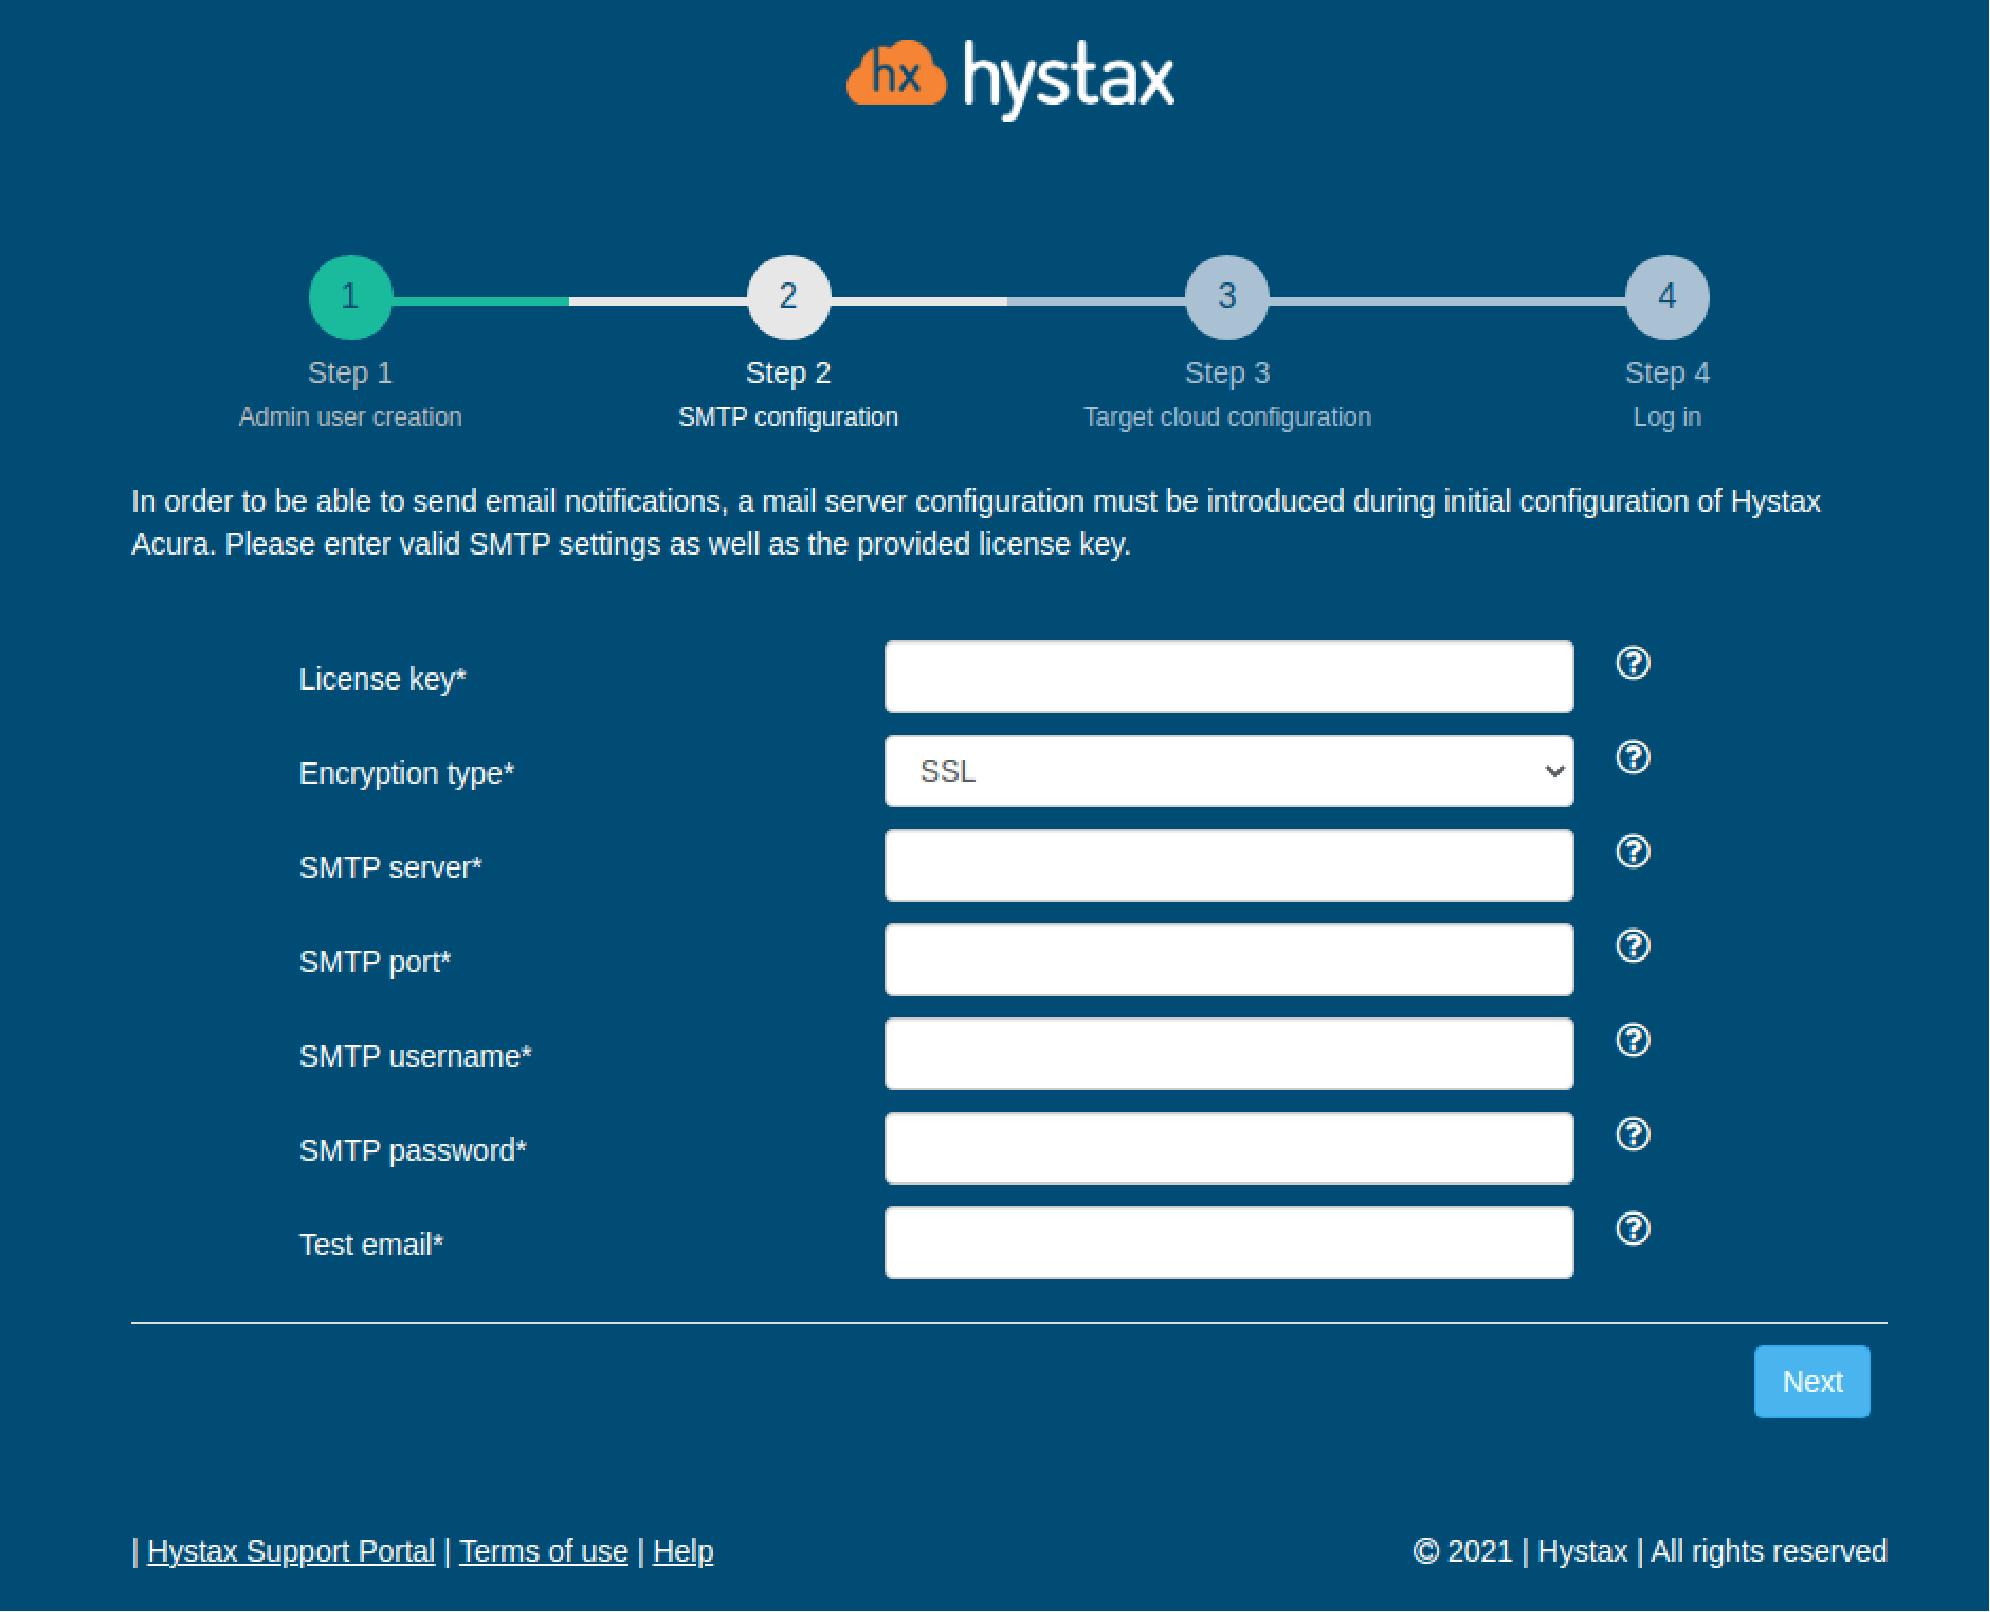
5. Step 2: Fill in your Hystax License key that was supposed to be shared with you in advance as well as the settings for accessing your mail server, which will be used to send notifications from Acura and generate periodic reports.

Note: SMTP server with TLS/SSL encryption is required to proceed with deployment.

If you prefer a public SMTP server associated with your email address (gmail, yahoo, etc.), please find its settings online. In the case of a private SMTP server, contact your network administrator for further details.

A sample notification will be sent to the specified “Test email” to verify the functionality when you click “Next”.

Hystax Acura installation Flexible Engine SMTP configuration

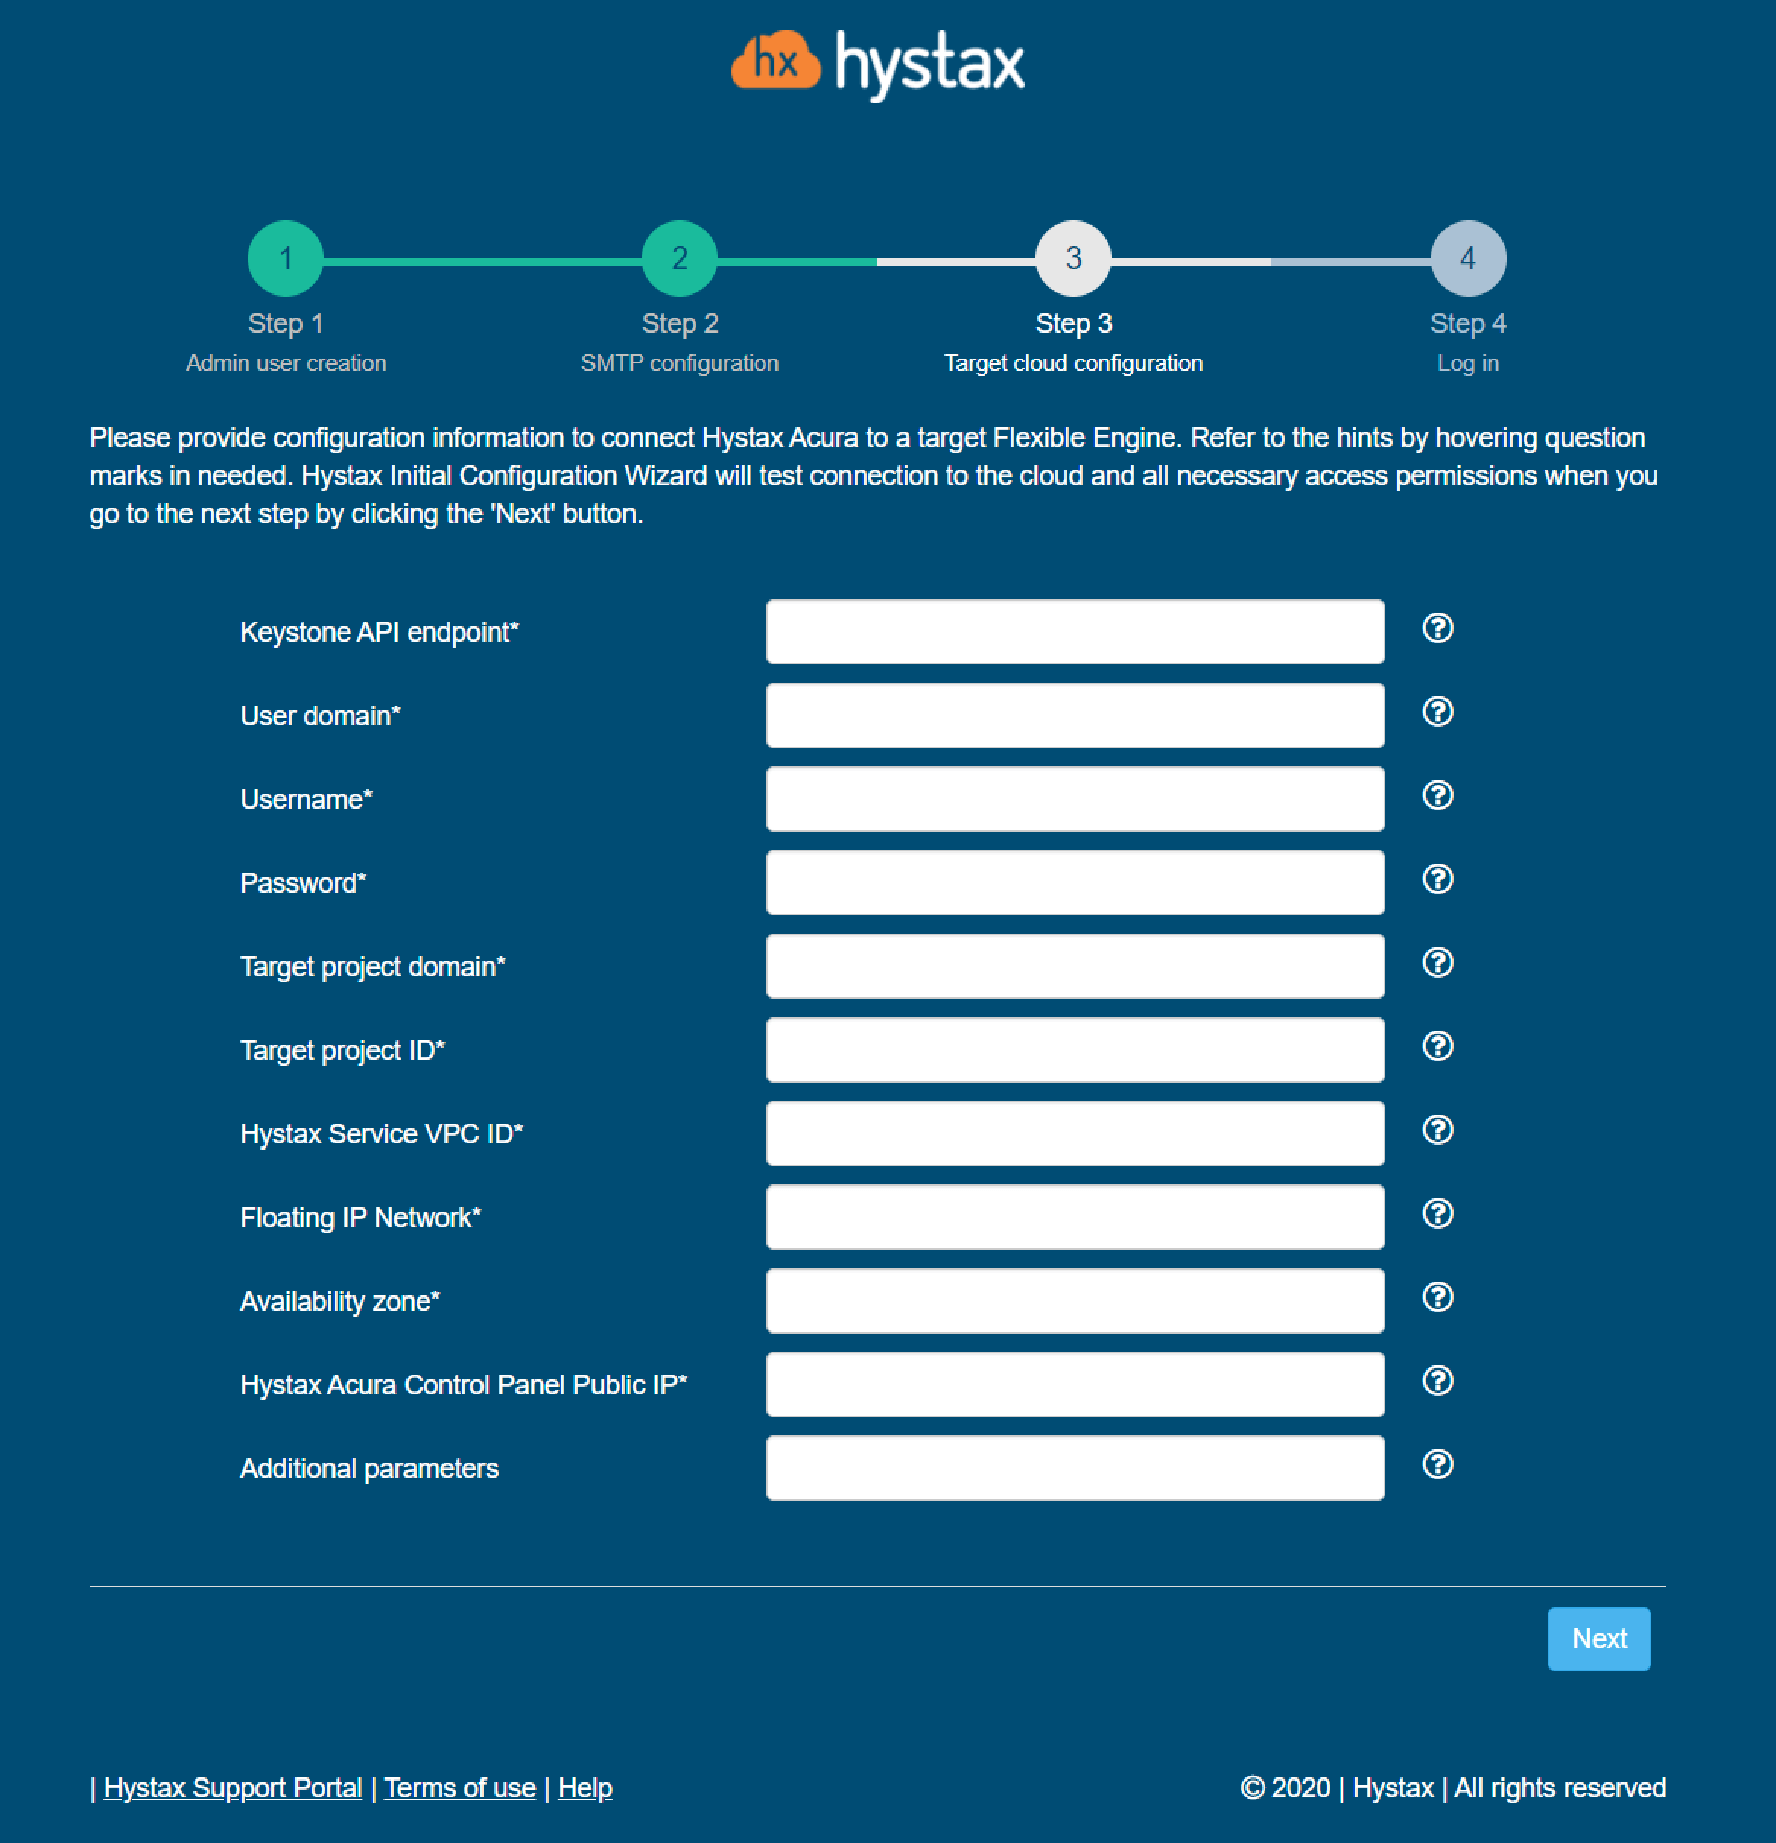
6. Step 3: Fill in all the fields by providing cloud configuration details. Use question mark icons to get hints on the fields. After you click “Next”, the Setup Wizard will validate the entered data and notify you in case of an error.

Hystax Acura installation Flexible Engine target cloud configuration

6. The specified Flexible Engine user should have the following rights for Hystax Acura to operate correctly:

  • Import image
  • Launch instance
  • Create volume
  • Attach the volume to the instance
  • Detach the volume from an instance
  • Create volume snapshot
  • Create volume from the snapshot
  • Remove snapshot
  • Remove volume
  • Manage networks

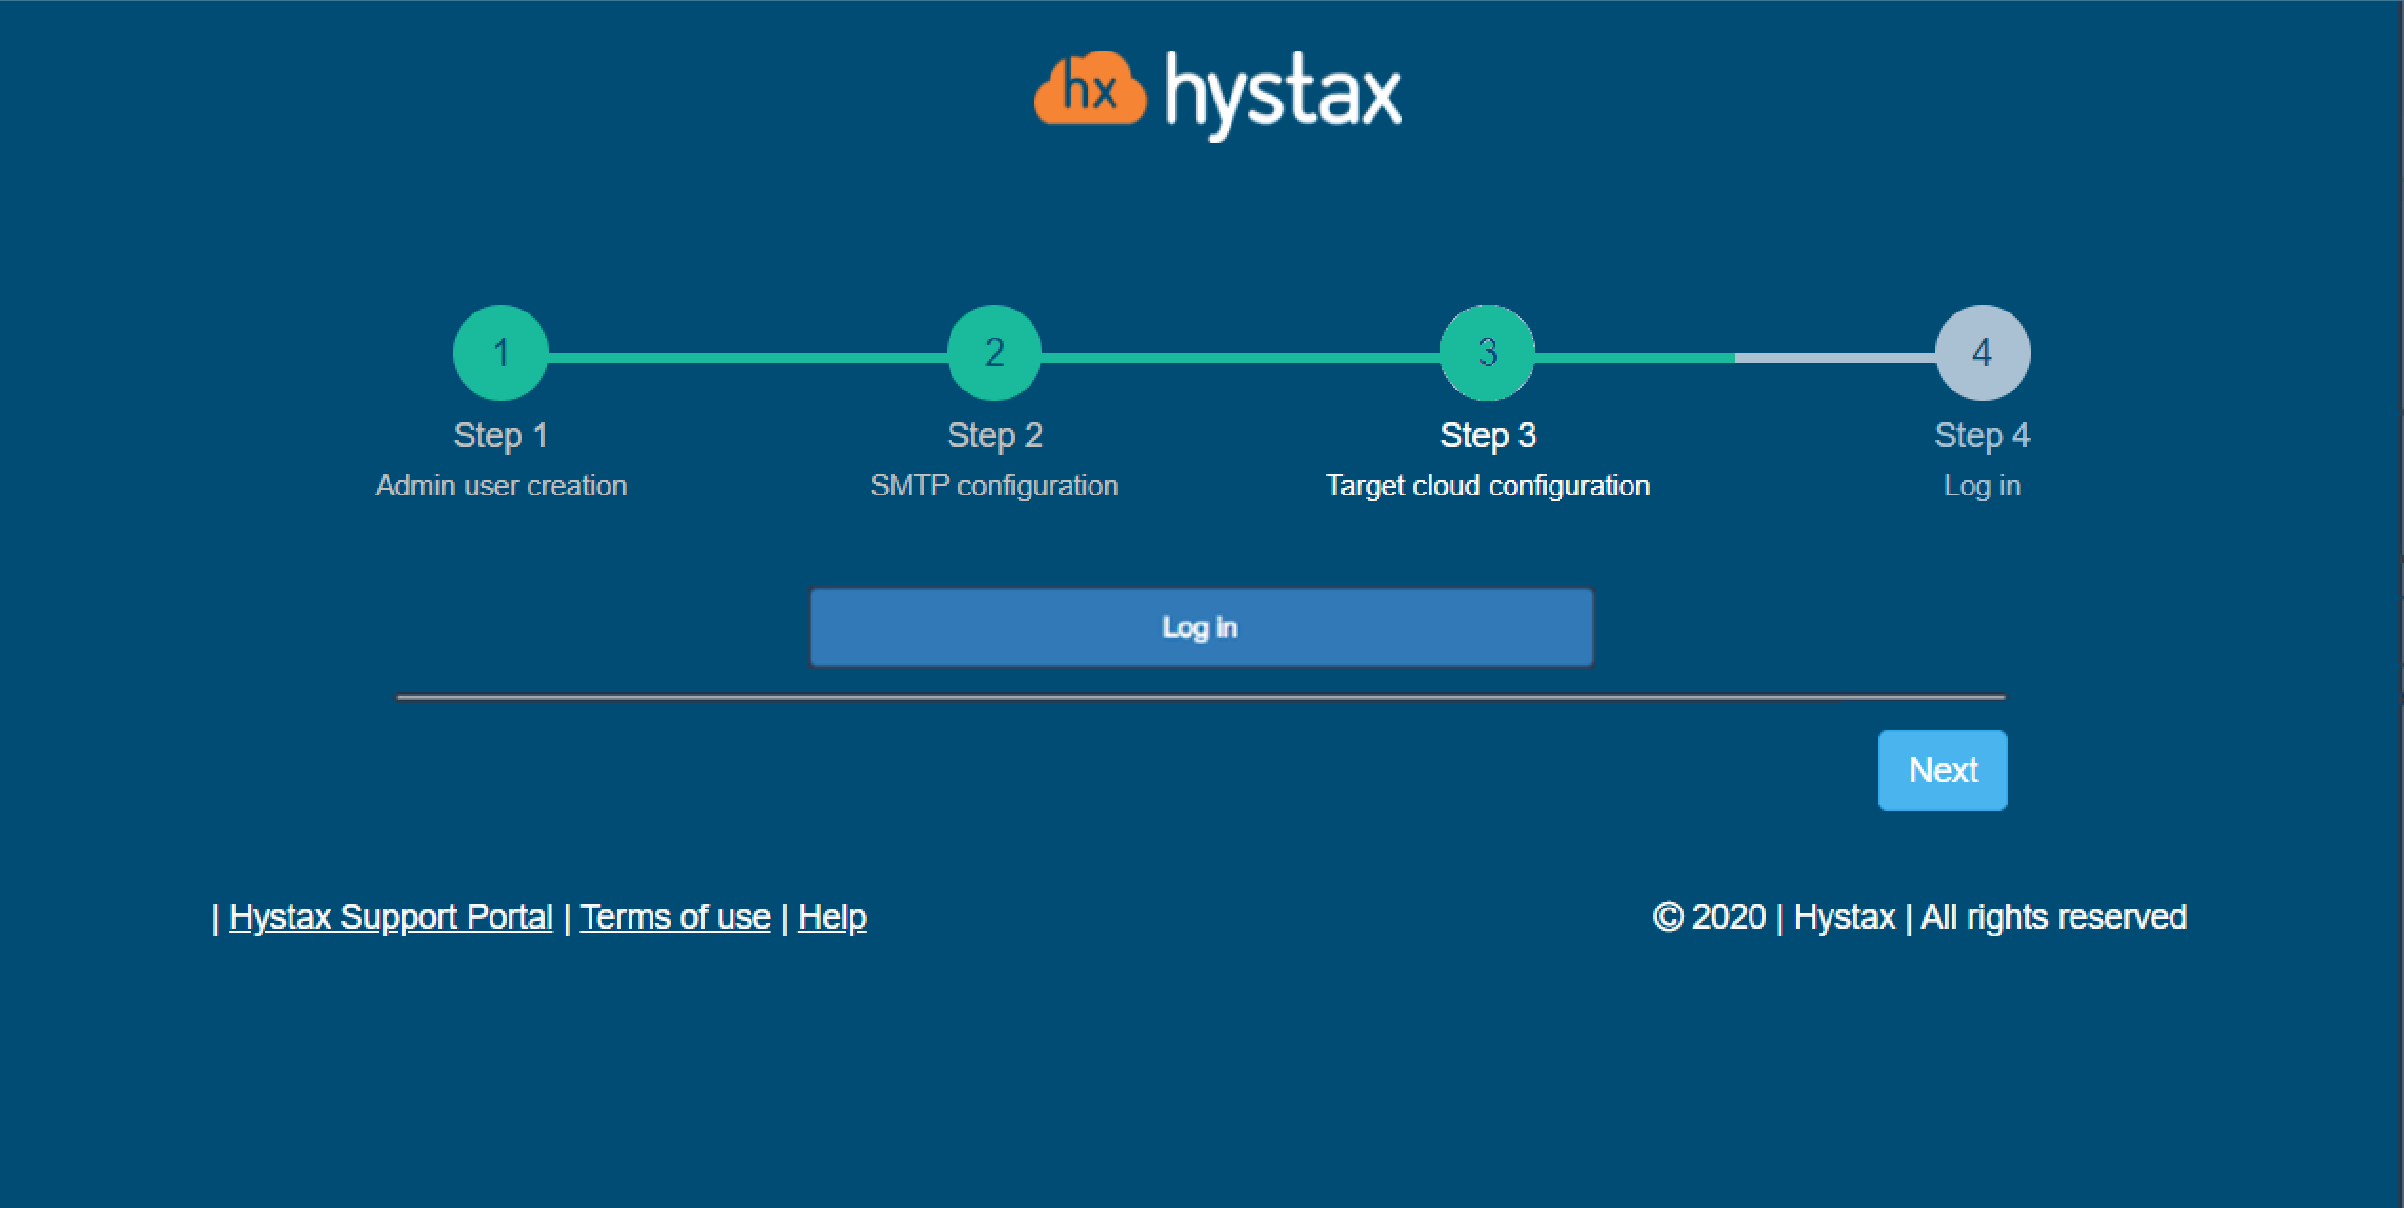
7. Step 4: Installation is complete, and you can now log in to the system using the credentials entered in the previous step.

Hystax Acura installation Flexible Engine login

Troubleshooting

Hystax Acura automatically checks cloud access and the necessary permissions for assuring successful operation. It provides detailed error messages that describe their potential causes. In case of an error, please check the correctness of the data entered and the availability of the necessary permissions.

Feel free to use the contact details below to reach Hystax support in case you have any questions or difficulties with the installation process. Hystax Support Portal is available at https://support.hystax.com/, which includes all articles from our Knowledge Base. You can also submit support requests in your personal account.

To run ML/AI or any workload with optimal performance and infrastructure cost with OptScale – a FinOps and MLOps open source platformcontact us today.

Contacts

Email: [email protected][email protected]
Phone: +16282511280
Address: 1250 Borregas Avenue Sunnyvale, CA 94089

Enter your email to be notified about new and relevant content.

You can unsubscribe from these communications at any time. Privacy Policy