Please consider giving OptScale a Star on GitHub, it is 100% open source. It would increase its visibility to others and expedite product development. Thank you!
Please consider giving OptScale a Star on GitHub, it is 100% open source. It would increase its visibility to others and expedite product development. Thank you!
Please consider giving OptScale a Star on GitHub, it is 100% open source. It would increase its visibility to others and expedite product development. Thank you!
Hystax is a cloud migration and Disaster Recovery company focusing on consistent replication of IT workloads and providing real-time migration and Best-In-Class Disaster Recovery.
To deploy the Hystax Acura solution, a customer needs to request Hystax ([email protected]) to provide an AMI and a CloudFormation template of the solution and follow the steps described in this document.
Installation steps
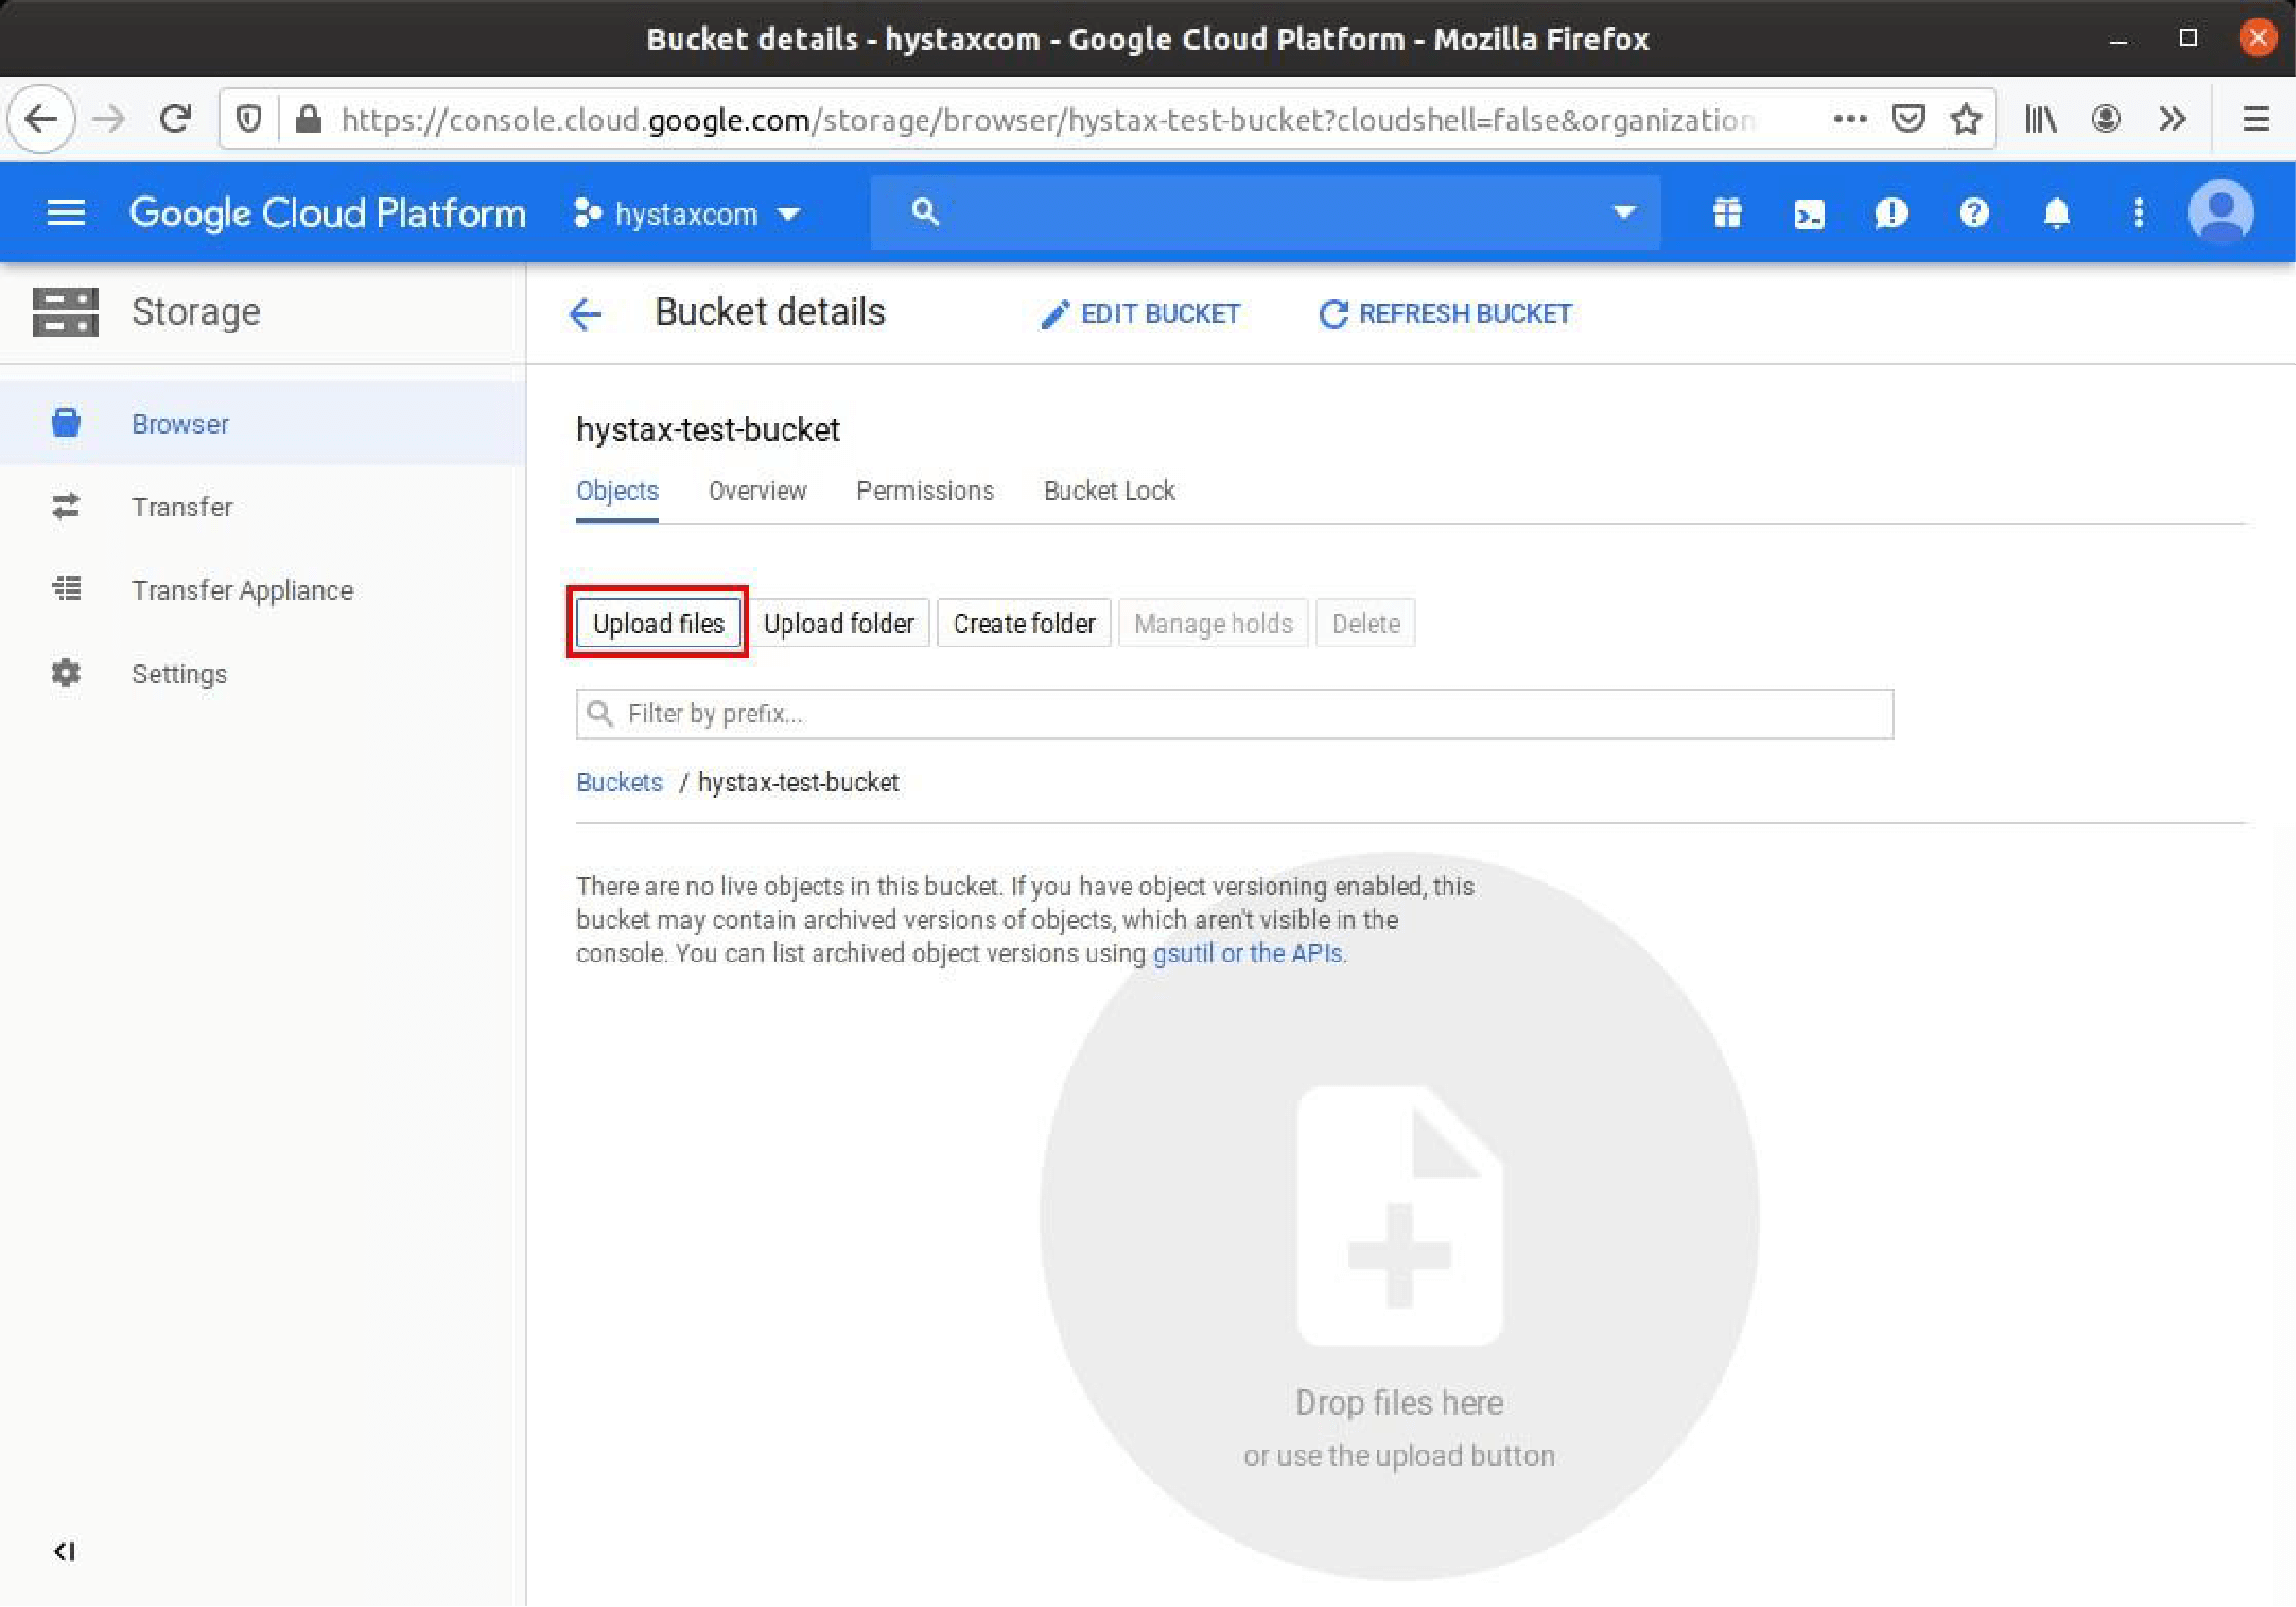
1. Upload Acura and Cloud Agent images to the cloud.
Download Acura and Cloud Agent archives provided by Hystax. Go to the “Storage → Browser” section in GCP UI and open one of your buckets. Create one if there are no buckets.
Upload the archives to the selected bucket. Wait till the upload is finished.
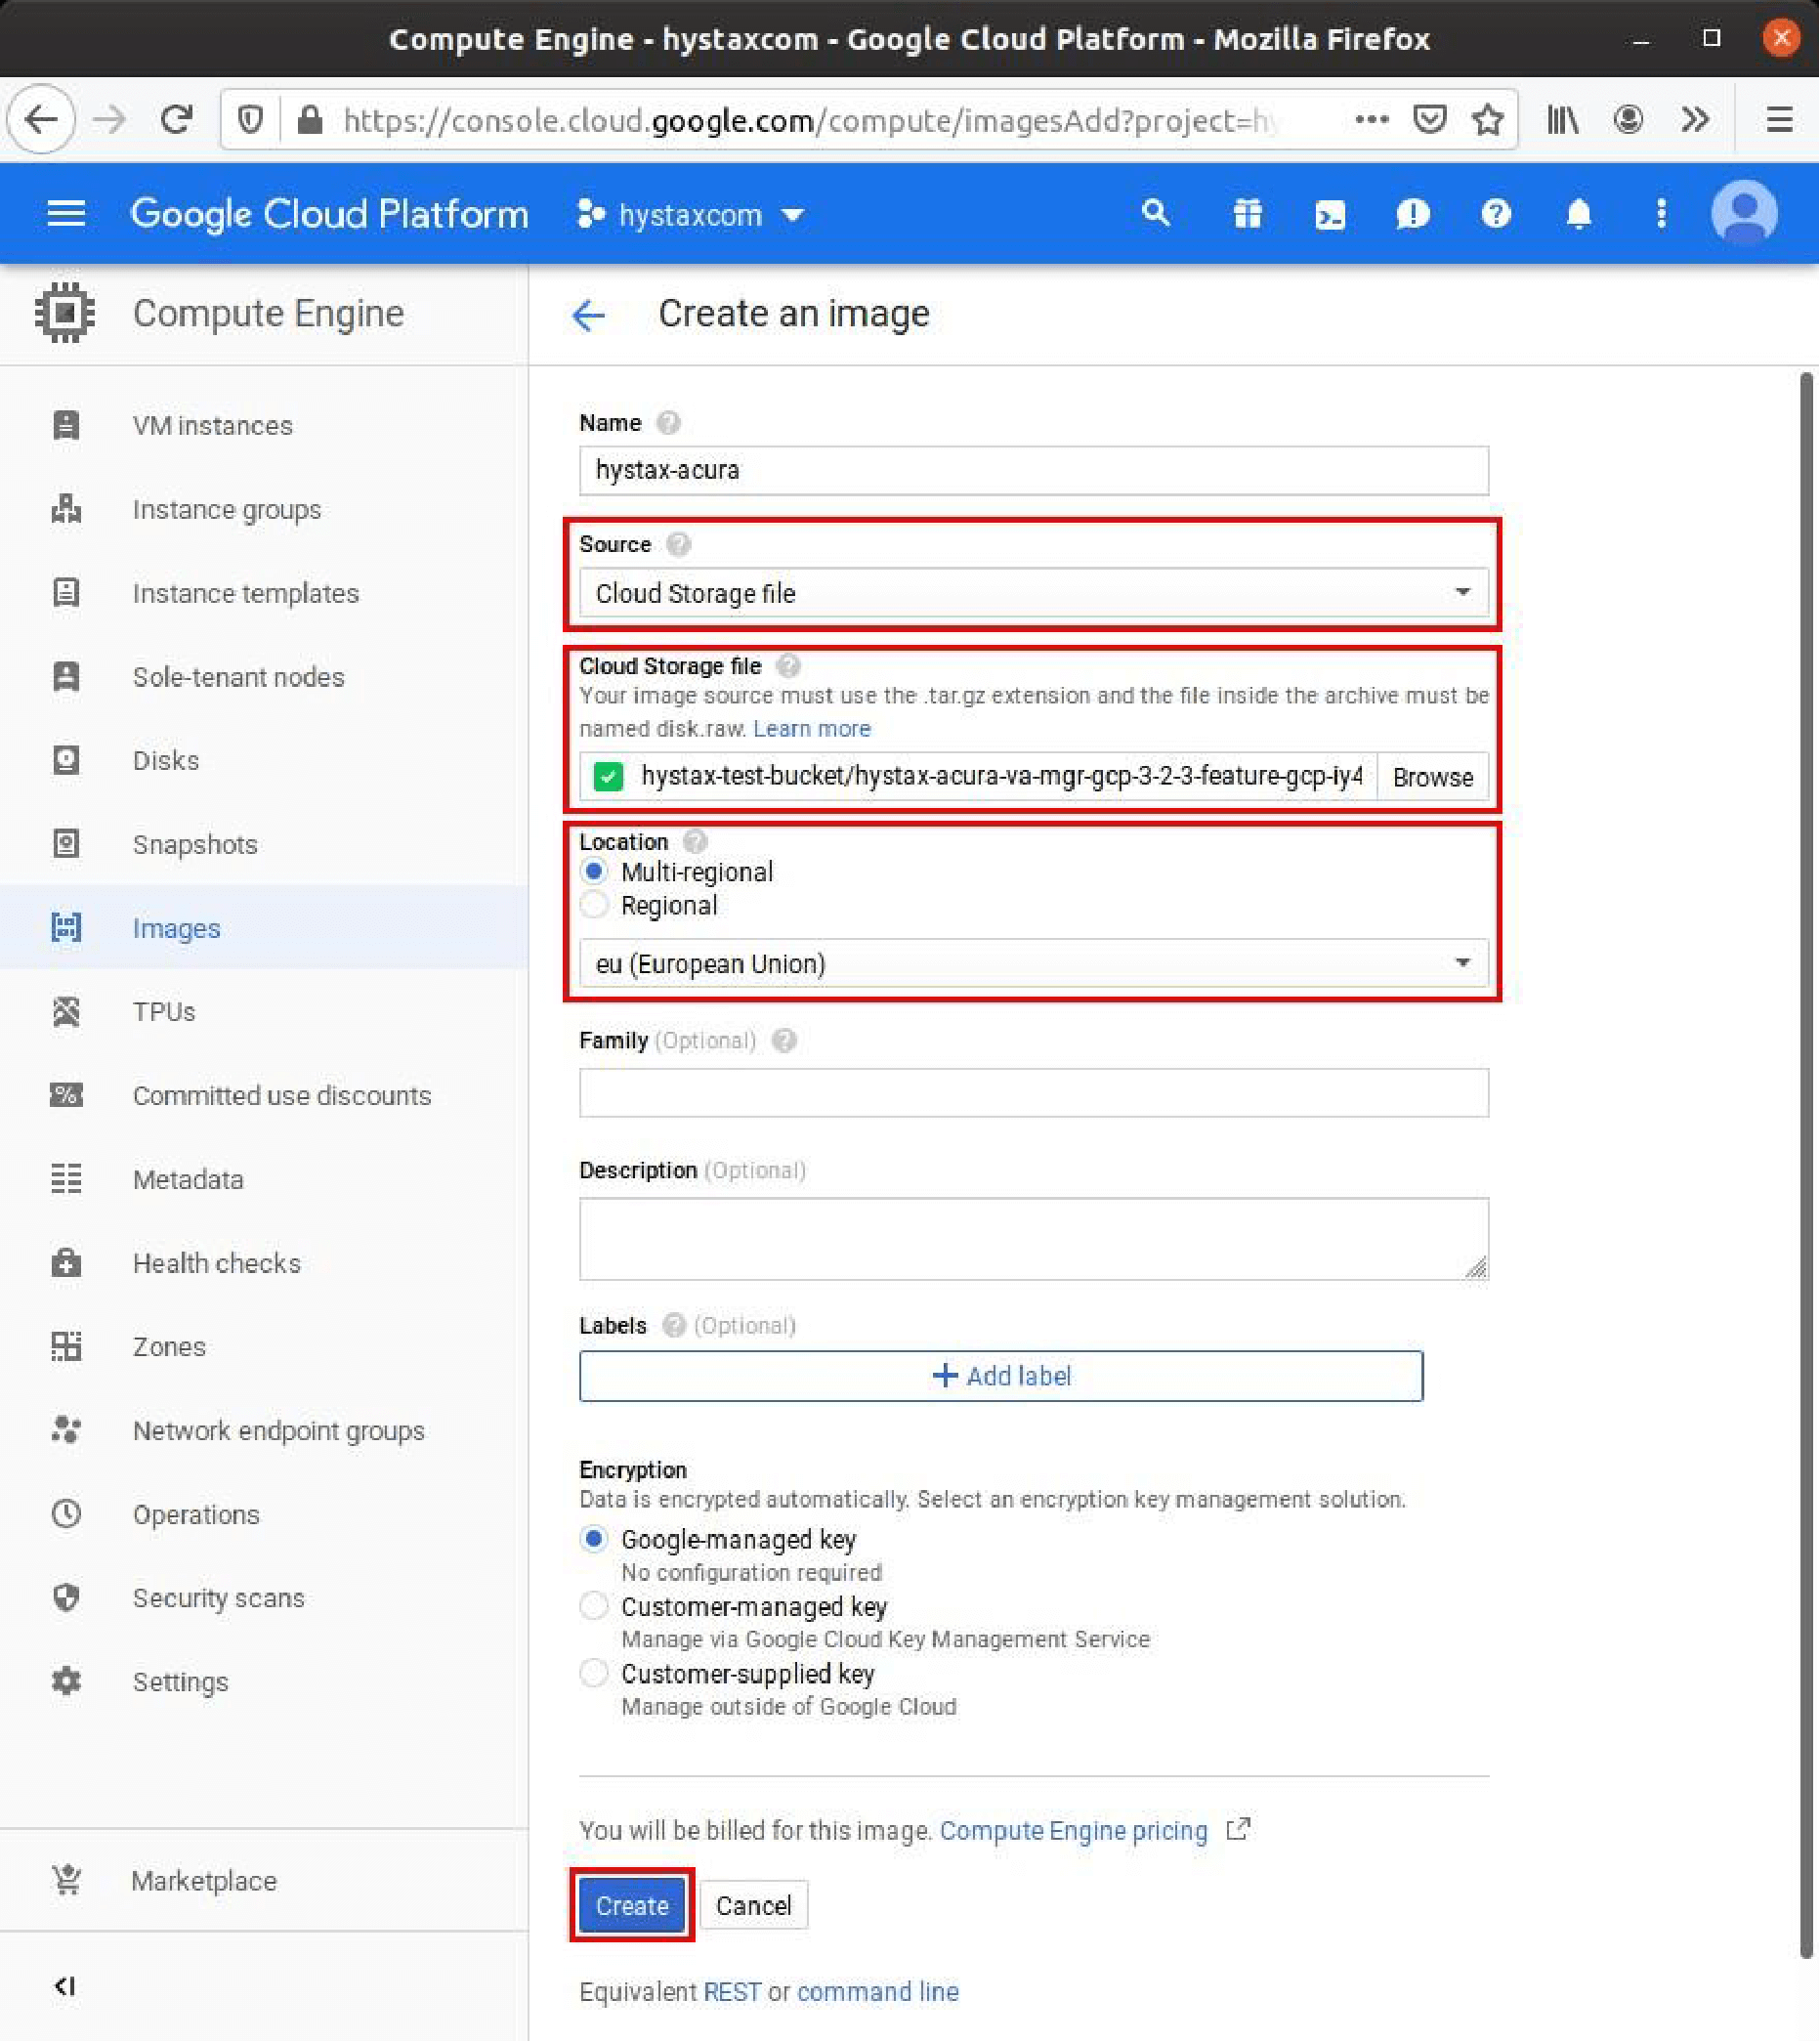
2. Create an image for Acura.
Go to “Compute Engine → Images” section in GCP UI and press “Create image”.
Set “Cloud storage file” as a source
Choose the Acura archive as the cloud storage image file
Choose the region you will use for Acura instance deployment
Image name is not important, you can put something like “hystax-acura” there
Once the image is created, it is safe to remove the Acura archive from the cloud storage bucket.
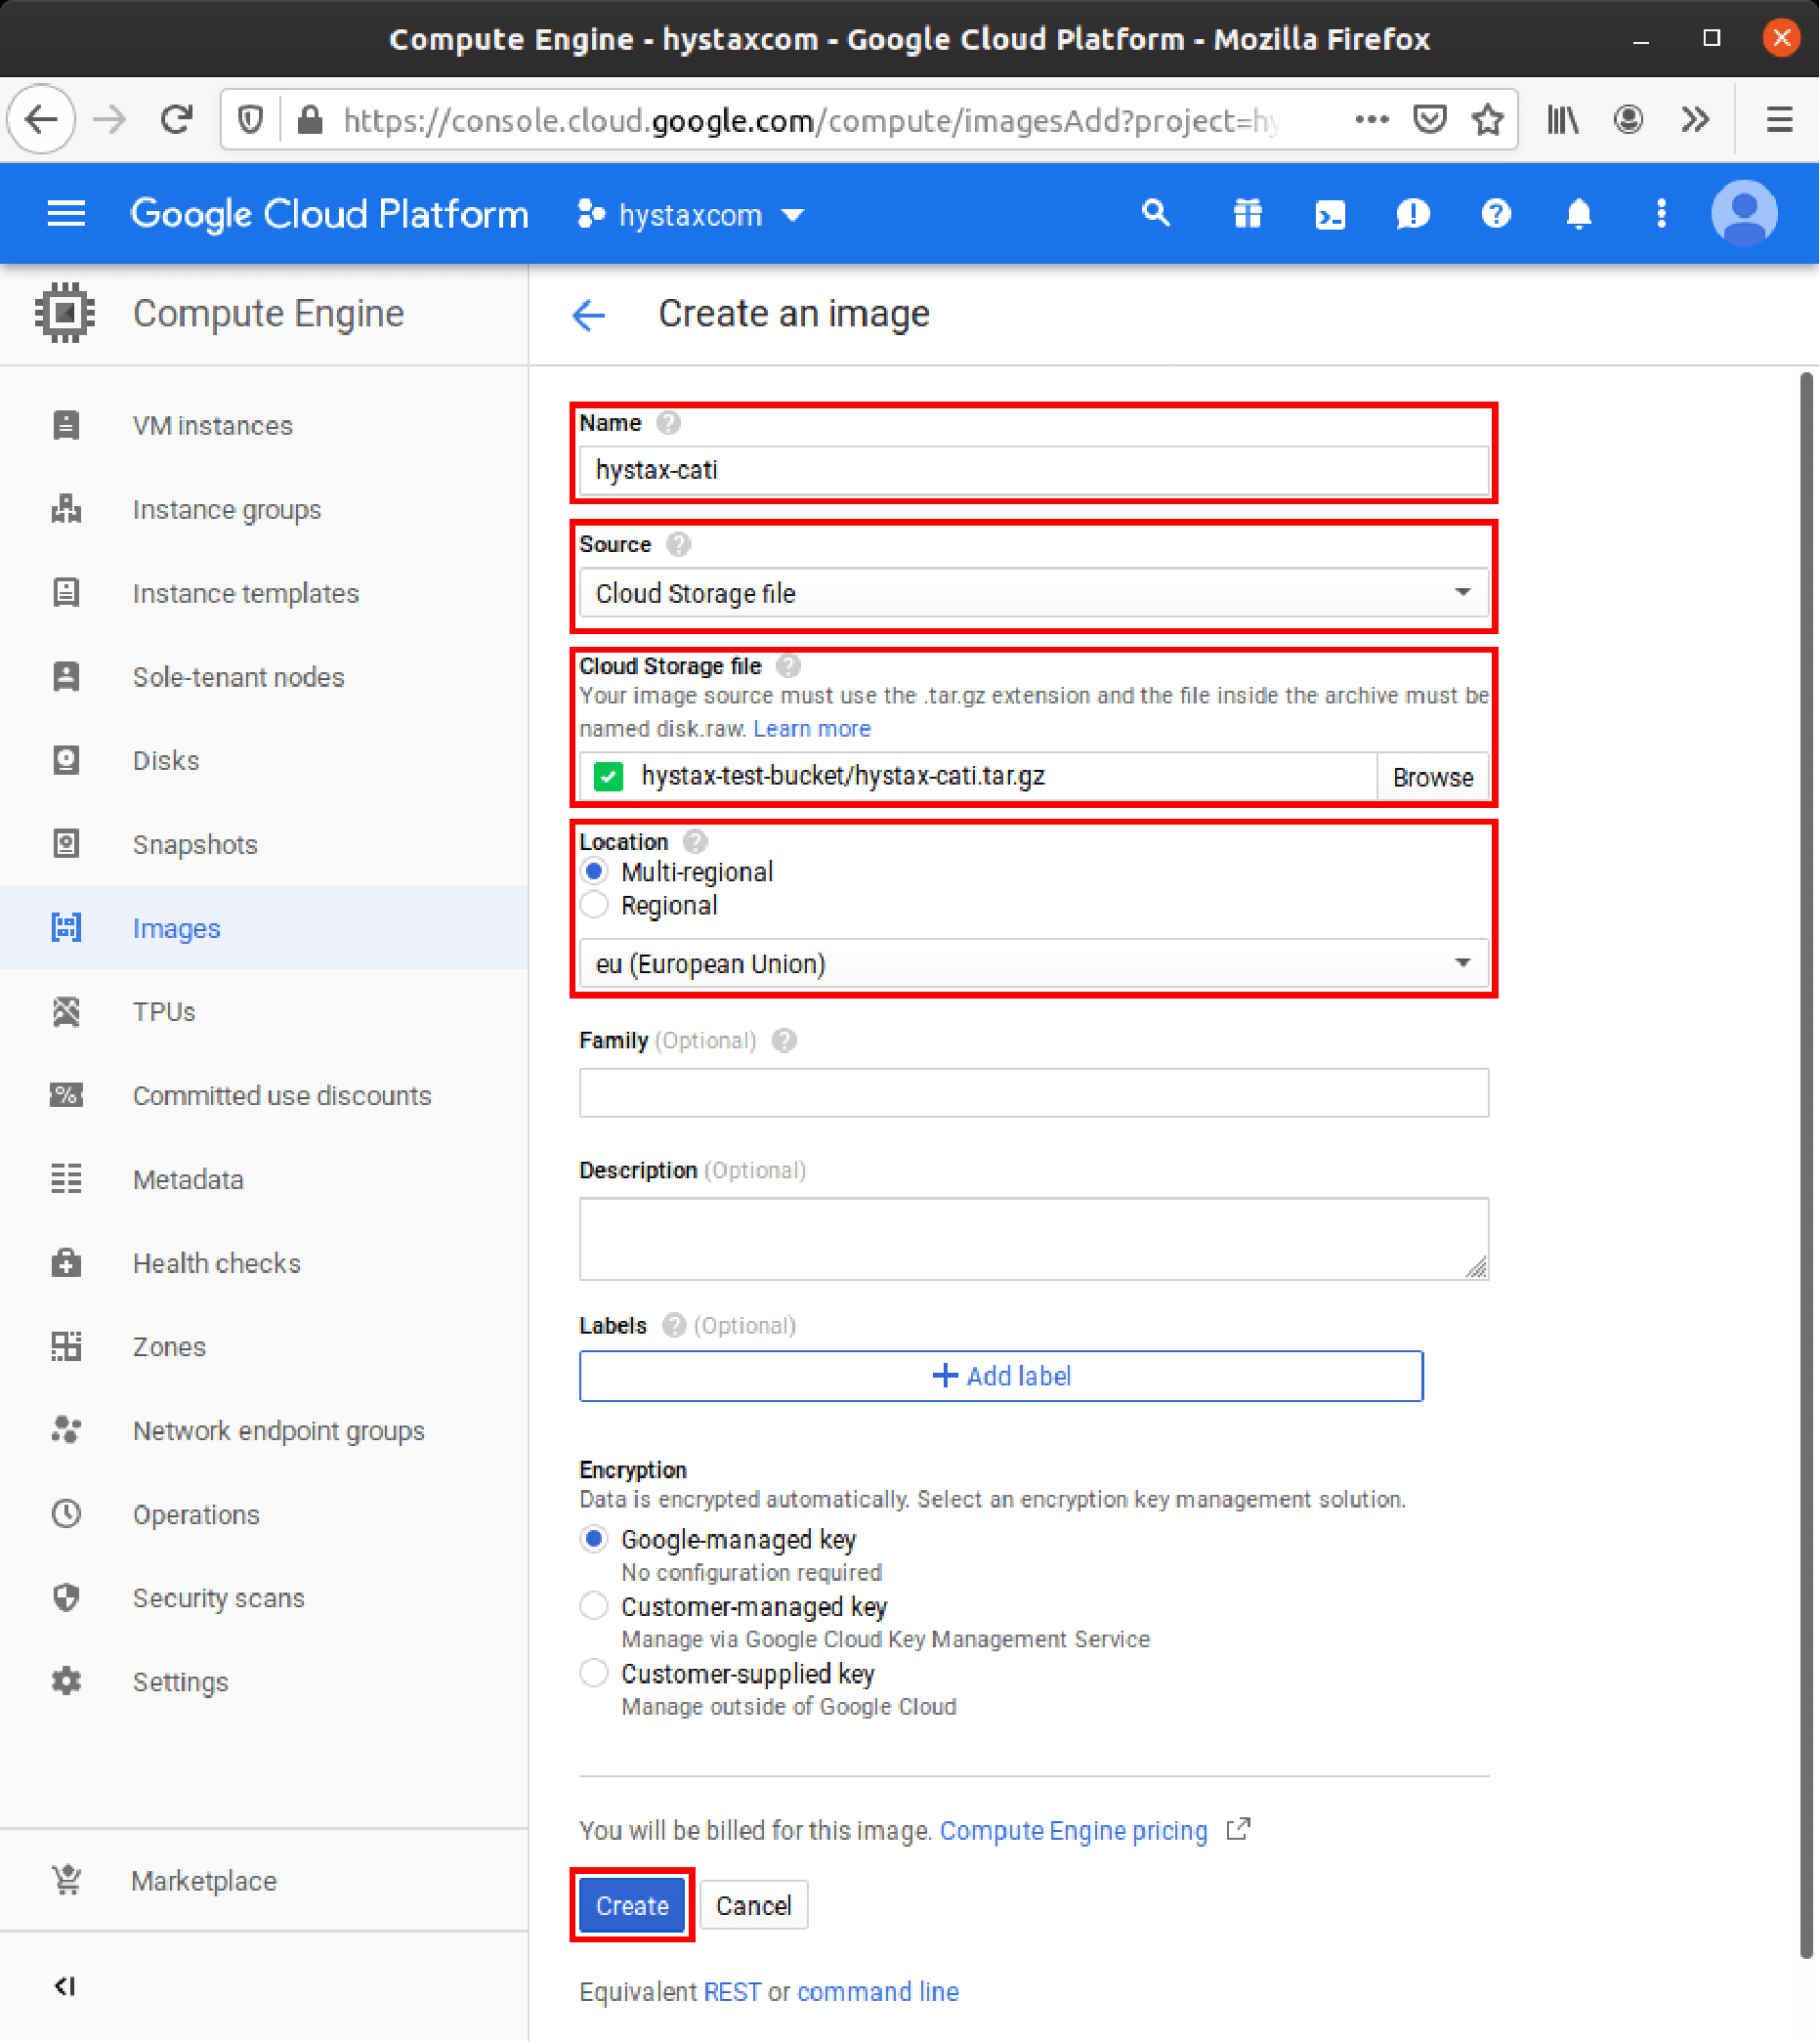
Go to “Compute Engine → Images” section in GCP UI and press “Create image”.
Set “Cloud storage file” as a source
Choose the Cloud Agent archive as the cloud storage image file
Choose the same region you used for the Acura image
The image name must be set to “hystax-cati”
Once the image is created, it is safe to remove the Cloud Agent archive from the cloud storage bucket.
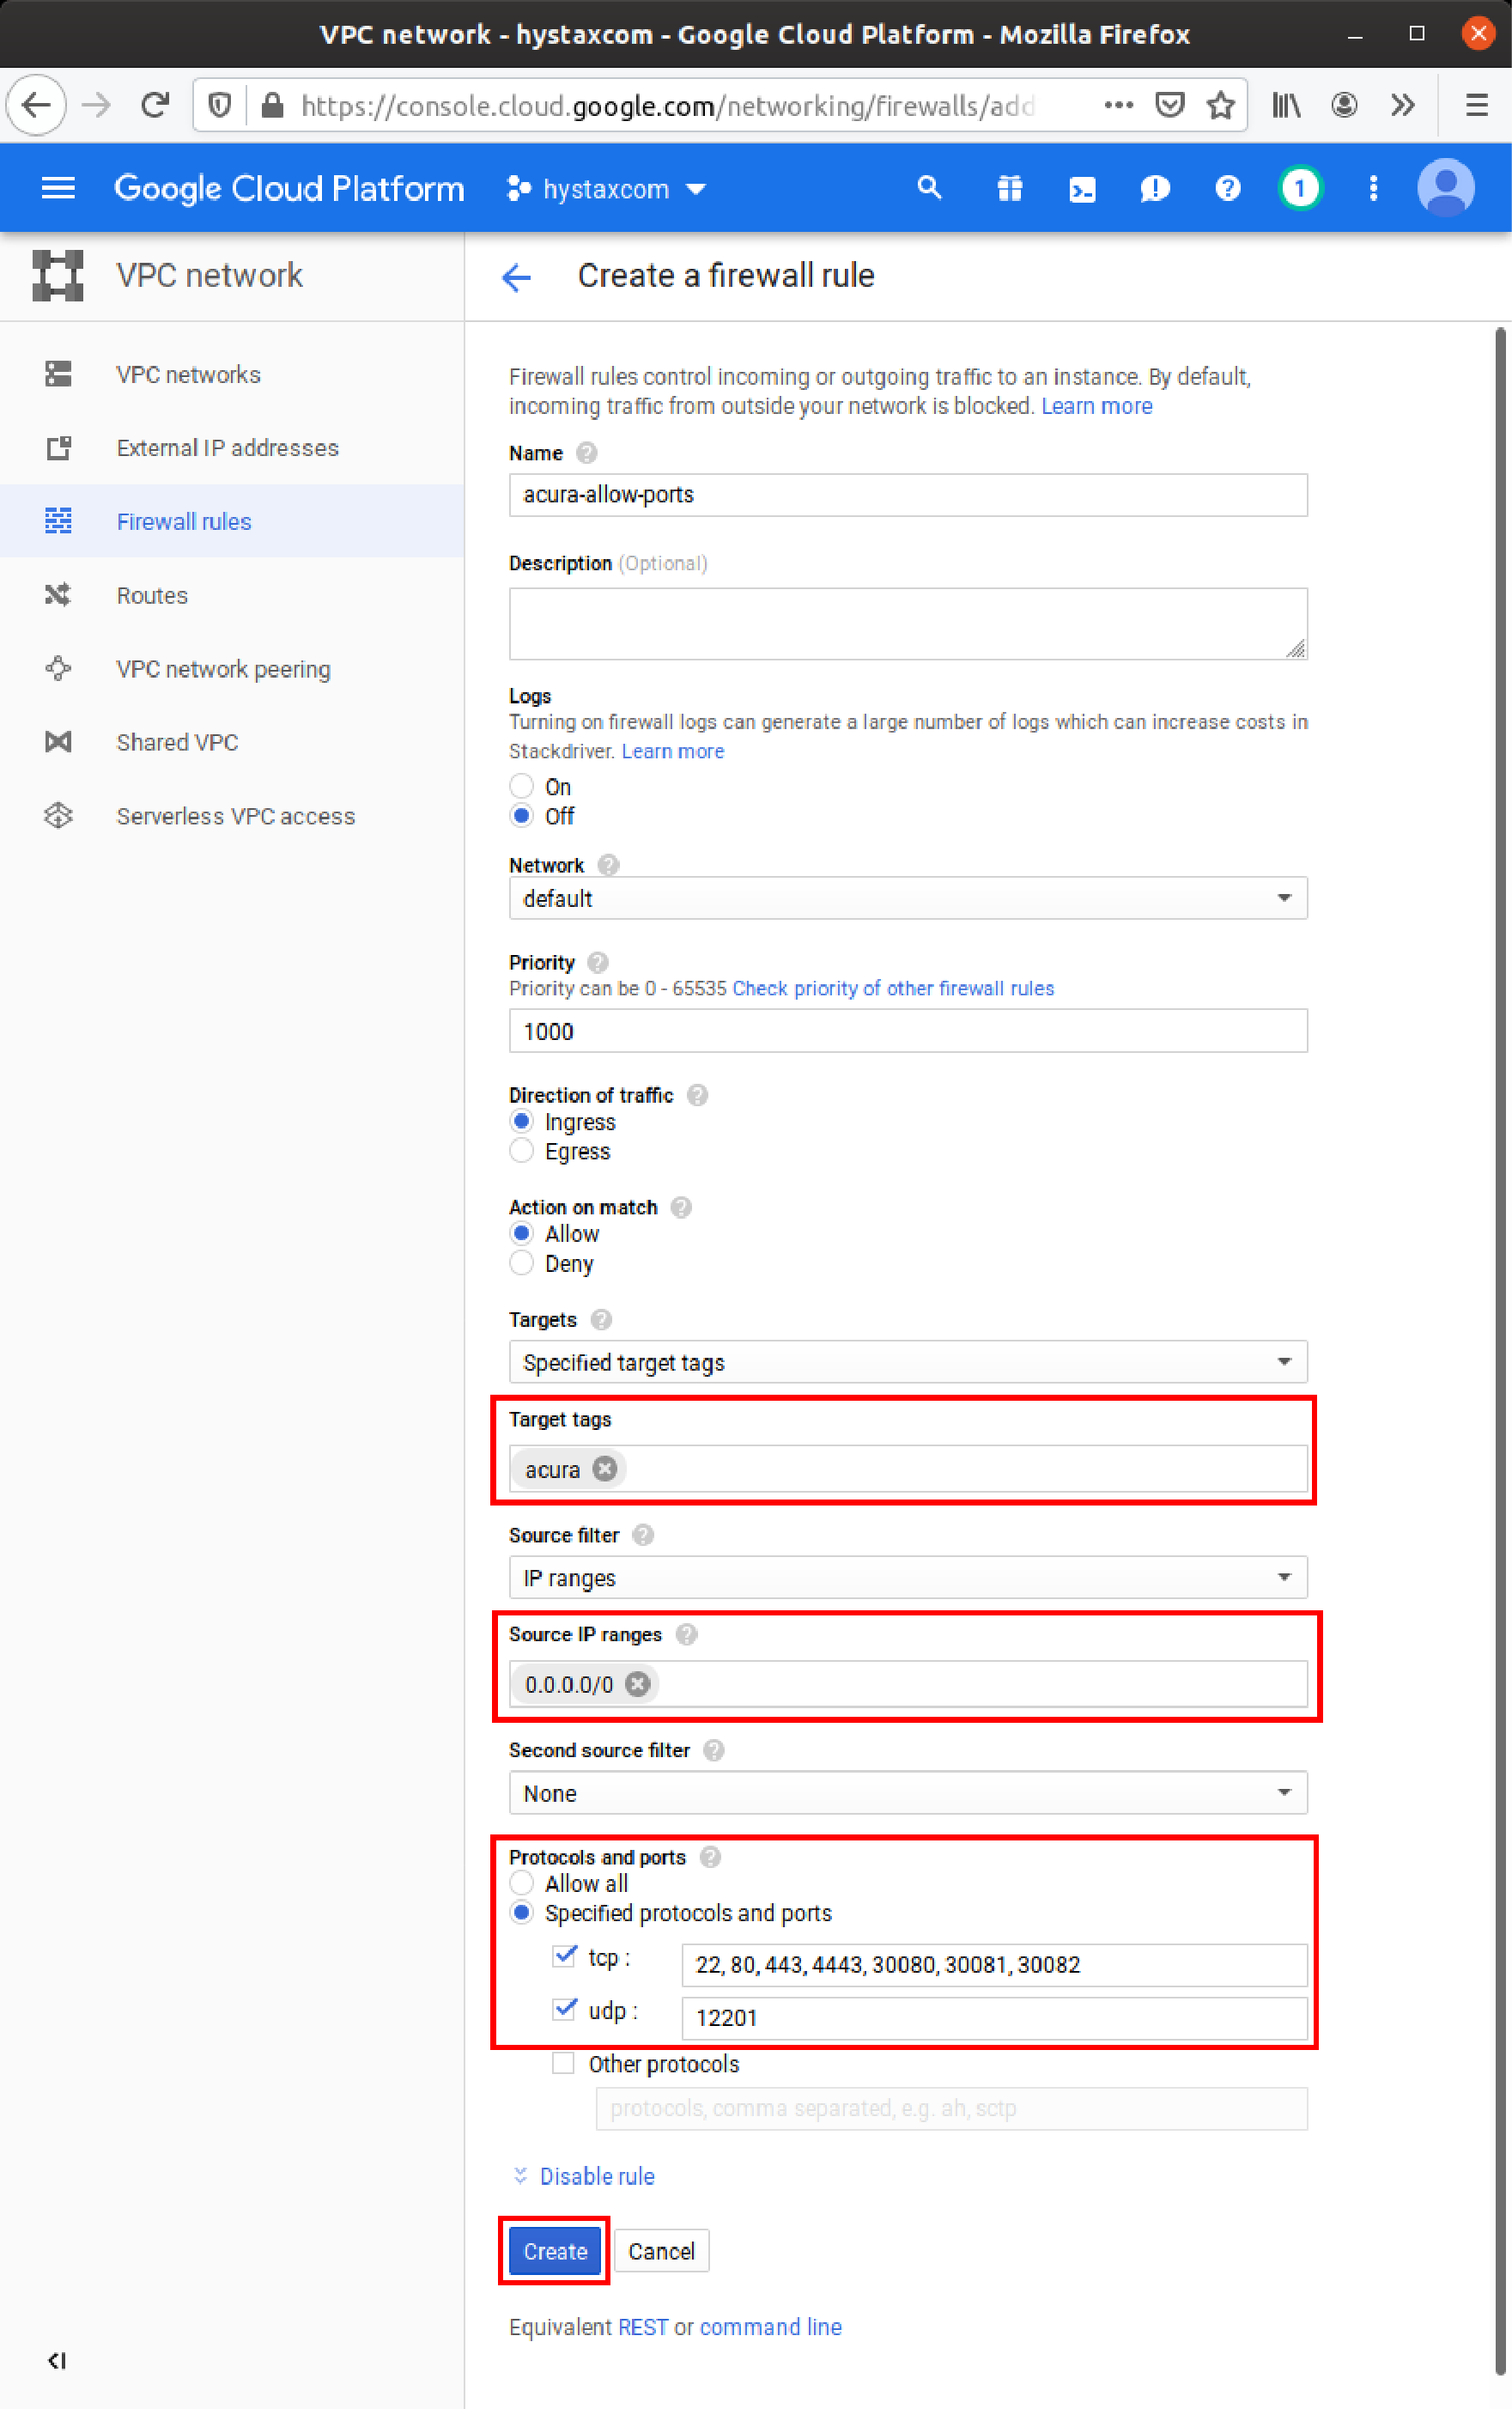
4. Create firewall rules for Acura’s instance.
Go to the “VPC network → Firewall rules” section in GCP UI. Create a new rule.
Choose the network you will use for Acura deployment
Set “acura” in “Target tags”
Allow the following ports:
tcp: 22, 80, 443, 4443, 30080, 30081, 30082
udp: 12201
5. Create firewall rules for Cloud Agent.
During replications, Acura will automatically create Cloud Agent instances and talk to them over the private network. Make sure that there is a firewall rule that permits communication inside your network.
For the “default” network this rule is already created by Google:
If you are going to deploy Acura to a non-default network, create a similar rule for this network:
During replications, Acura will automatically create Cloud Agent instances and talk to them over the private network. Make sure that there is a firewall rule that permits communication inside your network.
For the “default” network this rule is already created by Google:
Set “Targets” into “All instances in the network”
Set “IP ranges” to the CIDR range of your network
Allow all ports
6. Create Acura instance.
Go to “Compute Engine → VM instances” section in GCP UI and press “Create Instance”.
Choose “n1-standard-2” flavor or better
In “Boot disk” choose Acura image from “Custom Images” tab and set the disk size to be at least 100GB. SSD disk type is recommended
Allow full access to all cloud APIs for this instance. Acura will not be able to run without cloud API access
Open “Management, security, disks, networking, sole tenancy” spoiler and navigate to “Networking” tab:
Put “acura” to “Network tags”. This will enable the firewall rule created earlier
Edit the default network interface: create a fixed external IP instead of ephemeral. This will prevent Acura from losing its public IP on shutdown/reboot
Press “Create” to run Acura’s instance.
Note that you do not need to create Cloud Agent instances: Acura will run them automatically using the image created earlier.
7. Pass Acura Initial Configuration.
Once the VM is started, wait approximately 20 minutes for it to boot up, then open its external IP in a web browser. Please accept the certificate warnings and then you will see the initial configuration page.
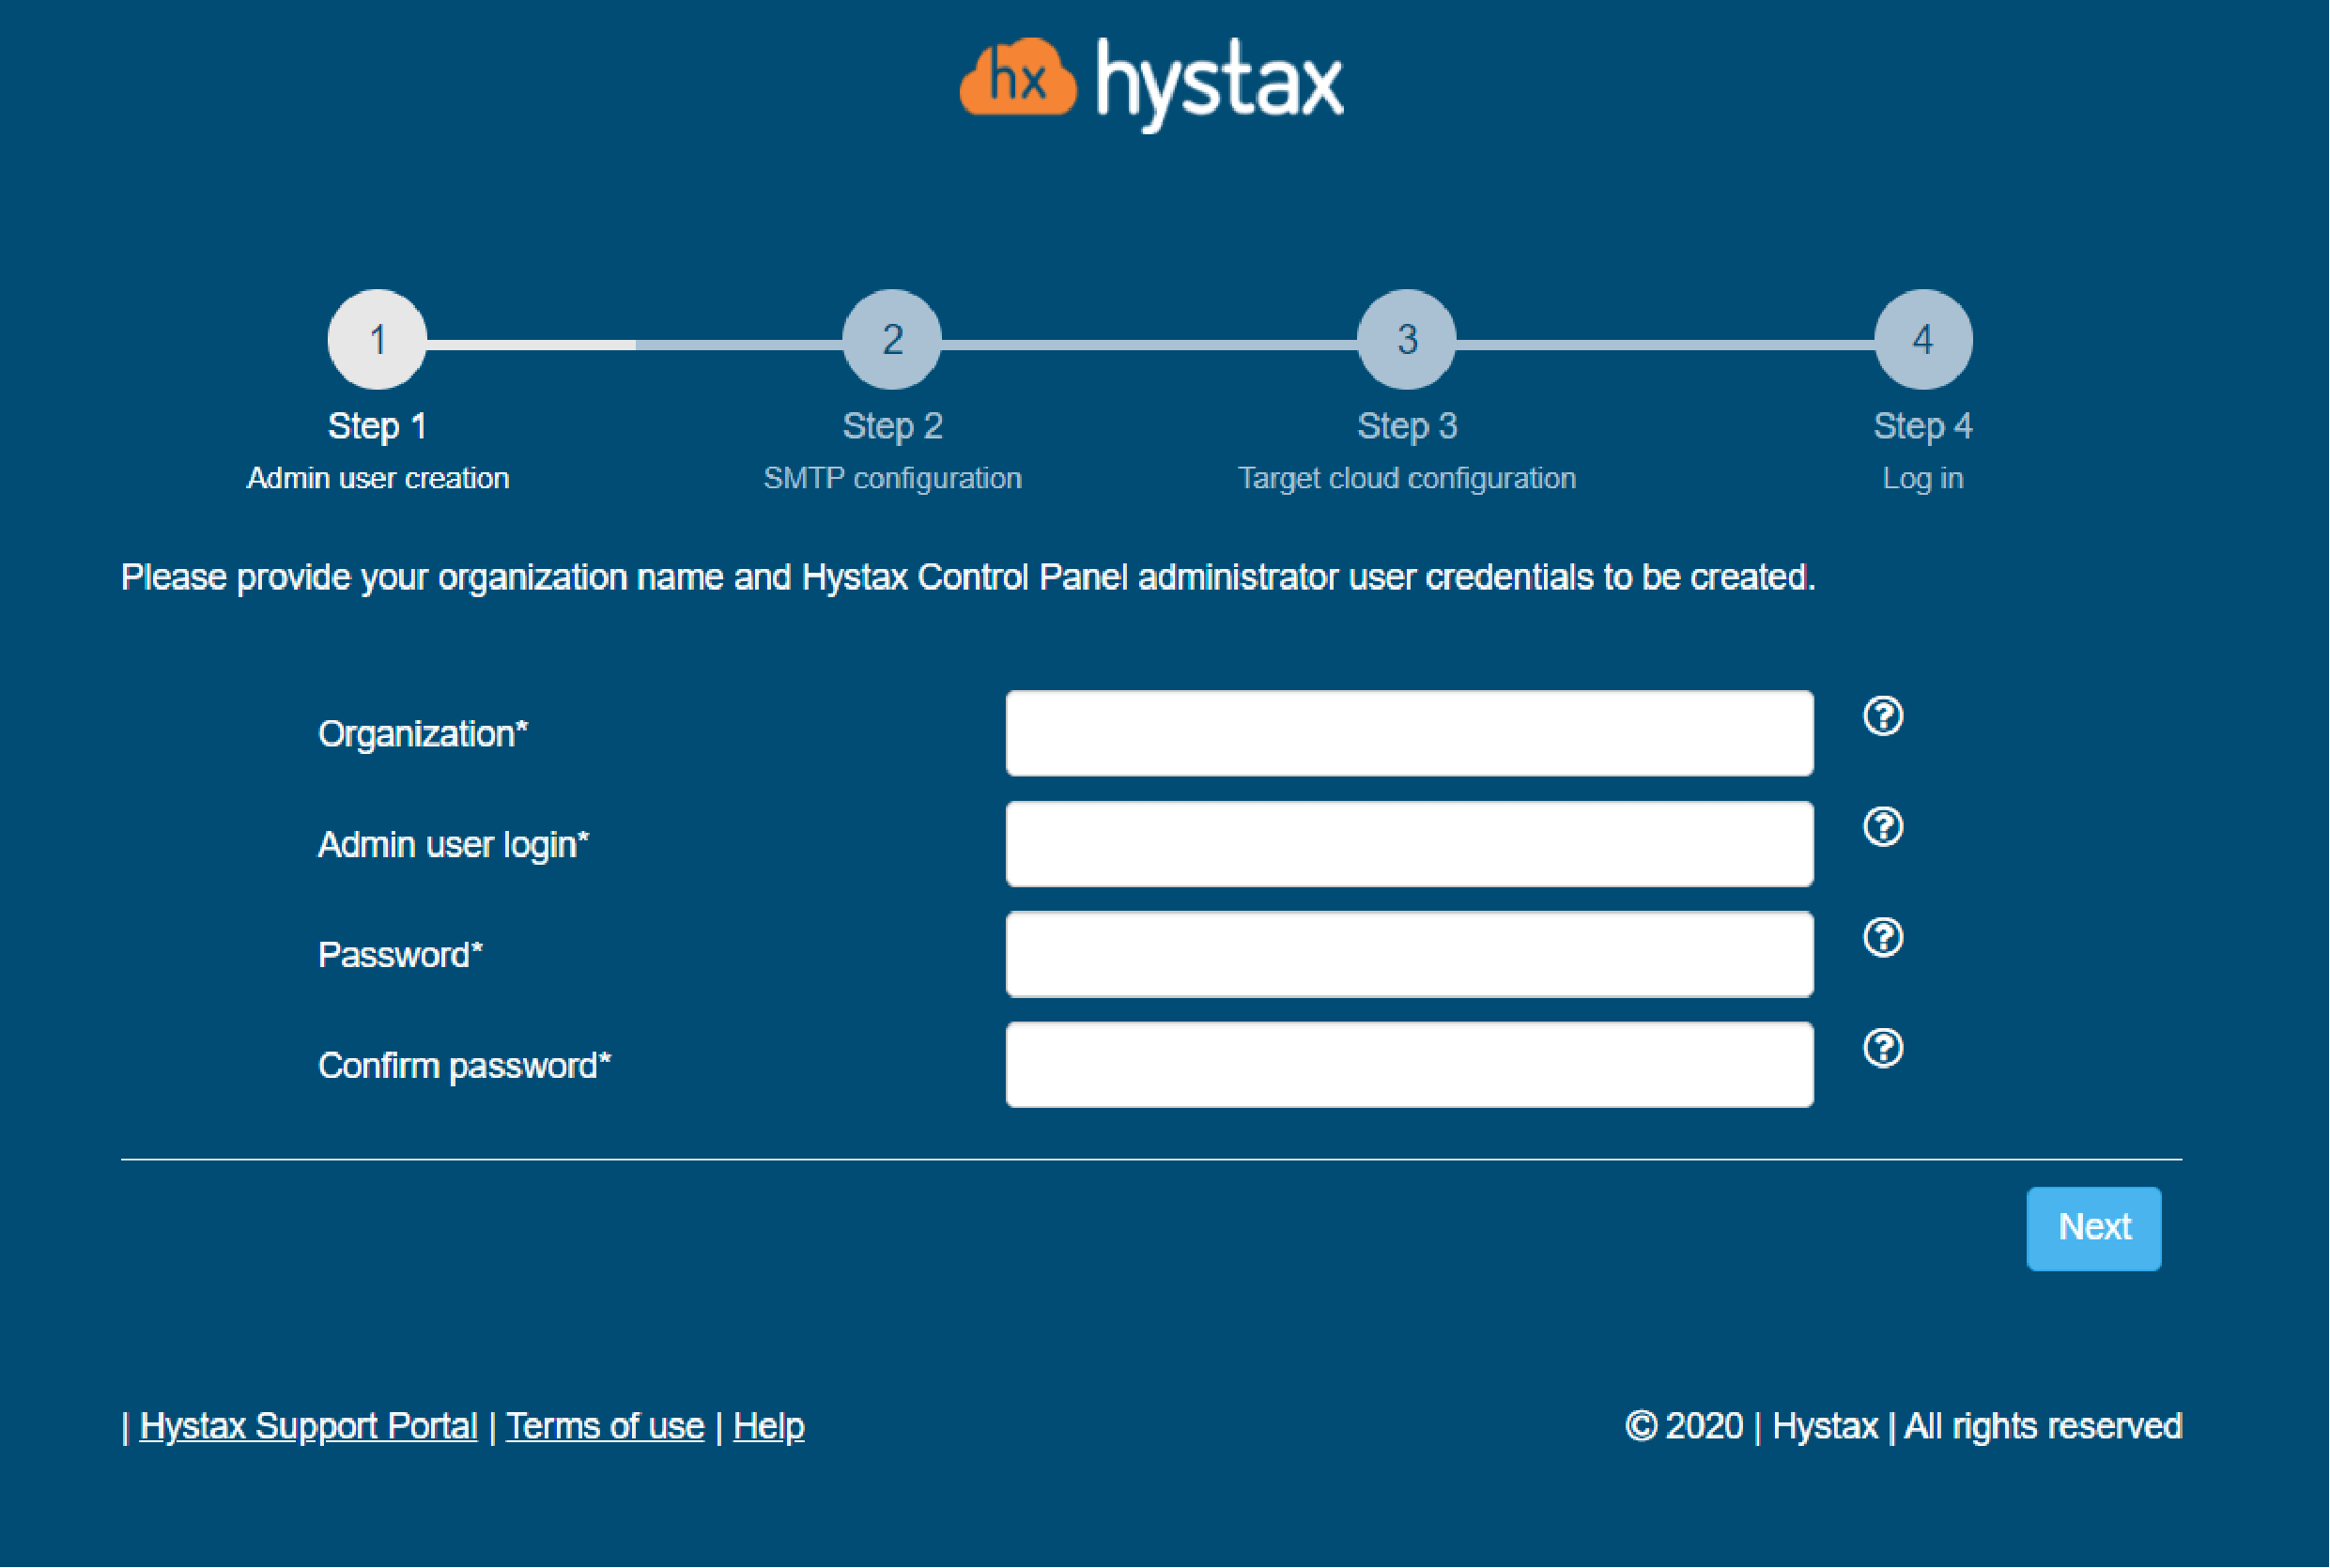
1. Step 1: Enter the organization name and new Hystax Admin User credentials into the Setup Wizard. This will be the user account for logging in to the Hystax Acura Control Panel and managing the system. If there are any errors, the system will notify you.
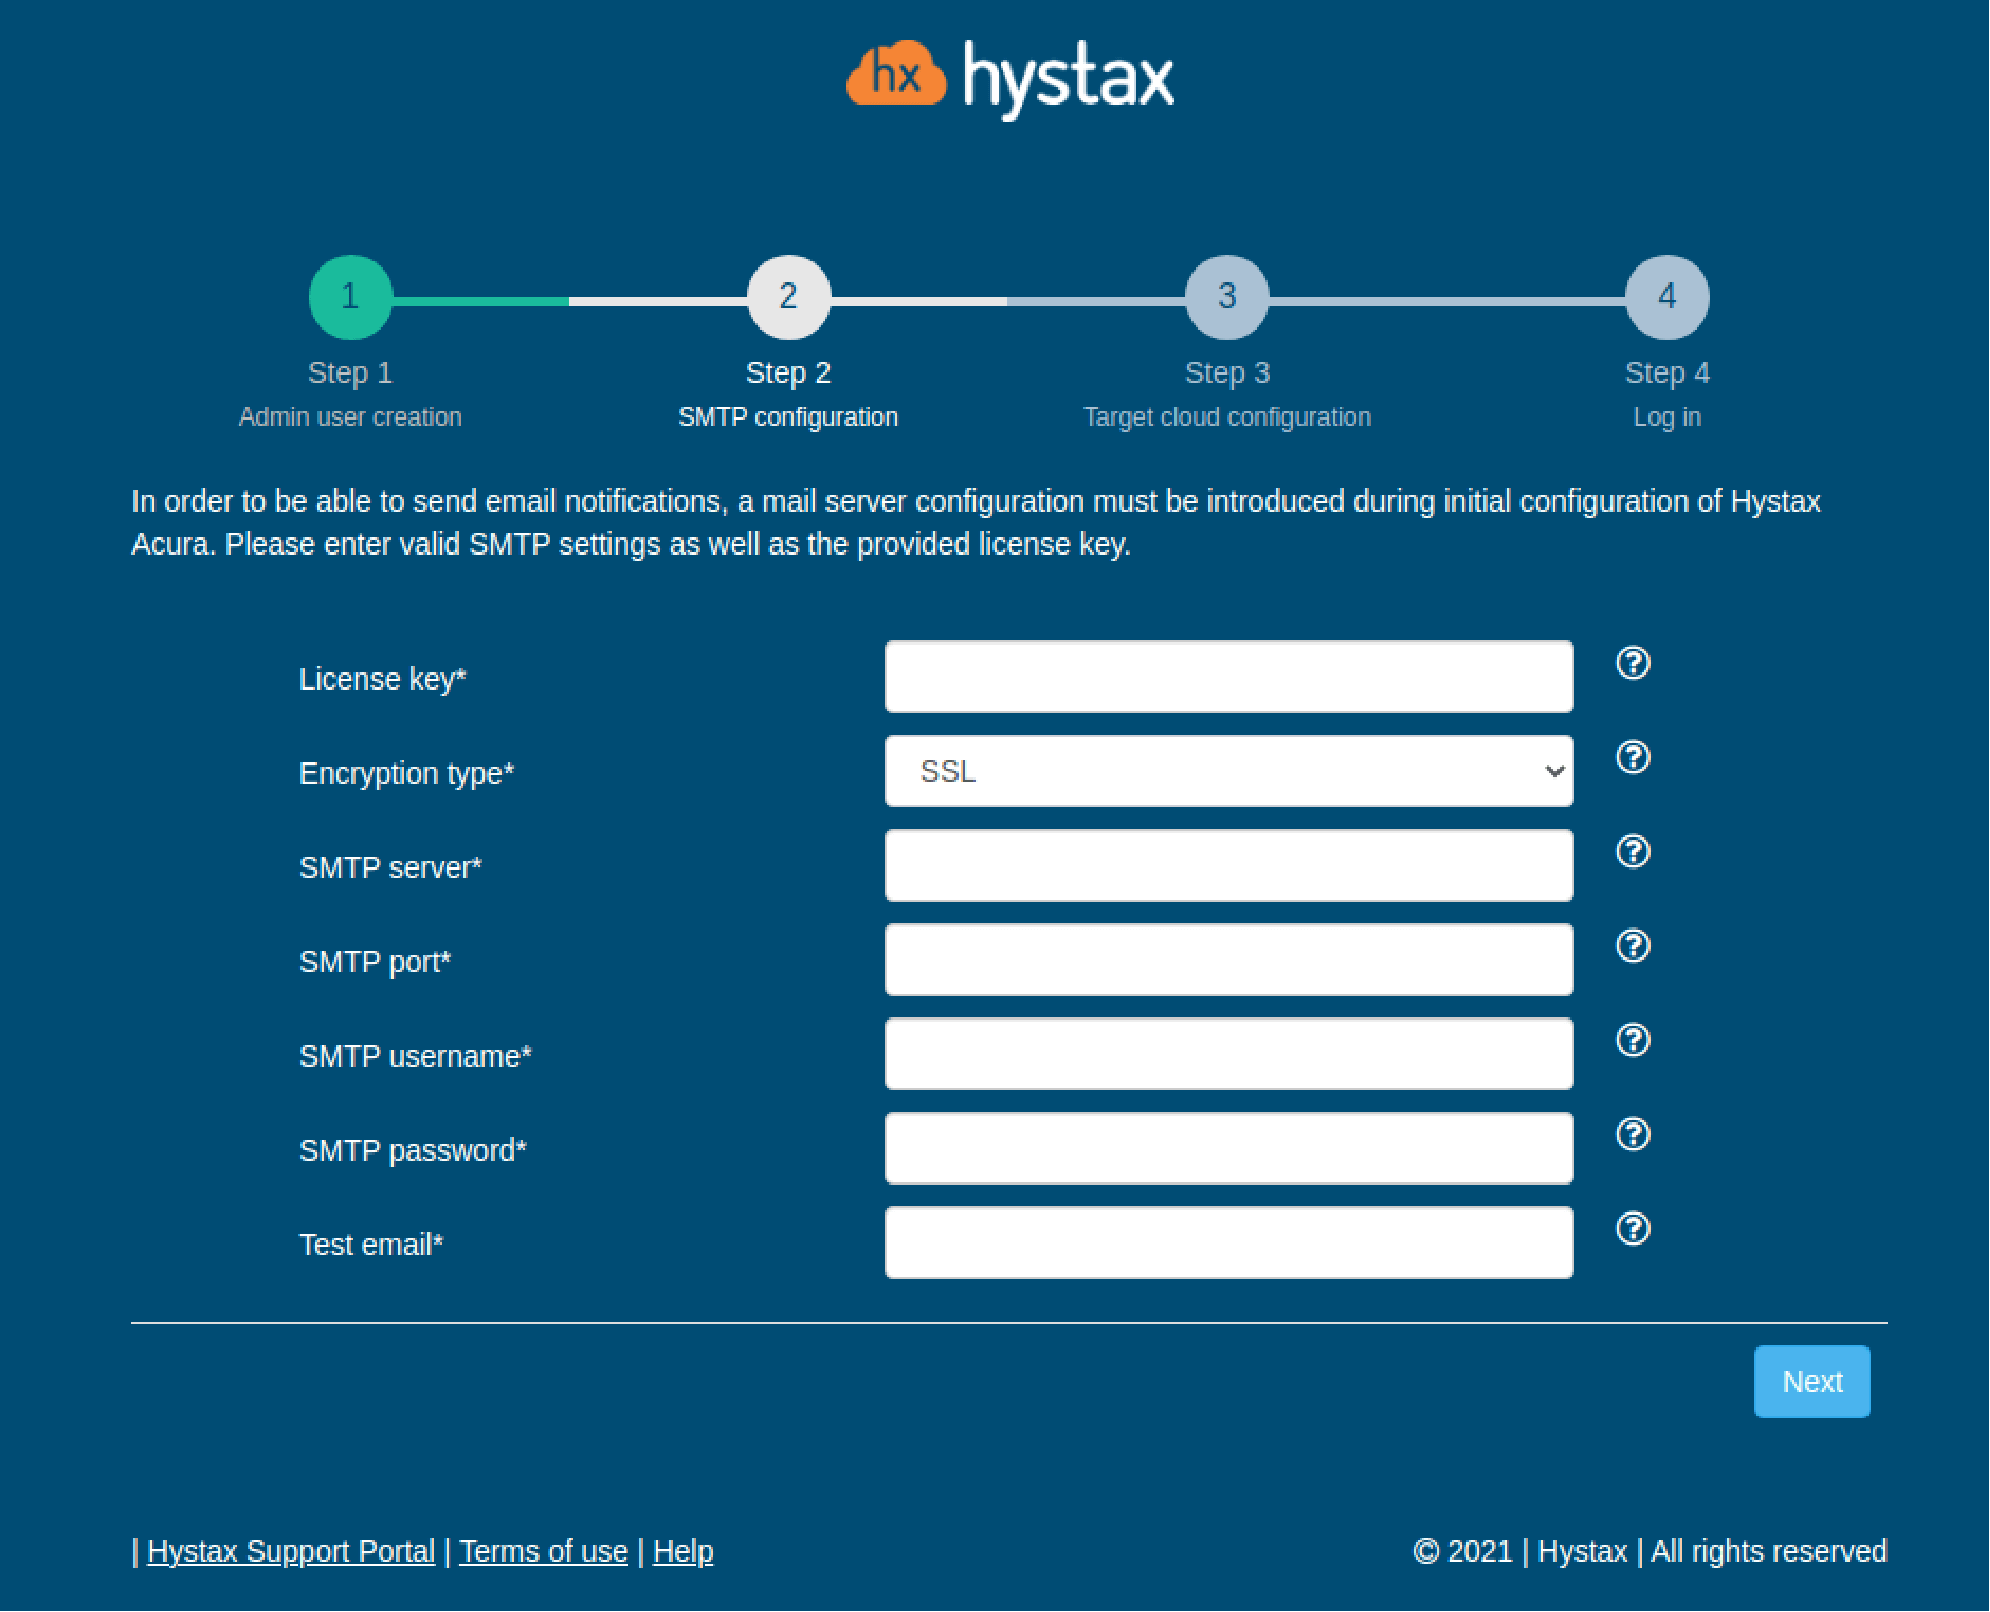
2. Step 2: Fill in your Hystax License key that was supposed to be shared with you in advance as well as the settings for accessing your mail server, which will be used to send notifications from Acura and generate periodic reports.
Note: SMTP server with TLS/SSL encryption is required to proceed with deployment.
If you prefer a public SMTP server associated with your email address (gmail, yahoo etc.), please find its settings online. In case of a private SMTP server, contact your network administrator for further details.
A sample notification will be sent to the specified “Test email” to verify the functionality when you click “Next”.
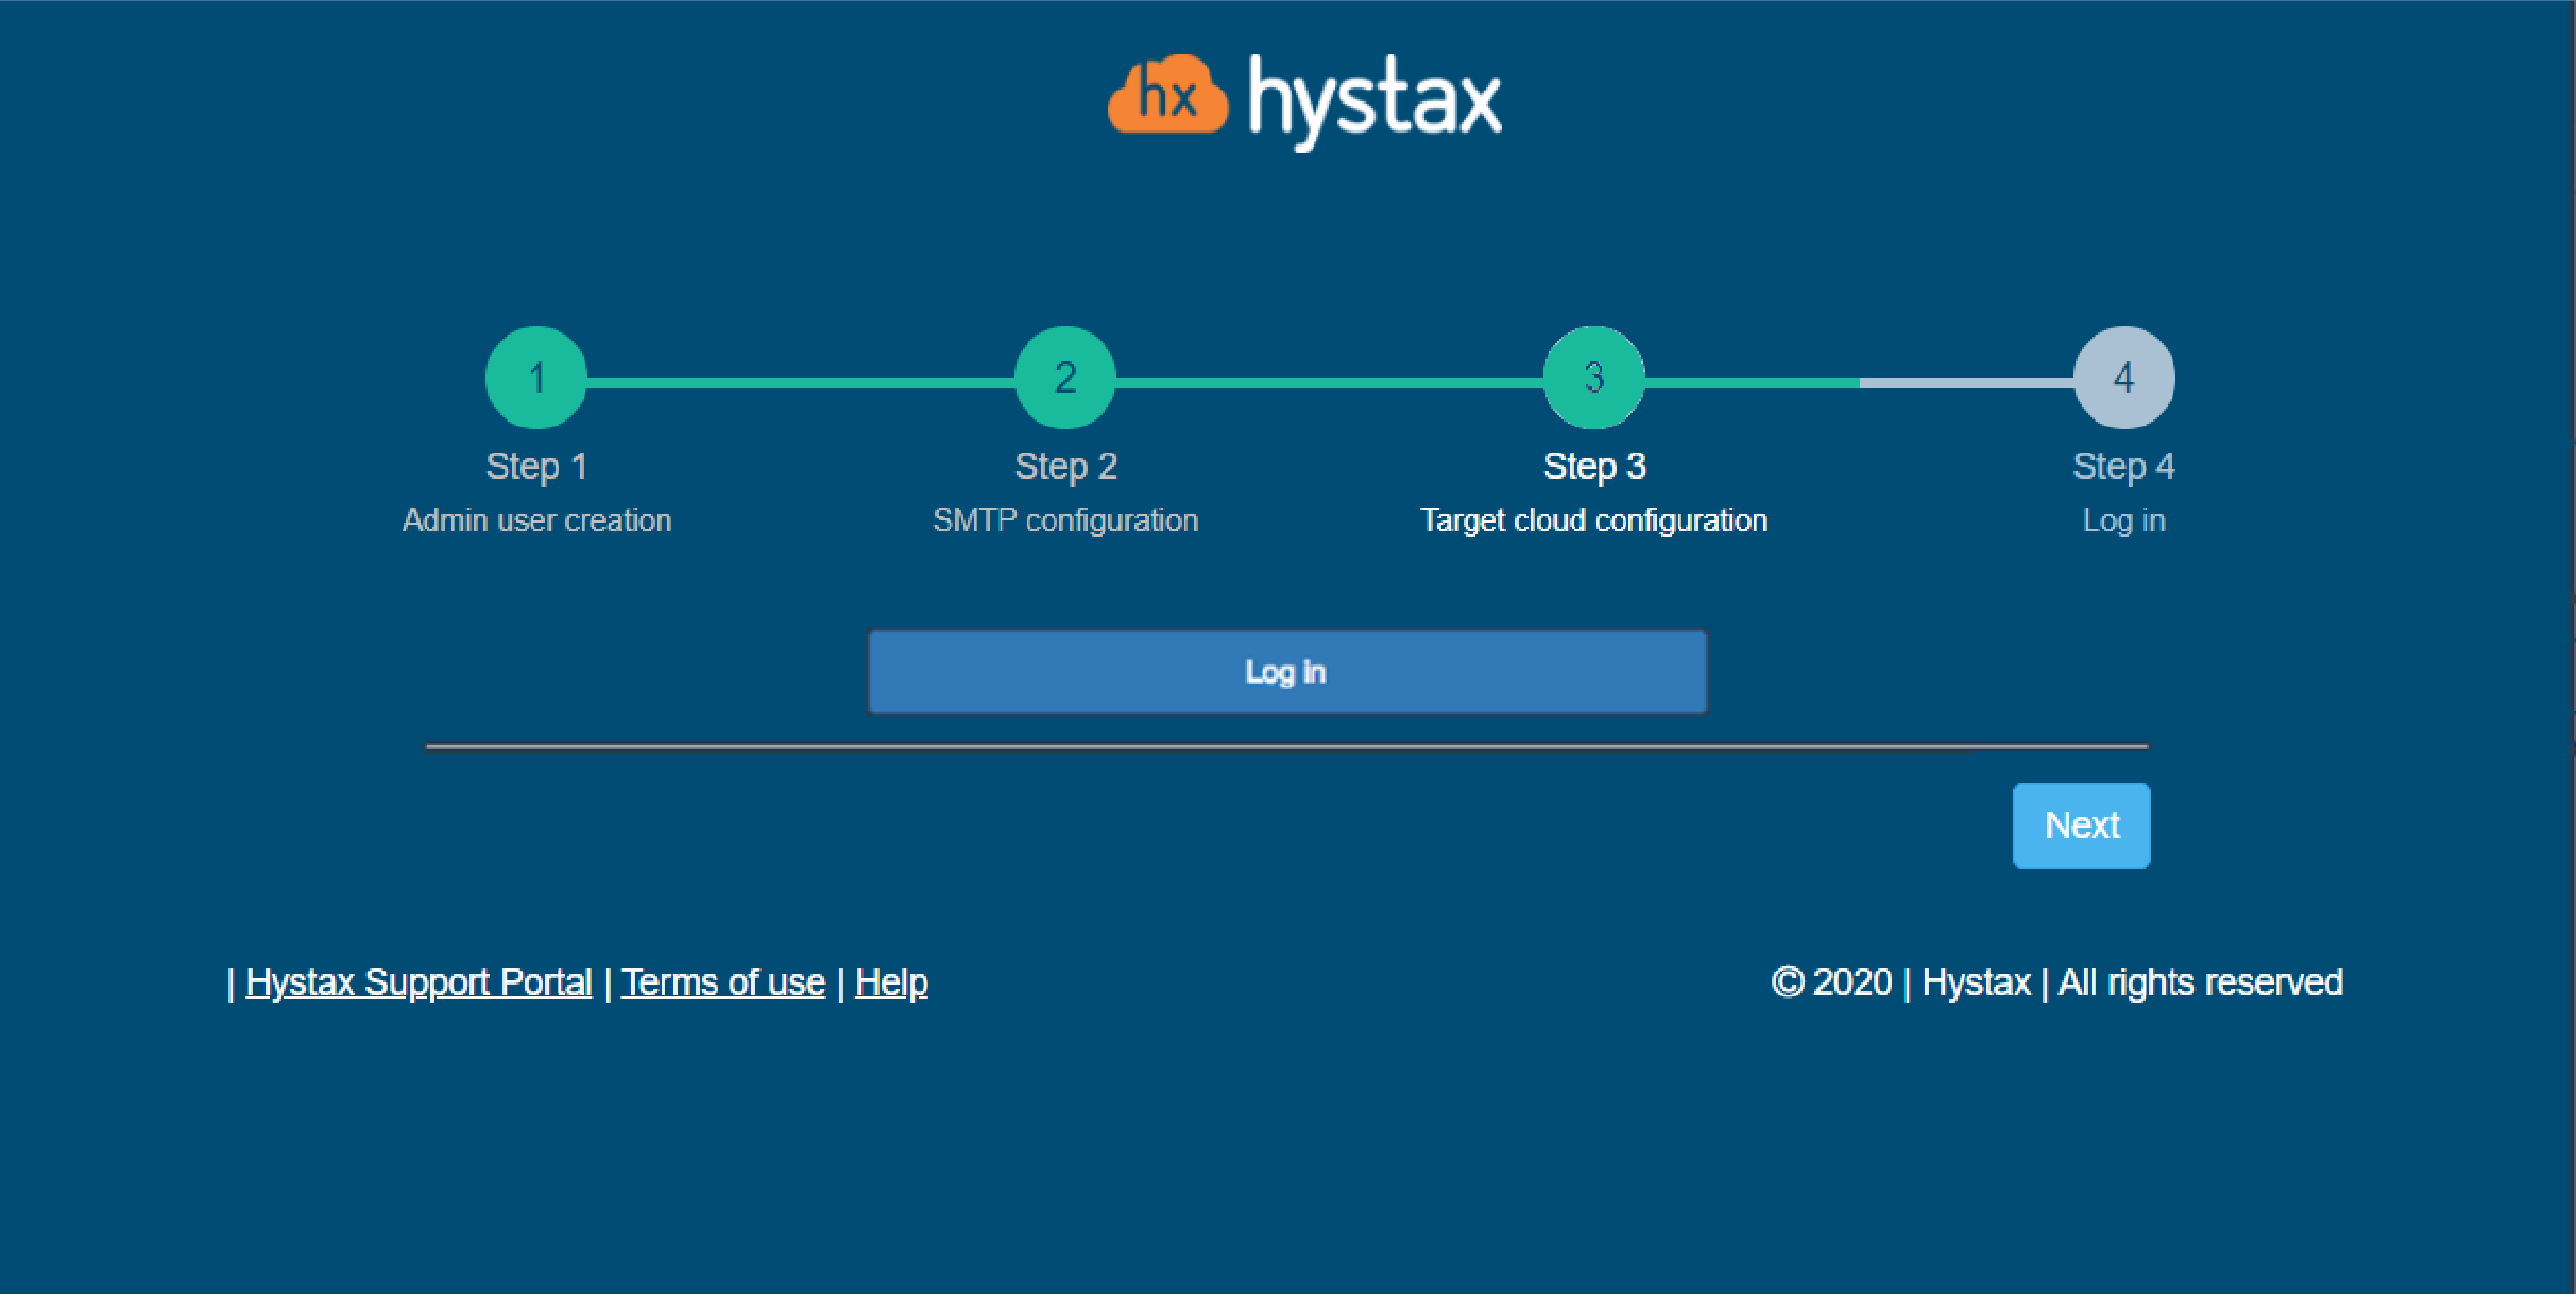
3. Step 3: Click the “Next” button.
4. Step 4: Installation is complete, and you can now log in to the system using credentials entered in the previous step.
Troubleshooting
Hystax Acura automatically checks cloud access and necessary permissions to ensure successful operation. It provides detailed error messages that describe potential causes. In case of an error, please check the correctness of the data entered and the availability of the necessary permissions.
Feel free to use the contact details below to contact Hystax support if you have any questions or difficulties with the installation process. The Hystax Support Portal is available at https://support.hystax.com/ and includes all articles from our Knowledge Base. You can also submit support requests in your personal account.