OptScale is a FinOps and multi-cloud cost management platform designed to help businesses efficiently manage and optimize their cloud resources. It offers key features such as cost analysis, budgeting, and resource optimization recommendations to reduce cloud expenses.
In this how-to, you will learn how OptScale allows various resources to be pooled and managed across vast global infrastructures.

Pools typically refer to a grouping of shared resources available by multiple clients or tasks within a cloud environment. These resources include computing power (CPU), storage, memory, or network bandwidth. Using the Pools feature in OptScale, you can maximize efficiency and flexibility in resource allocation, ultimately enhancing scalability and cost-effectiveness.
This feature is available under the Pools menu.
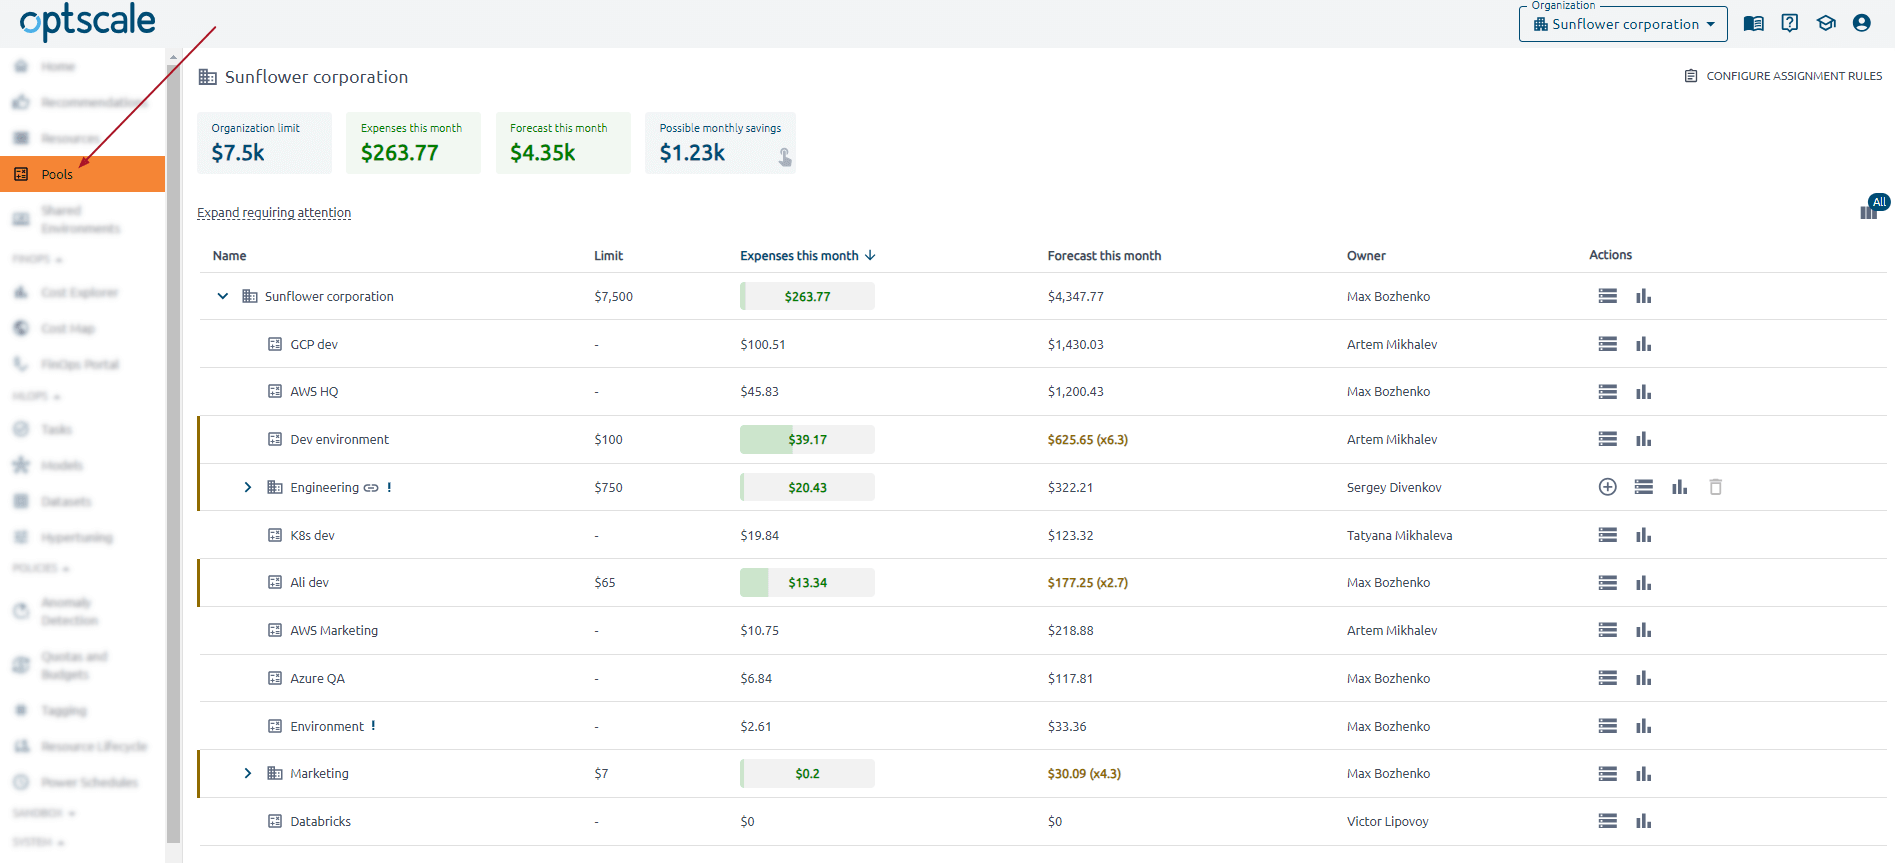
Managing pools and sub-pools in OptScale: How to track limits and expenses
The Pools page serves user information about pools and sub-pools, their limits, forecasts, owners, applied constraints, and export options on one page without moving focus away from subpages.
The page header includes only the organization name and configure assignment rules button-link.
The summary grid shows the organization limit, organization expenses, and forecast for this month. If there are exceeded pools, a spent over limit/exceeded limit card shows.
The table has a “folder-like “structure.
The general pool is created automatically when the first cloud is connected to OptScale. Its name is the same as the organization’s name. This pool contains a sub-pool named the connected data source. This sub-pool contains all resources belonging to the cloud. Sub-pools will be created when the other clouds are added.
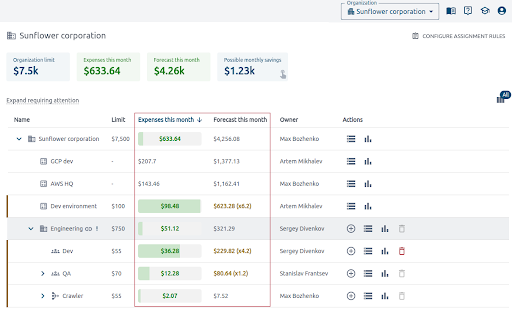
Pay special attention to the Expenses this month and Forecast this month columns. Use this information to track your expenses and view the Forecast. Suppose the total expenses of resources in the pool (sub-pool) exceeds the limit. In that case, the amount in the Expenses this month column will be red, and the extent to which the limit has been exceeded will be indicated in parentheses.
Suppose the expected monthly expenses are more significant than the limit. In that case, the value in the Forecast this month column will be yellow, and the number of times the excess will be indicated in parentheses.
Actions performed for pools are shown in the last column of the table.
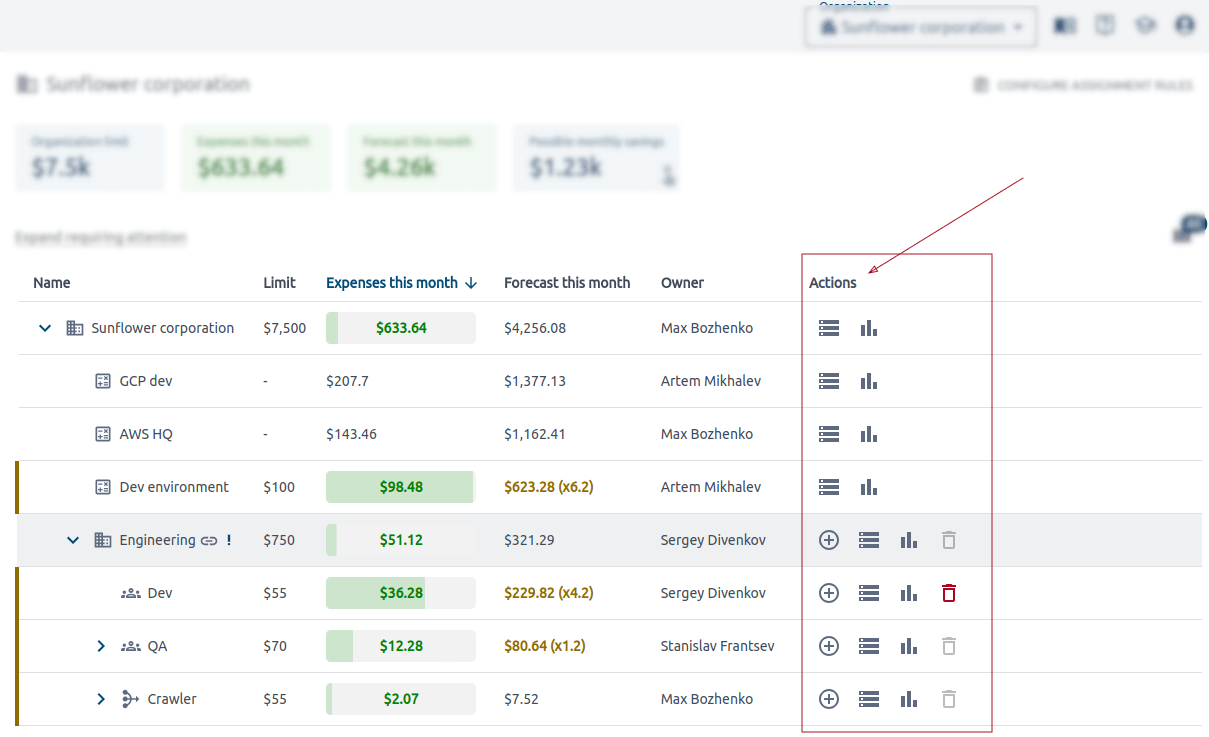
The actions performed for pools are described below.
Please note that if a user doesn’t have the ‘Organization manager’ permission or “Manager” permission for the pool, the buttons will not be visible to him, and he will not be able to launch the actions.
How to create a new sub-pool in OptScale
Add sub-pools using the Add sub-pool button in the Actions column.
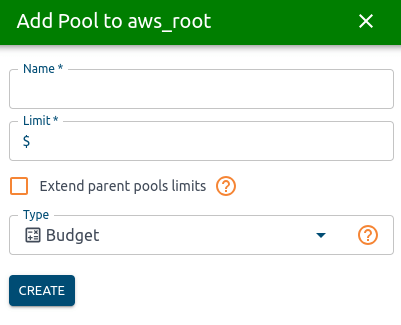
Enter the name in the Add Pool side modal and set the limit. The sum of sub-pool limits must not exceed their parent pool limit. Set Extent parent pool limits to unlock automatic extension of parent pool limits, if necessary. Select pool type. Pool types represent budgets, departments, teams, projects, temporary resources spawned when running CI/CD jobs, resources for running ML or AI, and some logically grouped resources. Use hints to get detailed information.
How to transfer resources to a specific pool in OptScale
Resources are transferred between pools according to predefined rules. To do so, click the pool to which you want to transfer resources. In the side modal shown, go to the Assignment Rules tab.
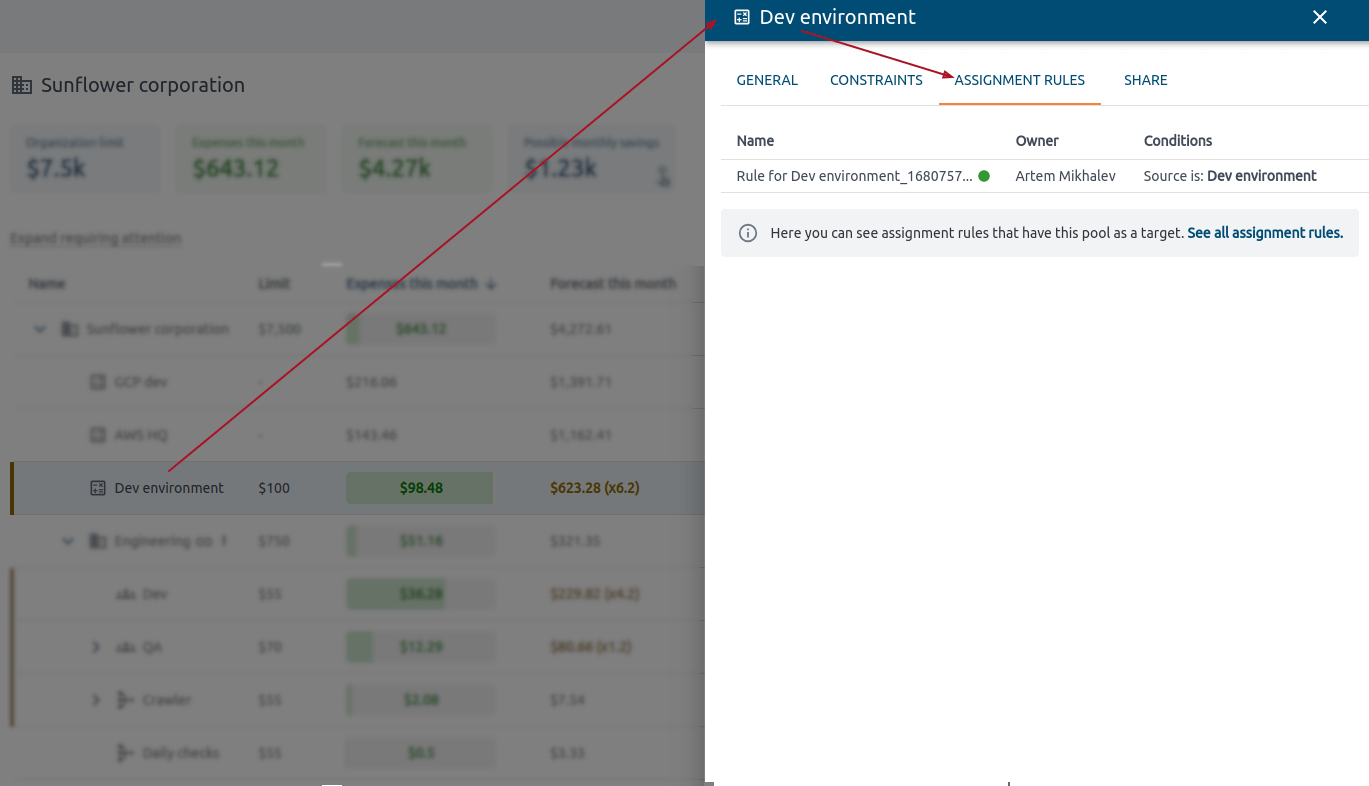
To add a new rule, use See all assignment rules link. The list of all rules is available on the page shown. Click Add.
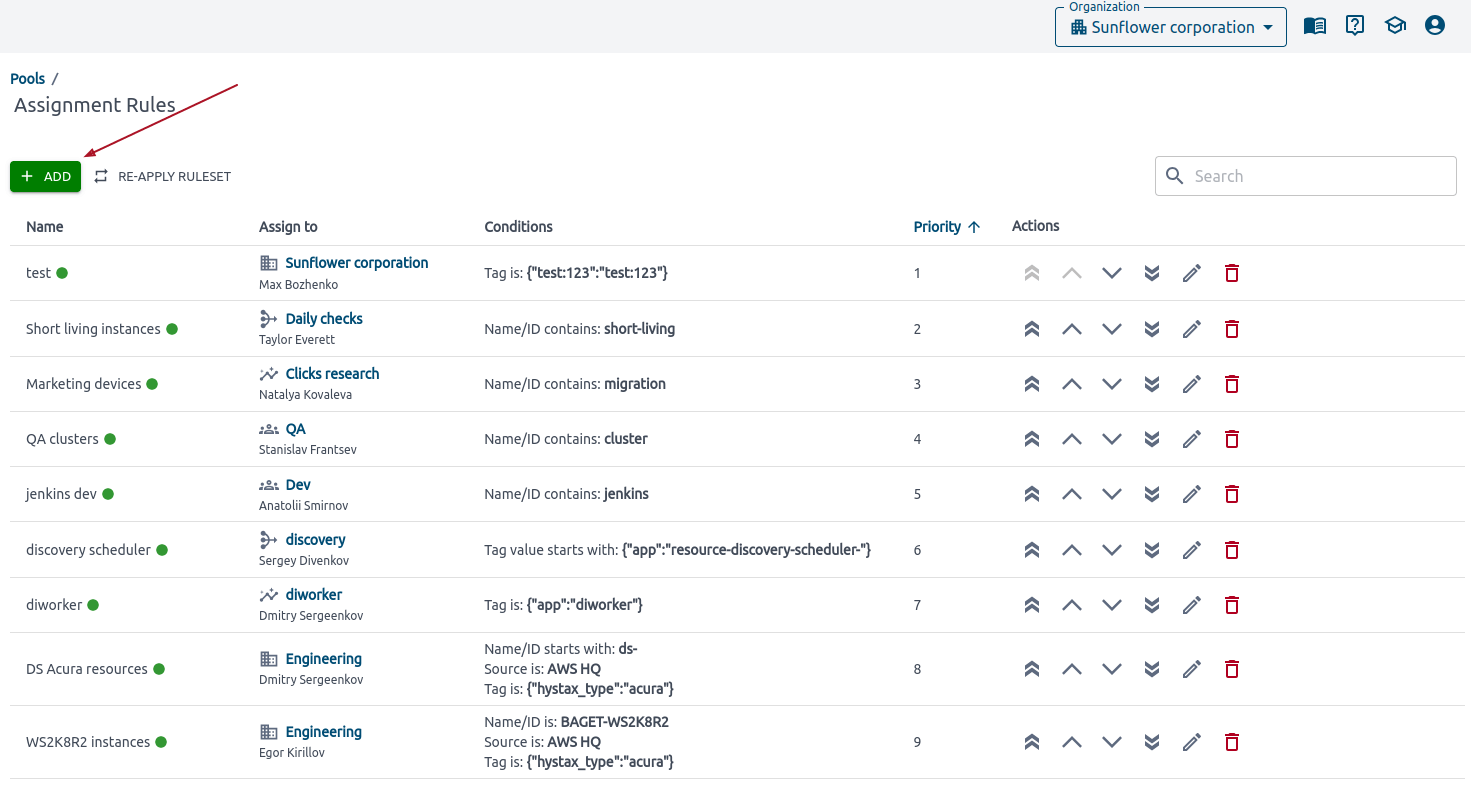
The form where you can determine by what rules resources will fall into a specific pool appears.
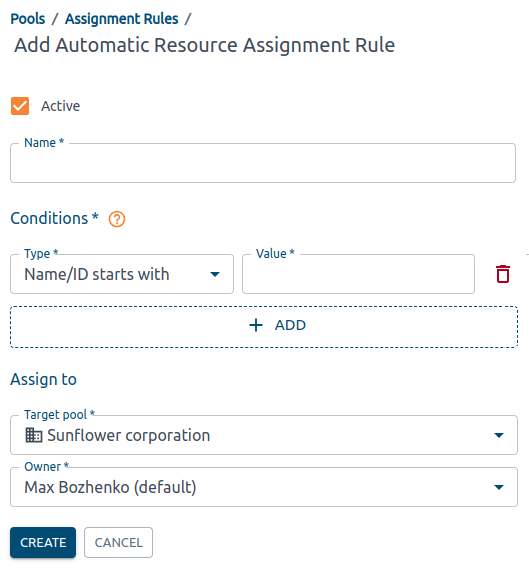
Specify the rule’s name. Pay special attention to the Conditions section. Fill out the fields in the Conditions section and use Add to add the necessary conditions.
Assign a target pool for which this rule applies. Press Create when done. By default, a newly created rule is set as active. Get back to the Pools section to see newly added items to the pool.
The Power Schedules feature in OptScale is crucial for cloud computing management, focusing on optimizing computational resource usage to enhance efficiency, reduce costs, and minimize energy consumption →
A little about limits in pool management…
Limits are an essential part of pool management. To set limits, click on the pool (or sub-pool). The current limit is shown in the General tab. To change it, click Edit below this information. Below, there is a diagram showing the monthly expenses.
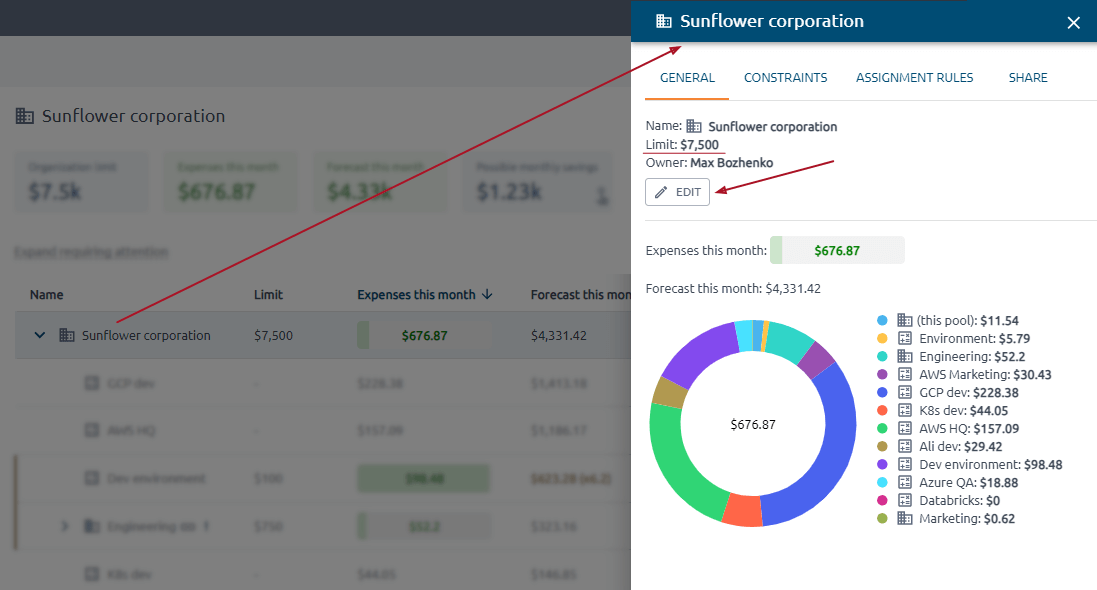
You can set an unlimited limit for each existing pool or sub-pool. Just put the limit to 0 to do this. The sum of limits of sub-pools can’t be more than the limit of the upper-level pool. If the limit is exceeded or close to it, then the progress bar of the Expenses this month column will be red. Otherwise, it is green.
Free cloud cost optimization. Lifetime
… and Constraints
A constraint can be set for each pool. There are two types of constraints: time-to-live (TTL) and daily expenses limit. Find constraints on the Constraints tab when you click the pool.
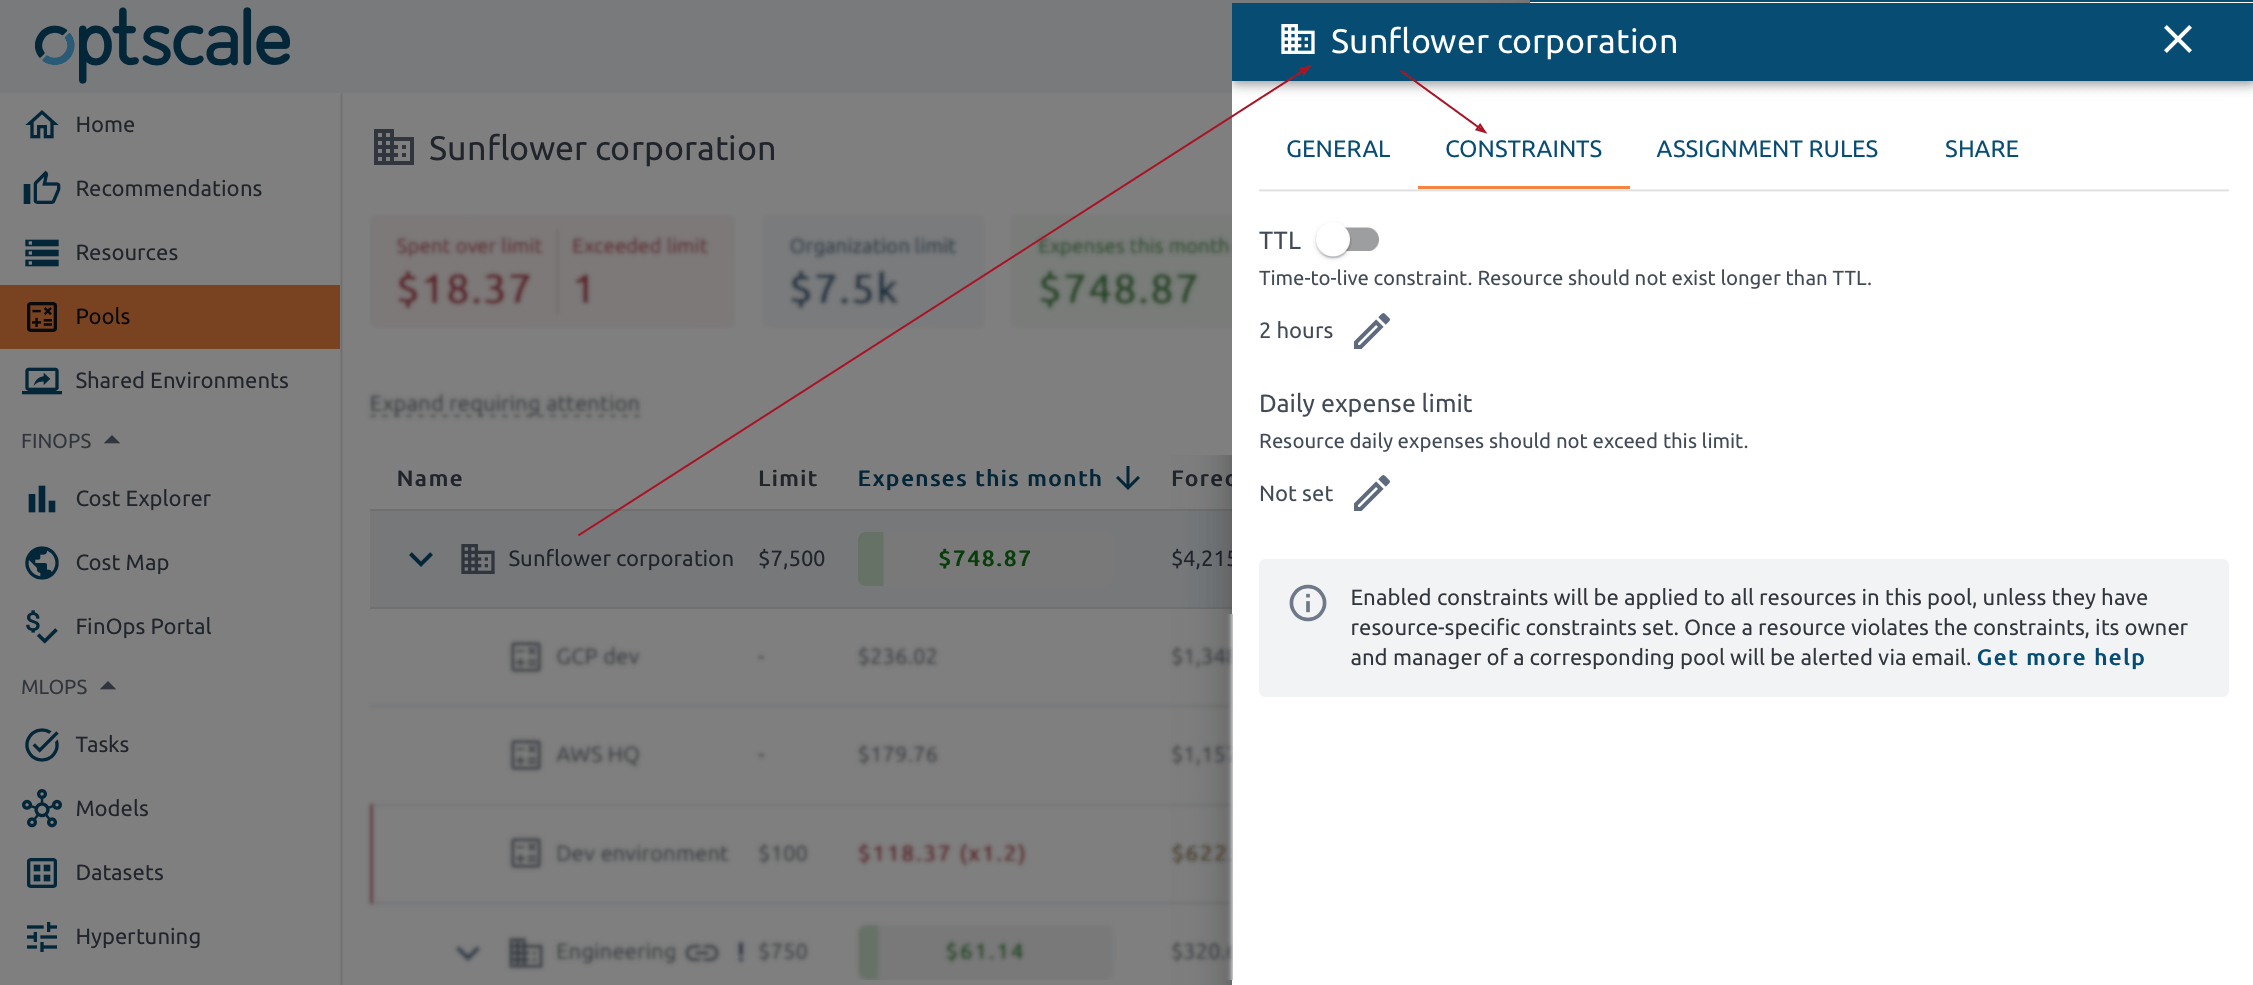
Edit constraints to update existing ones or add new ones. Enabled constraints will be applied to all resources in this pool unless they have a set of resource-specific constraints. Once a resource violates the constraints, its owner and the manager of a corresponding pool will be alerted via email.
We’d appreciate it if you would give us a Star.