Please consider giving OptScale a Star on GitHub, it is 100% open source. It would increase its visibility to others and expedite product development. Thank you!
To perform Disaster Recovery you need to complete the following steps:
Protection flow
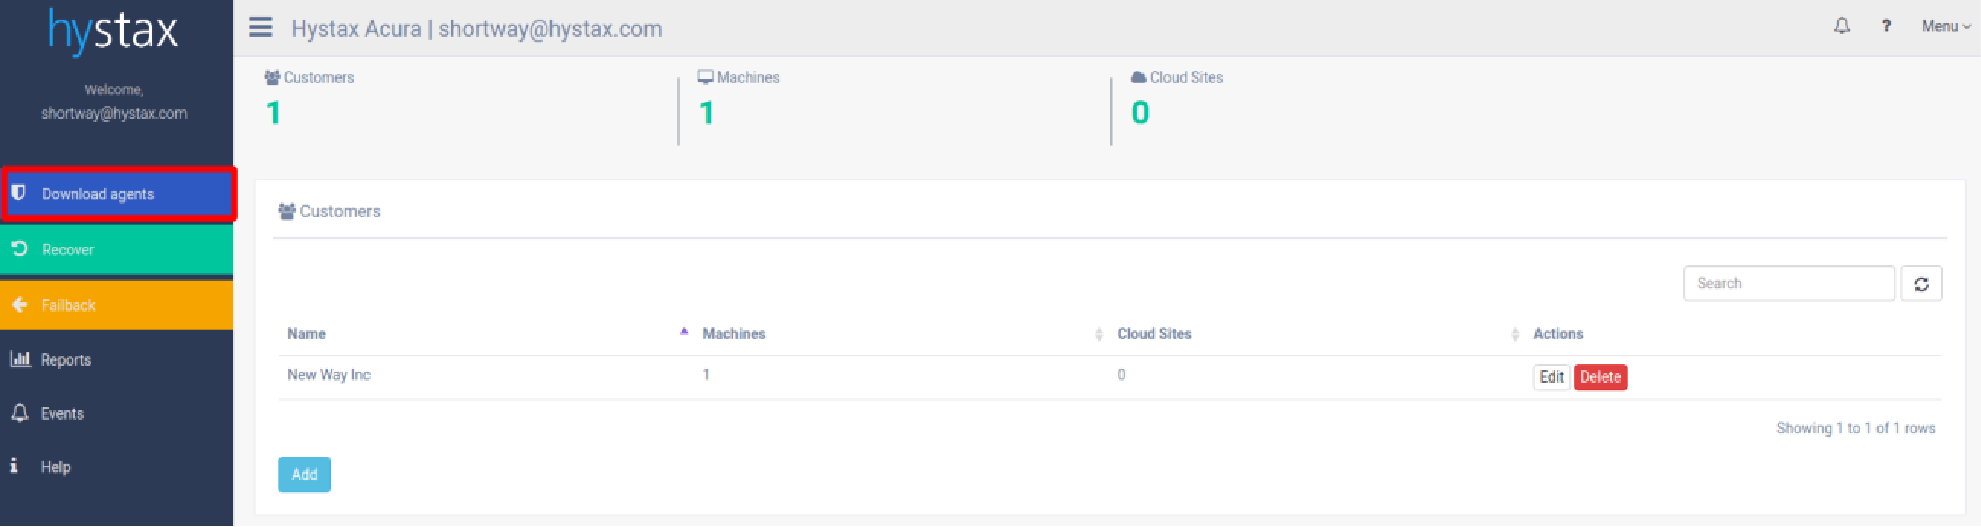
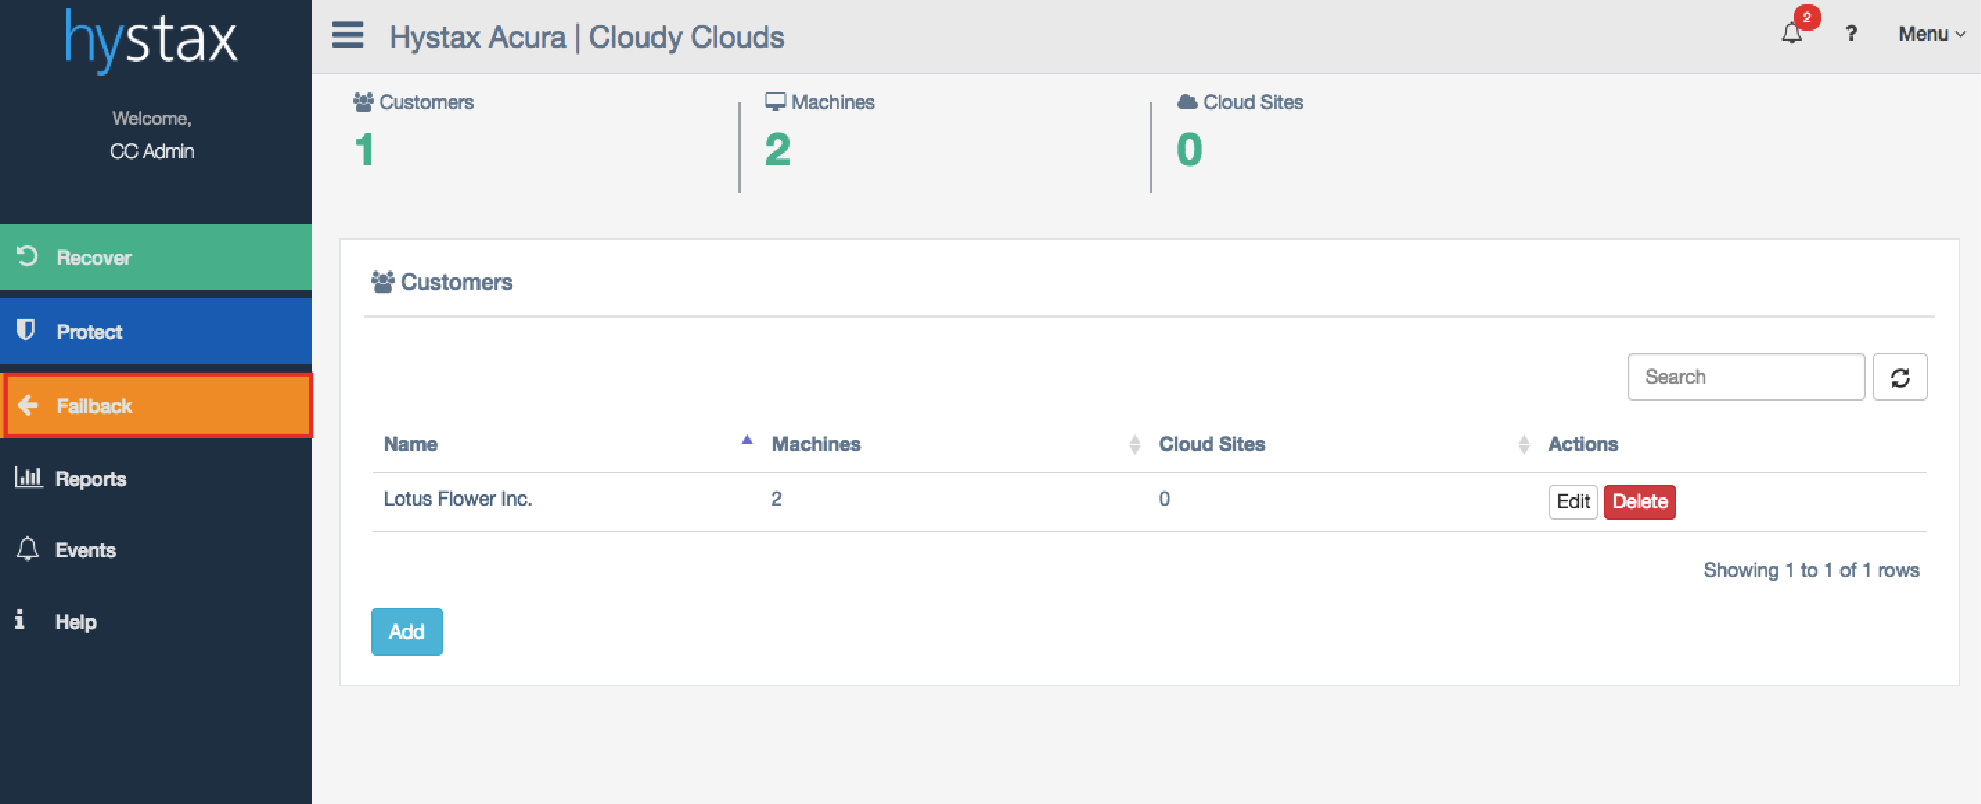
Login to the Hystax Acura Control Panel deployed as a part of the solution (refer to https://hystax.com/resources/ for more information on deployment instructions) and navigate to the customer dashboard for a customer you target to perform Disaster Recovery.
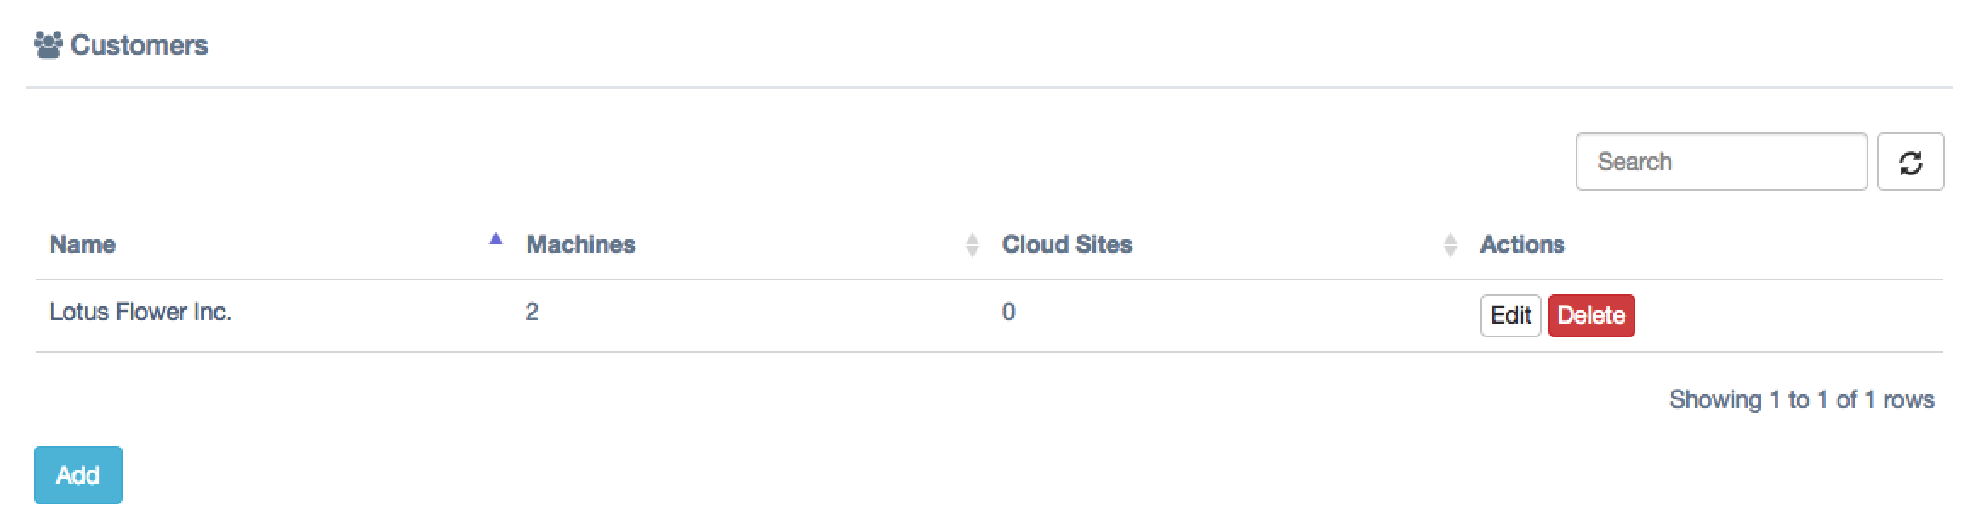
2. On a customer dashboard you can find information about protected machines, DR Plans, and failovers running. By default, no resources are available for a new customer.
3. Click on the ‘Download agents’ button in the main menu, select a customer for which machines need to be replicated and download a replication agent.
There are three types of replication agents:
VMware agent – an external agent that replicates VMware virtual machines without installing any software directly on VMs. Please note that the agent requires access to VMware CBT API; network access to vCenter or ESXi host is mandatory. Note that the agent from the same Ova template must be deployed to all ESXi hosts where machines must be protected. Please refer to https://docs.hystax.com/devices_protection.html#install-vmware-agents.
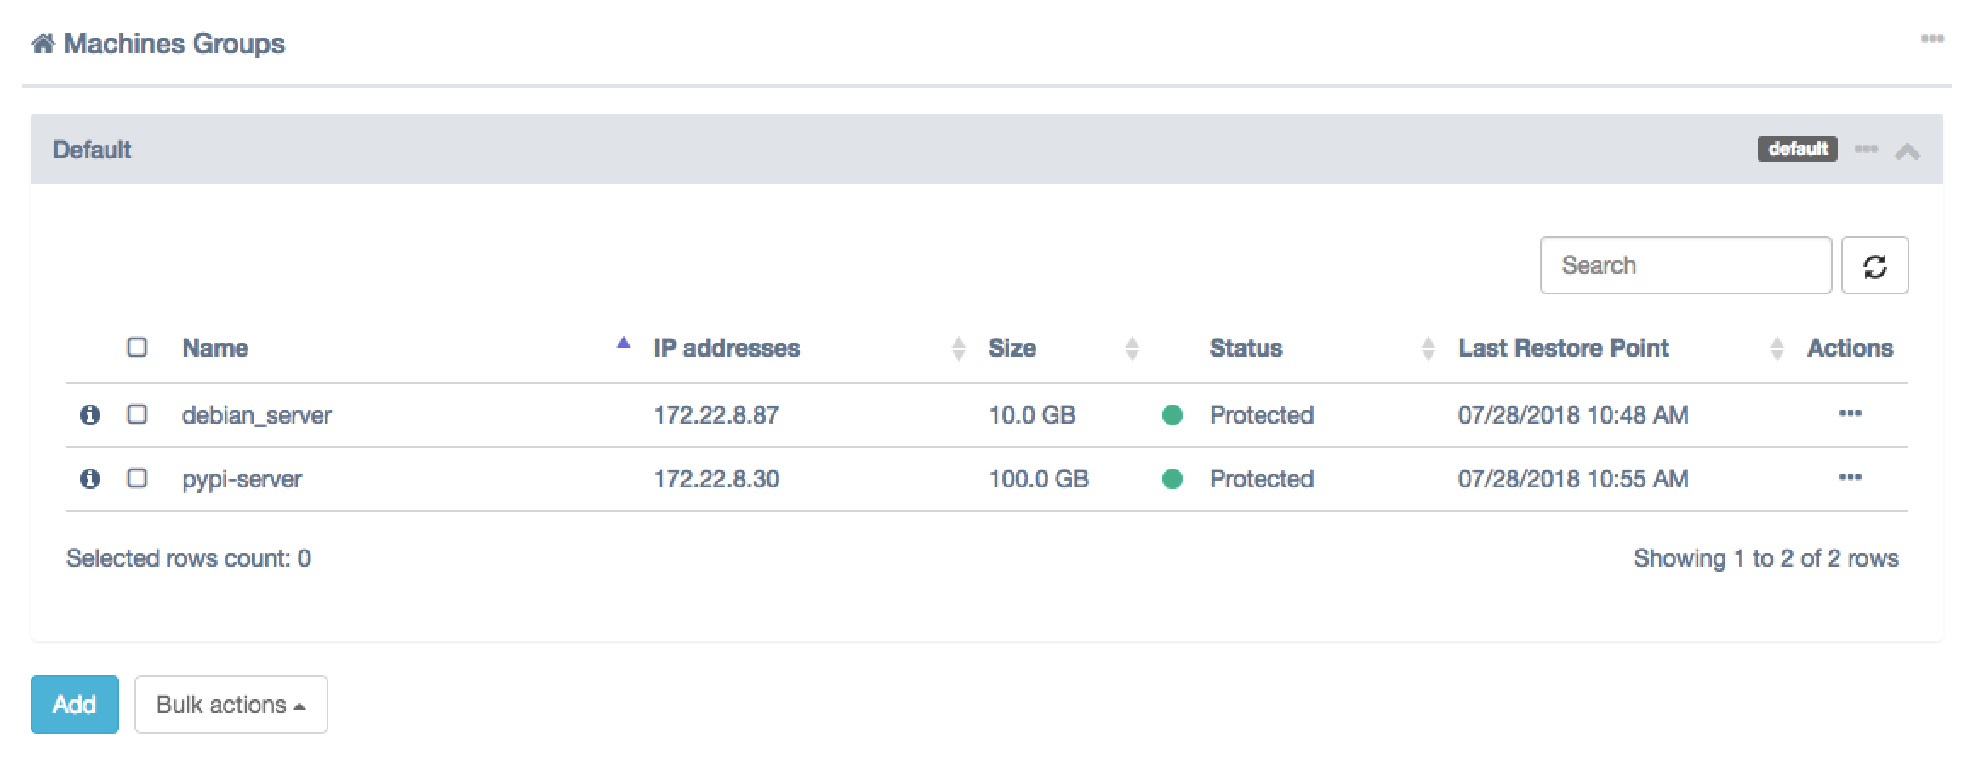
4. When any of the agents are deployed, the machine with it (or all machines on the same ESXi host where the agent is located) will appear in Hystax Acura Control Panel under the customer dashboard in the Unprotected state.
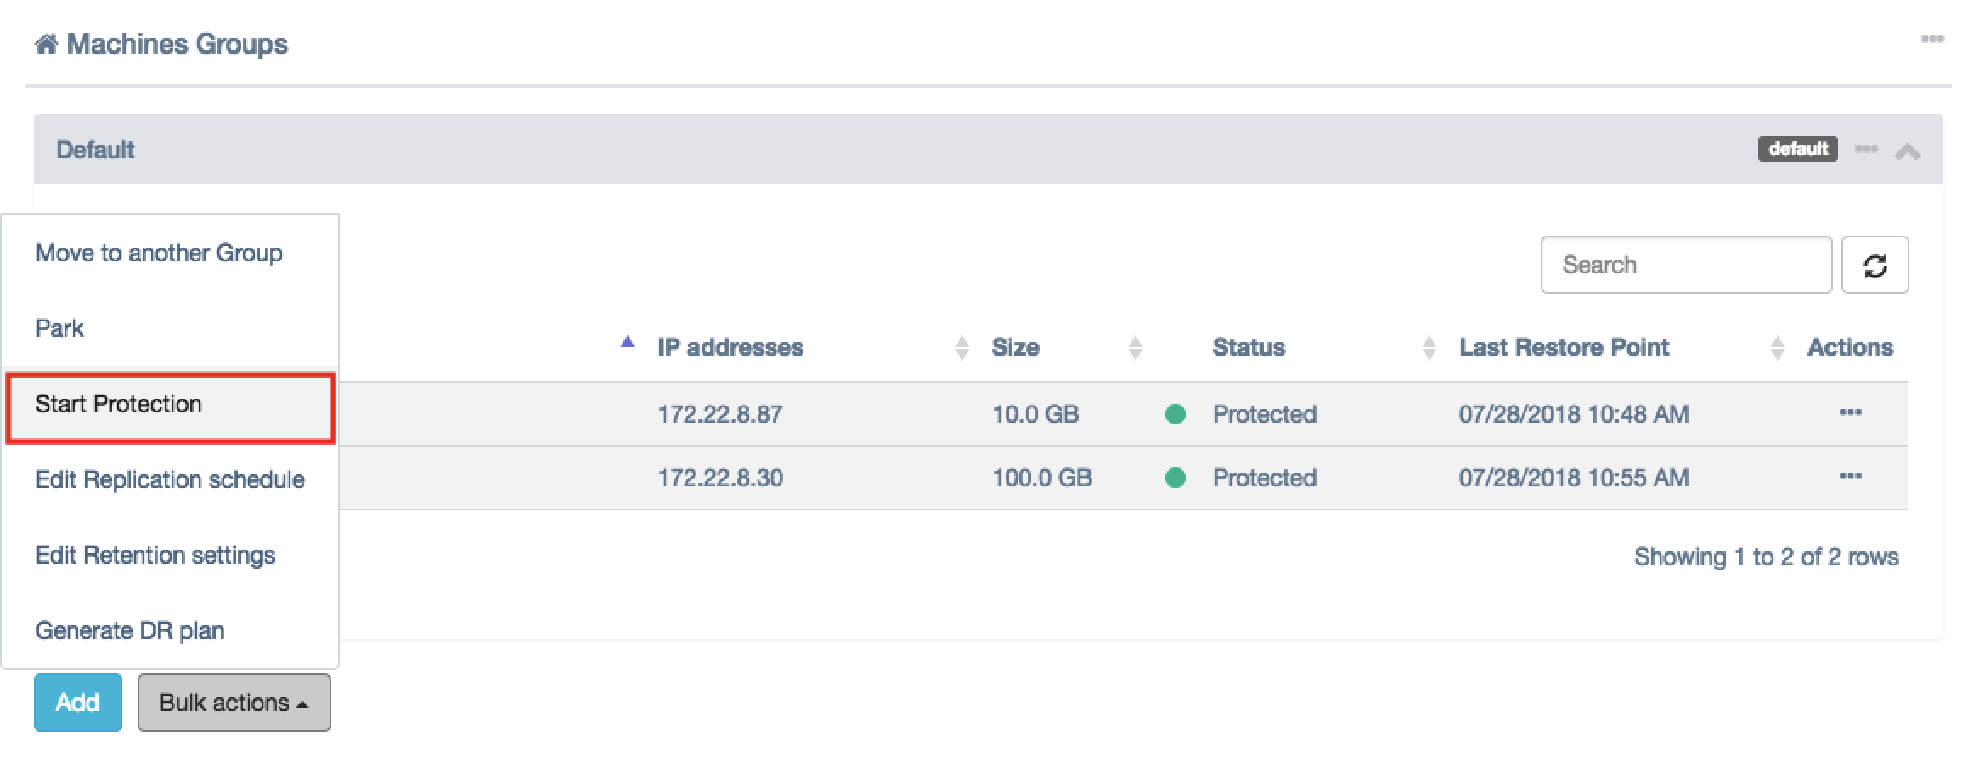
5. To start replication of machines, select the machines and click ‘Start Protection’ under ‘Bulk actions’ or for any of the machines specifically. After ‘Start Protection’ is performed, machines will be replicated to a target cloud, first, Hystax Acura takes a full replica and, later, incremental replicas according to a schedule set globally for all the machines or for any group of machines or for any machines specifically.
6. To change the replication schedule (RPO) and retention settings, navigate to Replication or Retention settings under machine settings or Bulk actions. For more information on configuring the settings, refer to https://docs.hystax.com/dr_overview.html#edit-replication-schedule.
Recovery flow
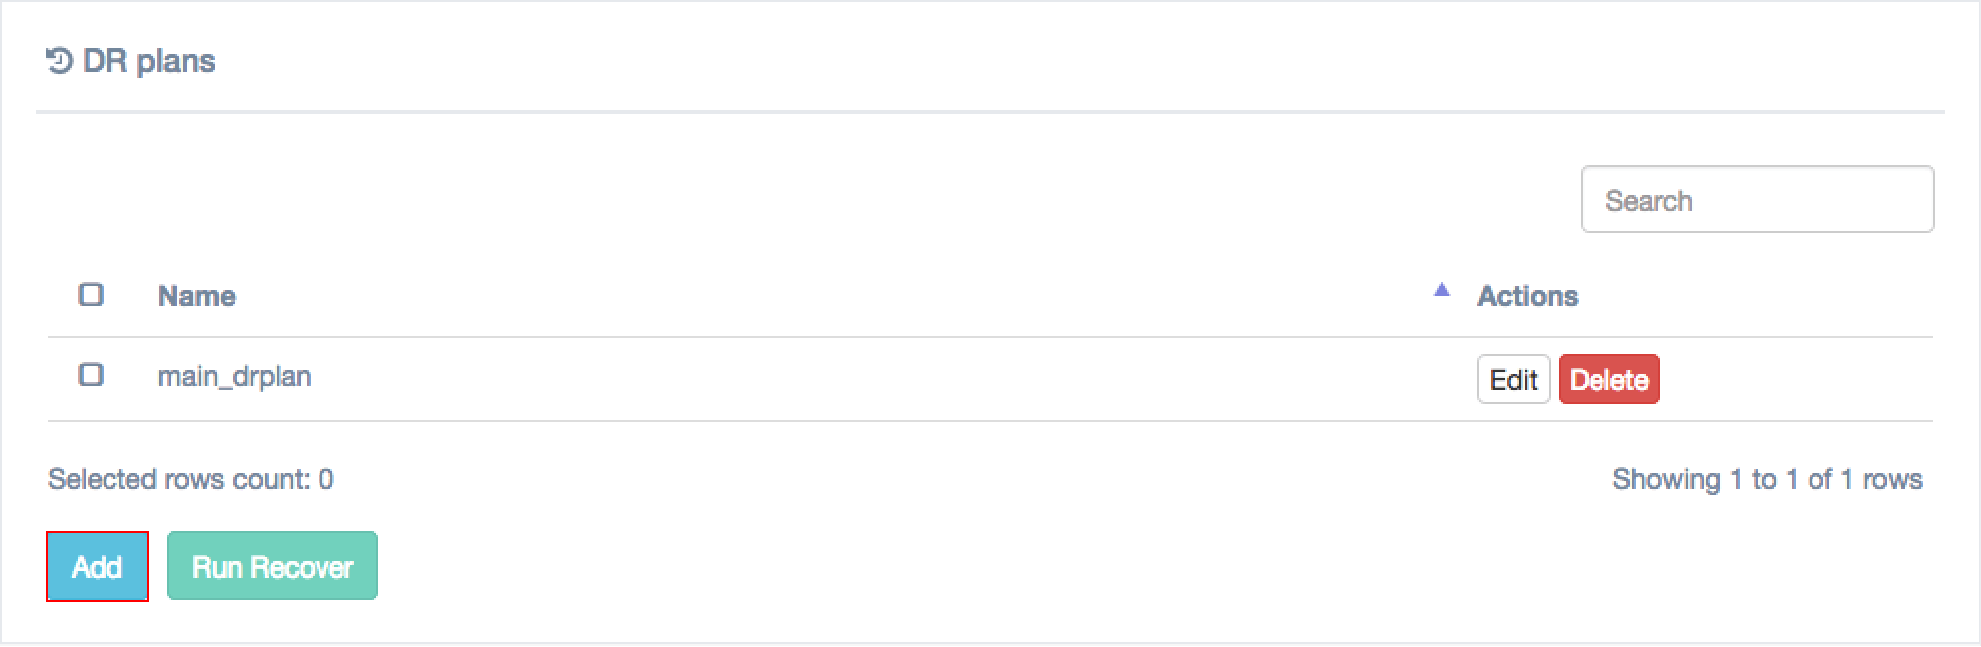
7. Recovery is based on disaster recovery plans, scenarios of what needs to be recovered, and the order in which it should be done in case of failover. For more information about Disaster Recovery Plans, refer to https://docs.hystax.com/dr_overview.html#disaster-recovery-plans.
To create a DR Plan, click Add on DR Plans region.
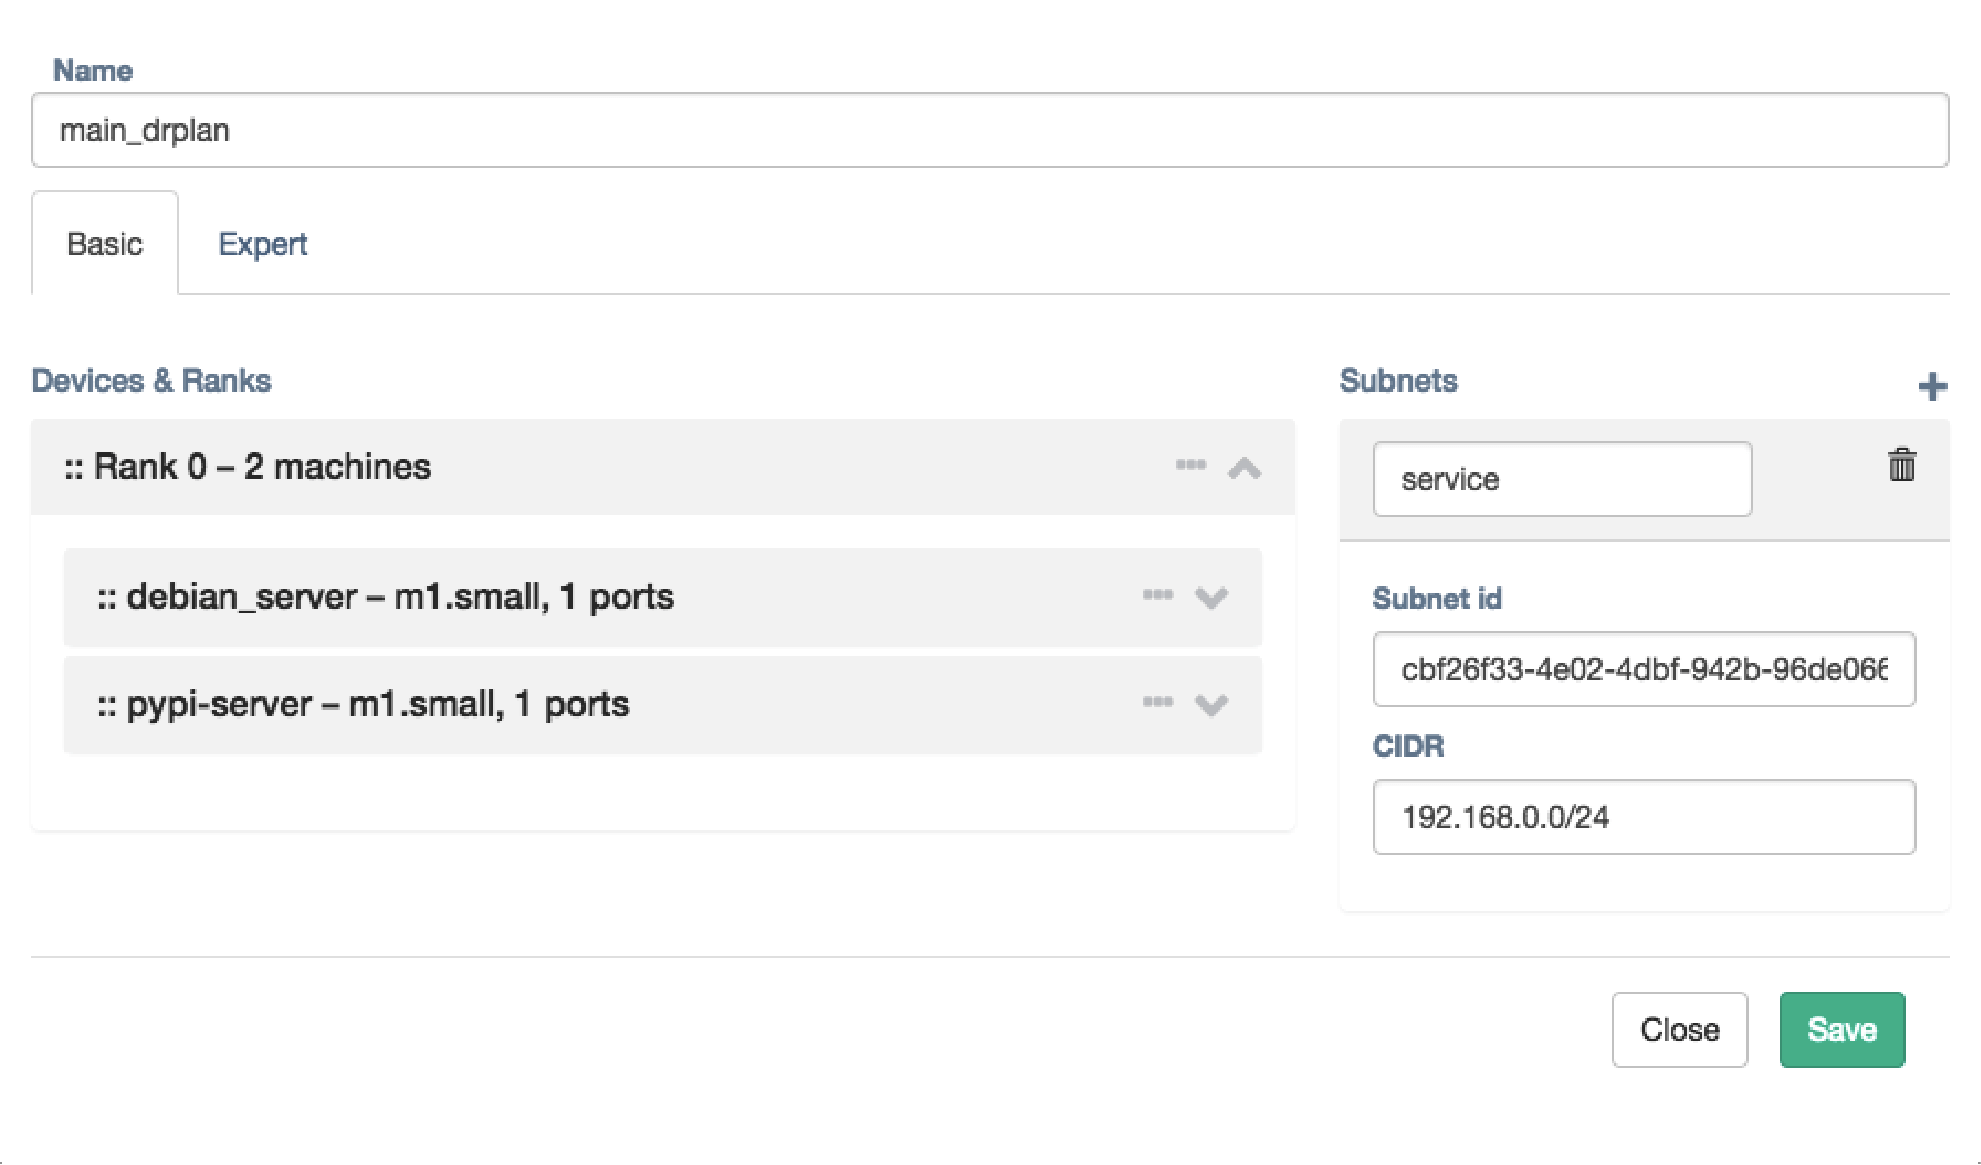
8. When creating a DR plan, orchestration is available in basic and expert modes. Basic mode generates a plan with standard settings, while expert mode is a JSON script with more powerful settings described under https://docs.hystax.com/dr_overview.html#dr-plan-syntax.
9. Add all the machines that need to be recreated, place them into ranks, and set correct IP addresses, networks, and boot delays.
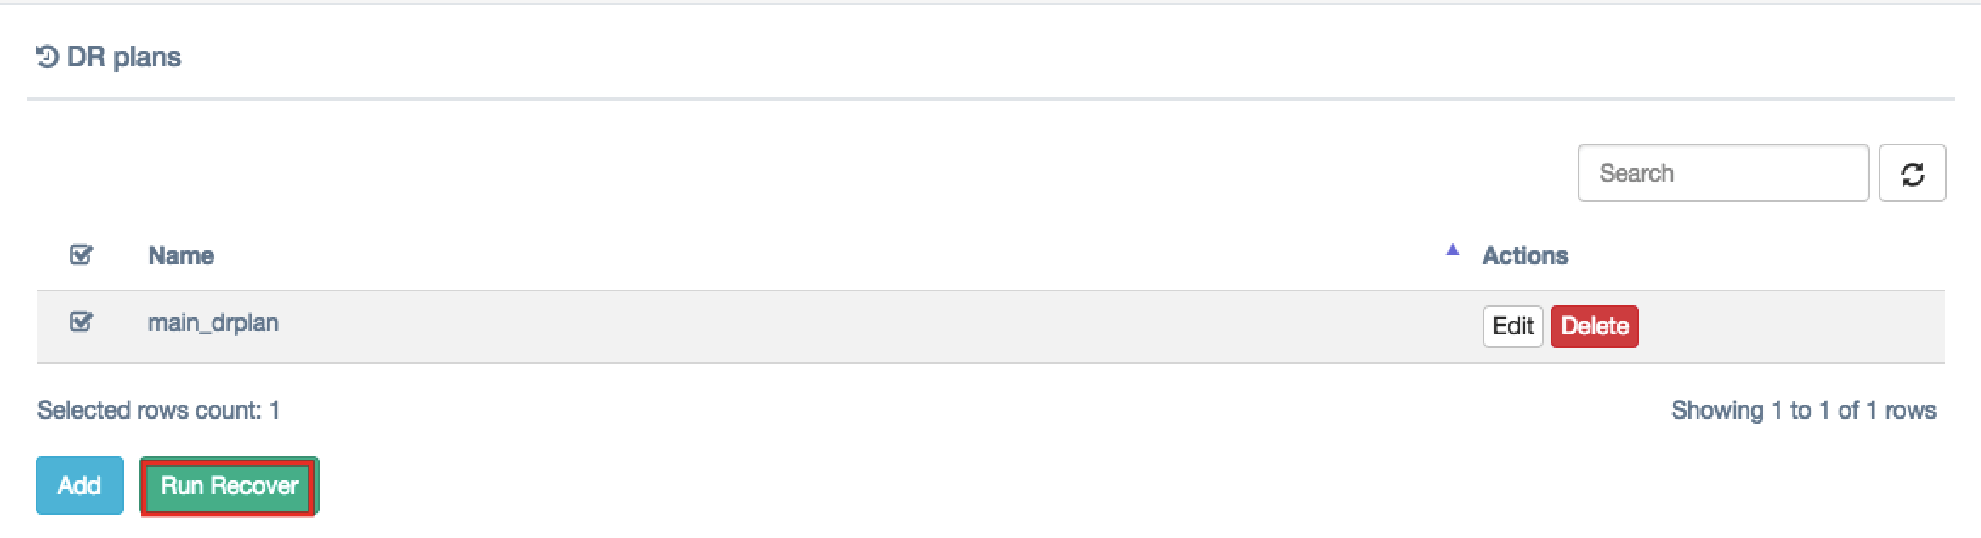
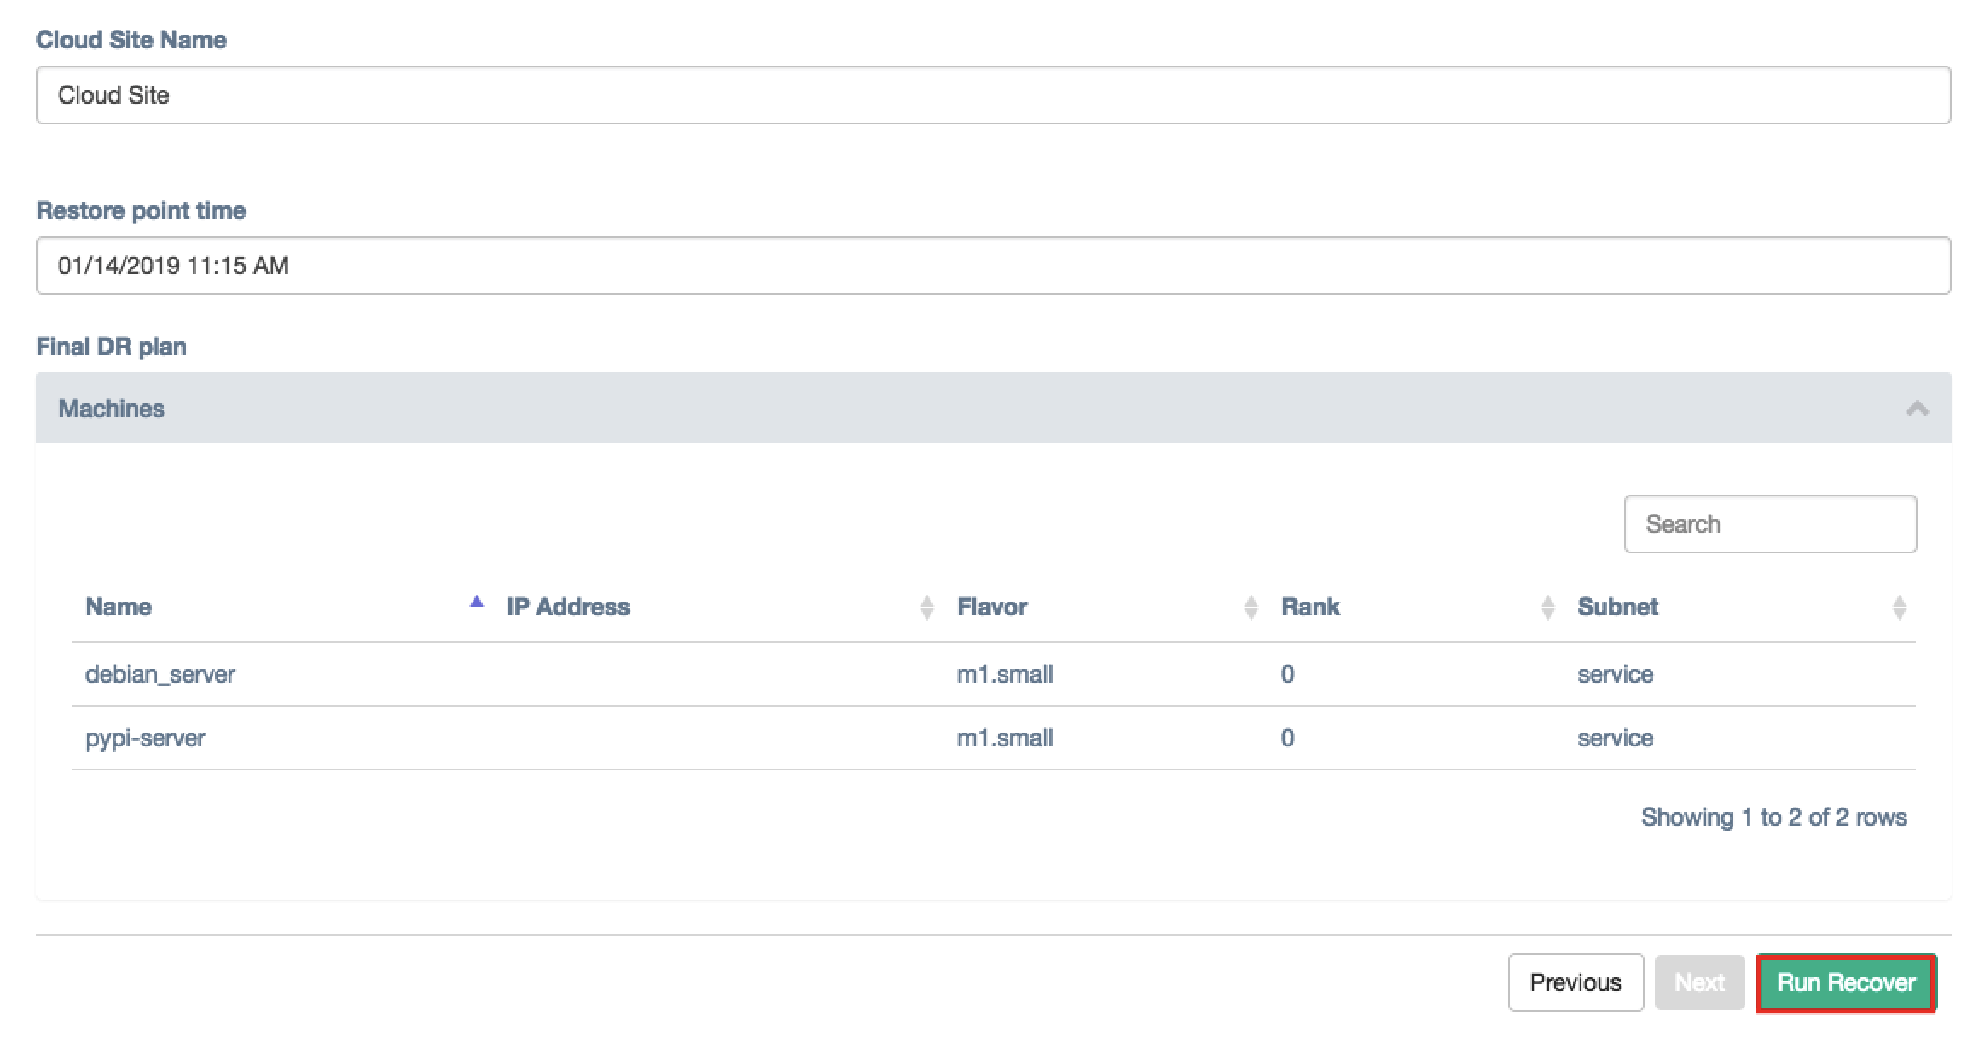
10. When the DR Plan is ready, you can run test or production failovers. To run a failover, select a DR Plan and click Run Recover.
11. On a third step select a restore point for the failover by selecting Restore point time. For all of the machines selected the closest snapshot in the past will be taken. Click Run Recover to start failover.
12. When a failover is running you can see and control its status on the Cloud Site page available via the customer dashboard.
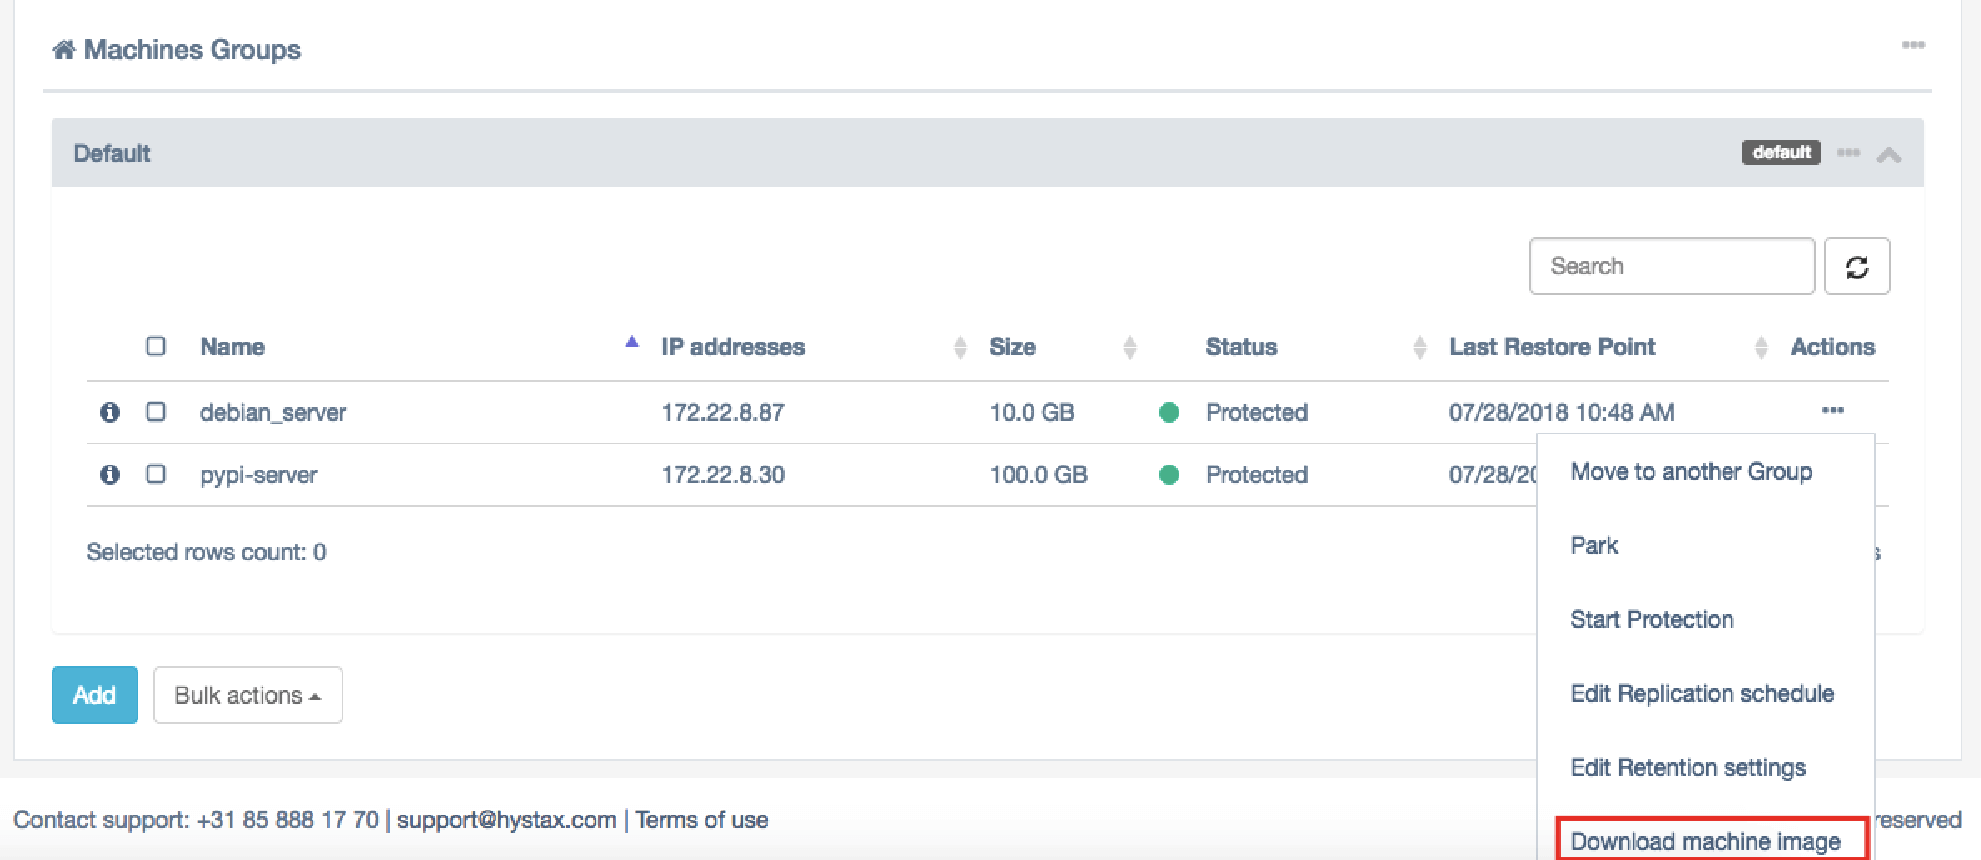
13. Image download option is available for any specific machine. Open it by clicking on the Download machine image and selecting a restore point. After generating links, image disk links are available to be downloaded.